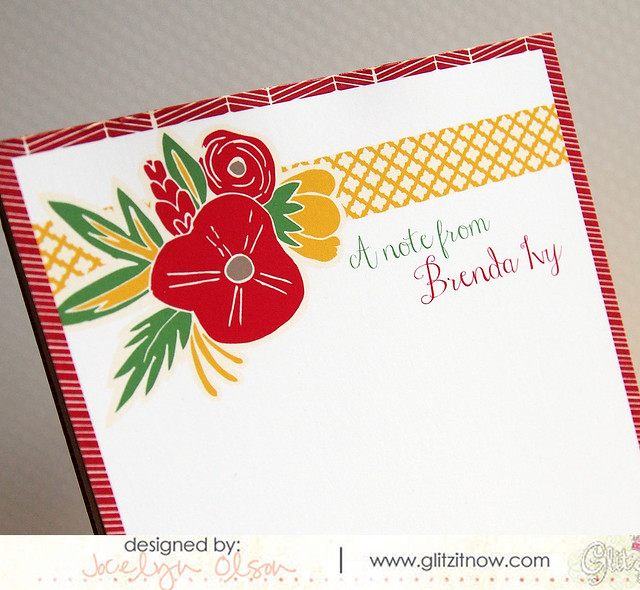
For the month of December, the Glitz digital team is sharing holiday projects. For my post last week, I shared a custom notepad I made (check it out HERE). Today, I'm sharing another notepad with a full tutorial. I apologize in advance for the numerous photos.
I decided to make a notepad for my daughter's teacher that would work beyond the month of December. Here's what the finished notepad looked like:

To make the sheets, I flipped the floral cluster from Hello December's Element Pack #1 over the yellow washi tape element from the Element Pack #2. Next, I added the sentiment. In another document, I opened four different papers from Element Pack #2, the Hello December Paper Pack, and the Cashmere Dame Paper Pack (the yellow) . I put four different copies of the white note over the patterned papers.
Here's what it looked like when I printed out the four different styles on one piece of paper:
I printed 8 copies of this paper onto a lightweight photo paper. You could use a heavyweight copy paper--just test the settings so the ink doesn't oversaturate the paper.
Next, I trimmed the papers down. This probably was the most time-consuming part of the process. ;)
Once I had all 48 pages cut, I worked on the back cover. If you wanted, you could skip this step, but I think adding a chipboard back makes the notepad more polished.
I printed off and trimmed down two patterned papers from the Hello December Paper Pack. I also trimmed a piece of chipboard...I used a leftover piece, but Ellen Hutson sells Craft-a-Board that is a good weight for this type of project.
For the next step, I glued the patterned paper to each side of the chipboard. This side isn't essential, but it makes the back pretty. :) Here are the back cover and the reverse side:
Still with me? I layered all 48 pages on top of the back cover. The pages need to line up more tightly than they look in this photo. Don't ask me how I know that. ;)
For the next steps, I had to enlist the help of my husband. I had no idea where his clamps were, or how to use them for that matter. ha ha.
My husband is a luthier and guitar amp builder, and he had some fabric glue that he uses to adhere Tolex to the amplifiers. We did a test, and the Fabric Fusion glue worked amazingly well. It dried fast--I did three coats within three hours. I think he bought the glue at the grocery store. Seriously.
Here are the different tools you will need--two clamps, two blocks of wood, two clean pieces of paper, and the glue:
Okay, next you make a sandwich: 1) block of wood; 2) layer of paper so the wood doesn't muck up your notepad; 3) the notepad hanging over the edge of the block about 0.25-0.5 inches; 4) another piece of paper; 5) block of wood.
Add clamps toward the front of the notepad sandwich, but not in the very front. You need to leave space to add the glue. I added the glue directly and smoothed it with my finger. I'm impatient, so I only waited about an hour between coats. Here's the set-up:
While this process probably looks complicated, it was actually pretty easy...just a lot of little steps.
(Drum roll, please...) Here's the final notepad:
If you make a notepad, please share a link--I'd love to see it!
Thanks so much for stopping by!


This is so cool! And it looks so professional/store bought. Way to go hubby!
ReplyDeleteSo gorgeous!! I love love love love love the flowers!!!
ReplyDeleteWhat a cute idea...and so pretty. She'll LOVE it!
ReplyDeleteYou know that is amazingly cool and a perfect teacher gift from the queen of digital stamping. You rock. And your kids have some lucky teachers.
ReplyDeleteSuch an awesome gift!
ReplyDeleteWow what teacher would not absolutely love this Jocelyn!
ReplyDeleteYour husb is a luthier? Serious coolness. :)
ReplyDeleteWhat a beautiful notepad! I had an environment club at school one year that would make notebooks like this out of recycled paper, but this is way more elegant. A lovely gift!
I made a calendar in a very similar way but I think I jus used PVA (do u call it that in the States?!), its a great idea for a lil gift!
ReplyDeleteOh.My.GOD! This is AMAZING! Even with these instructions, I'm not sure I could do this, but I might just give it a go! Wow, Jocelyn, you've knocked my socks off! (Yes, I'm playing catch-up on my visiting)
ReplyDelete