This week, the Glitz Design teams are sharing projects with a WIINTER theme.
My daughter is 8, and there is a 4+ year age gap between her and my son. We have about a zillion pictures of her by herself from when she was little, but I've noticed that most of her older pictures have both kids in them (am I the only one??). I wanted to get some shots of just her. I snapped some pictures of her in our backyard in December....most were pretty goofy, but she looked so happy and content in one picture.
A couple of weeks ago, I posted another embroidery hoop project using a paper background. Instead of putting the photo of my daughter on a layout, I decided to put it on a hoop that I can hang on the wall. My goal is to make 5 hoops and hang them together. :)
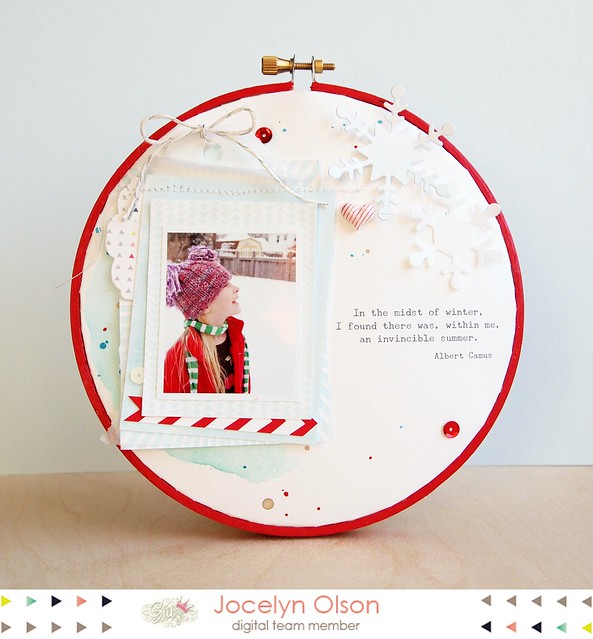
Here's the finished project:
I wanted the coolness of the winter and pops of color--kind of signature me. For the elements, I used a variety of papers and elements from the Glitz Finnley, Cashmere Dame, Hello December, and Hoopla collections. I played around with the opacity and brightness to lighten some of the papers slightly. For the sentiment, I printed it on the paper and based the elements around it.
Want to see how I made the hoop? I shared this photo series on the Glitz blog, but I'm sharing the step-by-step below.
Before step 1, print your sentiment, print a digital design, etc. Please note, the first two photos are from my other hoop project (which is why I'm missing the printed sentiment).
- Step 1: The hoop has an inside and an outside hoop. Use the inside hoop for measuring the paper. Make sure there is at least 1/2" of cardstock around the outside of the circle.
- Step 2: Trace a circle around the outside edge of the inner hoop. I used pen in my photo so you can see it, but be sure to use pencil.
- Step 3: Cut a circle approximately 1/2" outside of the pencil circle. The circle doesn't need to be perfect. See mine below:
- Step 3 (continued). Cut the edge of the circle up to the point of the pencil line. I made my cuts about every 1/4"-1/2". I moved the flaps, but I did not crease them.
- Step 4: Watercolor, mist, stamp, or stitch on the cardstock circle. I used Bristol and watercolored on mine. Be sure to erase the circle (not that I know anything about that....ha ha).
- Step 5: Get out the papers and elements. I printed out more than I ended up using. :)
- Step 6: Lightly mist the edges of the circles with water to soften the heavy cardstock (this part is optional, depending on your paper). Place the circle over the inner hoop and bend down the flaps. I had to open my hoop completely to get the outer ring over the paper.
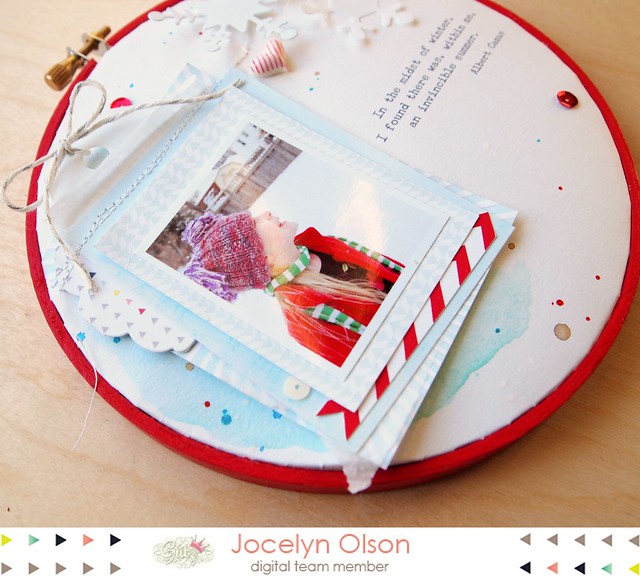
And the other side:
If you would like to see the other winter projects, be sure to check out the Glitz blog.
Thanks for stopping by!
Supplies
Cardstock: (Bristol) Canson; (vellum) PTI
Digital elements: (blue triangles, grey triangle tab, aqua snowflake from Finnley collection; red arrow from Hello December element pack #1; solid blue from Hoopla collection; blue and white starburst frame from Cashmere Dame element pack #1) Glitz Design
Inks: (spray mists) Lindy's Stamp Gang, Studio Calico
Dies: (snowflakes) Marianne dies; (Scallop Tag) Paper Smooches; (Journal Tabs die) PTI
Embellishments: (sequins) Neat & Tangled; (twine) Lawn Fawn; (heart) Freckled Fawn; (red glossy paint) Martha Stewart


This is soooooooo gorgeous!! I love love love love that photo and what you did with the hoop!!!!!
ReplyDeletethis is the coolest thing ever!
ReplyDeletewow this is AWESOME..
ReplyDeleteThis is just so pretty! I can't wait to see the other four! Get to work!
ReplyDeleteWOW! Love this gorgeous project!
ReplyDeleteI really want to try this! I'm gonna go look on ebay...
ReplyDeletei loooooooove this so much!
ReplyDeleteWhat a great idea! Thanks for sharing.
ReplyDeleteThis is such an awesome idea (& beautiful execution)! I really want to try this :D TFS!
ReplyDeleteWow- love it.
ReplyDeleteThis hoop is seriously amazing! I love the ice blue layers and pops of red. Your .gif showing the steps is soooo cool!!
ReplyDeleteWhat a fabulous keepsake! And it is so very signature Jocelyn -- in other words, amazing!
ReplyDelete