
I'm sharing my Paper Smooches card that Kim shared on the Paper Smooches blog. I used the new Desert Icons dies. Since I went to Saguaro High School, I really like the Saguaro icon. :)
Here's my card:
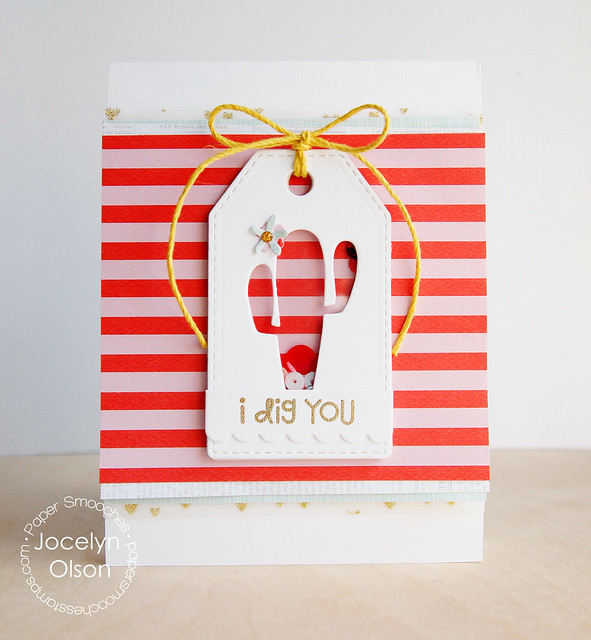
I was originally going to make a clear shaker tag, and ended up attaching it to the card. To make the tag, I wanted to be able to see all the way through and still have extra room for the sequins to shake.
Here's how I made the see-through shaker tag:
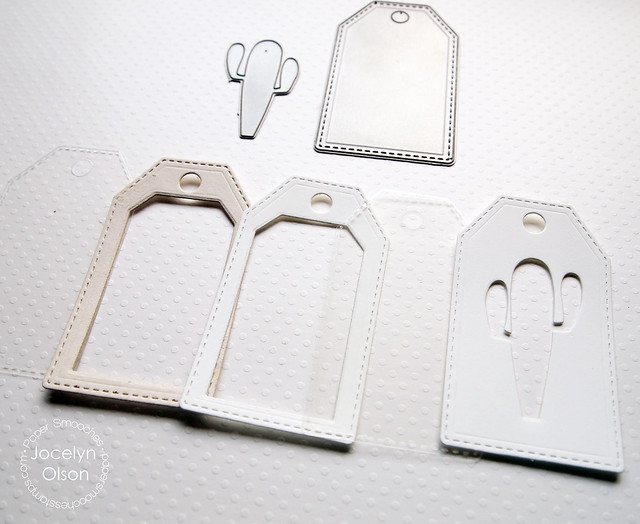
1. Die-cut the Paper Smooches Stitched Tag. Die-cut the Desert Icons cactus in the tag.
2. Die-cut the tag out of acetate twice.
3. Die-cut two tags out of Craft-a-Board (or a coaster). Die-cut a rectangle or larger-than-the-cactus shape out of the center of the craft board tags. This area will allow the sequins to move.
4. Optional: Die-cut the tag out of cardstock or patterned paper. I used the Craft-a-Board and a coaster, but it's nice to have a finished layer under the acetate.
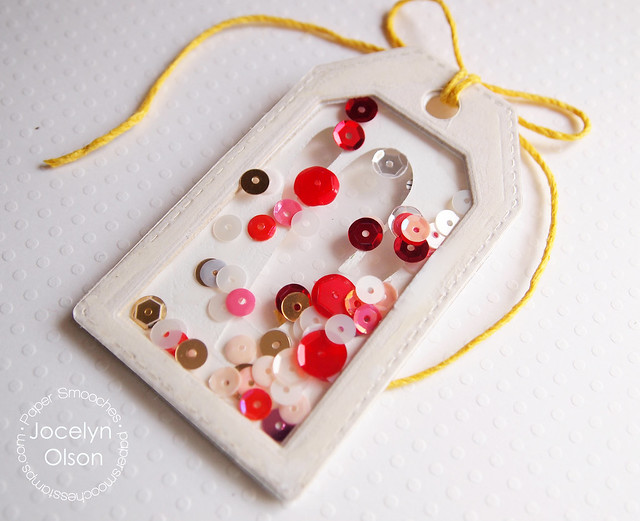
5. Glue the layers--cactus tag, acetate, Craft-a-Board (two layers), cardstock/patterned paper, and acetate.
Here's what the finished tag looks like from underneath:
I attached the tag to the card, but I like how the tag would work well alone on a gift. I layered some Teresa Collins papers. The papers just arrived at i {heart} papers (along with the Paper Smooches dies).
Here's a close-up:
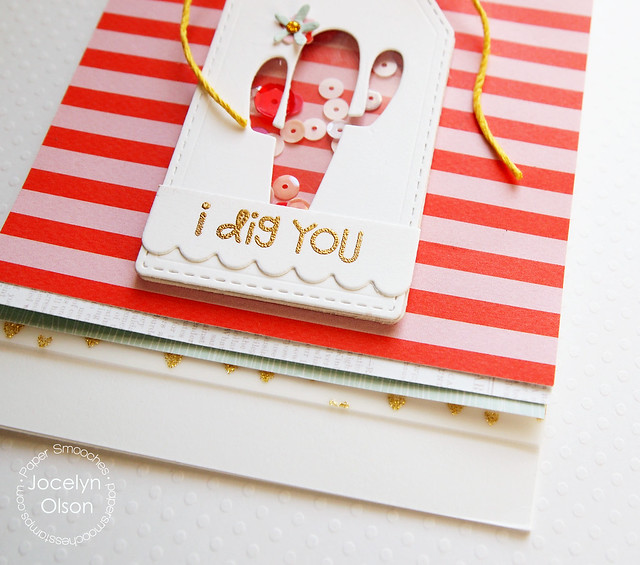
Since I used a layer of Cosmo Cricket gold vellum and some gold sequins, I embossed the sentiment from Woofers and Tweeters in gold. I die-cut a Scallop Tag for the sentiment and cut off the top of the tag.
Here's the top:
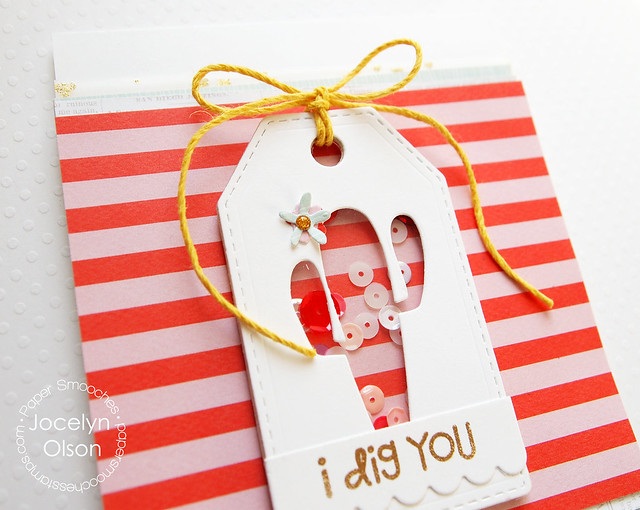
I finished off the card with a couple of tiny Flowers die-cuts, a Studio Calico gold enamel dot, and some yellow twine.
You can find these products at IHP. :)
Thanks for stopping by! Have a fantastic day!
Supplies
Cardstock: (white, acetate) PTI
Patterned paper: (Something Wonderful) Teresa Collins; (gold glitter vellum from Vellumptuous) Cosmo Cricket
Stamps: (sentiment from Woofers and Tweeters) Paper Smooches
Ink: (Versamark)
Embossing powder: (Extra Fine Gold) Ranger
Dies: (Desert Icons, Stitched Tag, Scallop Tag, Flowers) Paper Smooches
Fibers: (yellow twine) Hemptique
Sequins: (craft supply)
LOVE the cactus shaker, so fun!!!
ReplyDeleteGreat shaker card !!!!!
ReplyDeleteOooh, I just love these PS dies, the cactus is so cute. Your shaker card is awesome, Jocelyn :-) Love the striped background!
ReplyDeleteLove it! That bold striped paper with the bit of the gold vellum peeking under, fabulous!
ReplyDeleteLove it!!! This is amazing! I want to try too!!! Thanks for the inspiration Jocelyn! Hugs...x
ReplyDeleteSo sweet and I love it when your keen sense of humor comes through. And I just saw Cristina's take on you (I immediately thought of you when I saw her layered card and thought "oh, she's going all Jocelyn"). Absolute proof that you have created a trend, madame! You are do dang good at it and so copy-worthy. Thanks for all you do for all of us!
ReplyDeleteI always forget about making shaker cards & yours is super cute! (Btw- did you go to Saguaro High in AZ? I'm in AZ too-Chandler :) )
ReplyDeleteThis is SO cute, Jocelyn!! LOVE the sequins peeking through the cactus!
ReplyDeleteDid you go to school in Tucson?! I grew up there, but would have gone to a different HS. I think they were pretty close to me though!!
I love the unexpected colours of this card! (Since I at least automatically think greens, browns with cactus, anyway...) And of course I also love the embossed sentiment.
ReplyDeleteGosh, I love your shaker card/tag with the sequins and PP background showing through the cactus. Great idea to add extra depth for the sequins to move. Also love the tiny flower... and the layers, gold hearts and sentiment :).
ReplyDeleteSeriously? Could this BE any more adorable? I love it!
ReplyDelete