Showing posts with label Papertrey Ink. Show all posts

Wednesday, July 22, 2015

Right at Home Stamp Launch Blog Hop

Hi everyone! I hope you're having a great week. :)


I'm participating in a special hop today! The Right at Home store is releasing a stamp set called Happy Mail! This super cute 3"x4" set is only available at the Right at Home store. Nicole asked some folks to help her with the release, and I'm happy to be participating. :)

Here's what I made:

Happy Mail


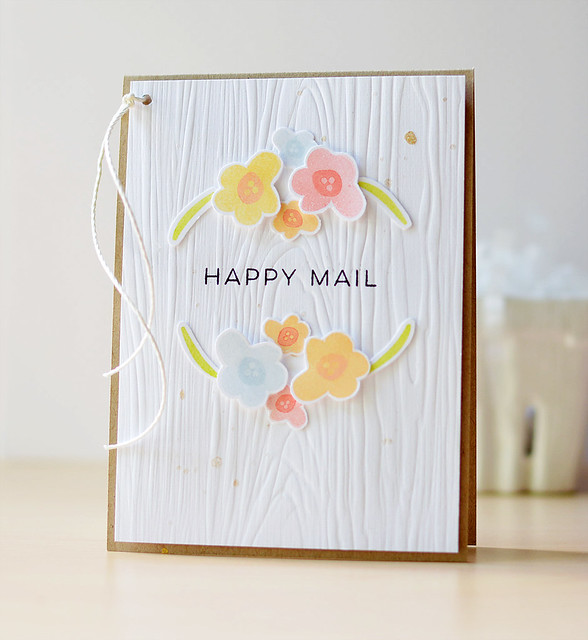
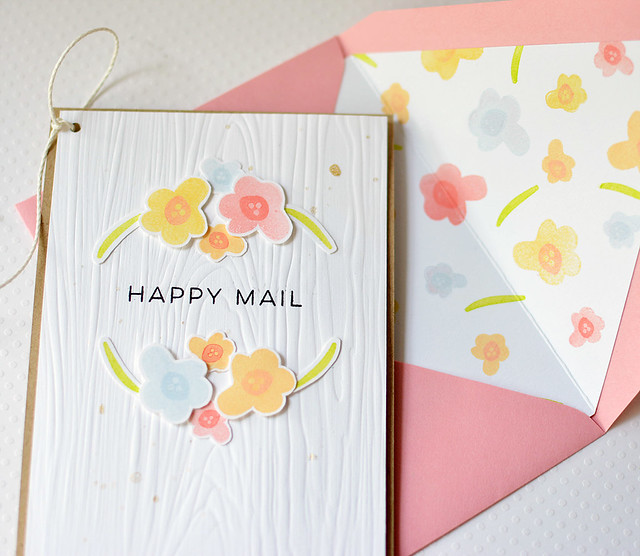
Aren't those flowers sweet? The Happy Mail set is perfect for envelopes, but I wanted to show how the set worked for a card, too.


Happy Mail

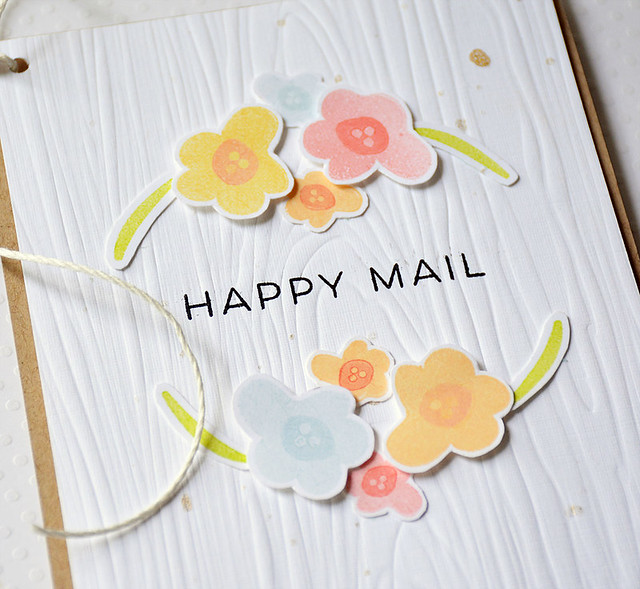
I stamped the Happy Mail flowers and centers in different colors and fussy cut them. Next, I stamped the "happy mail" sentiment and embossed over the panel. After arranging the flowers, I added some gold splatter and cord (the punched hole with the cord was inspired by the amazing Claudia Shadler).

Here's a close-up:

Happy Mail

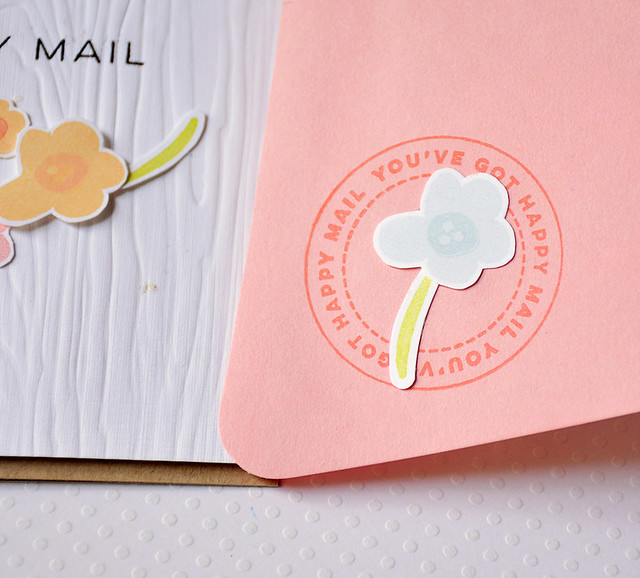
Right at Home sells Waste Not Paper Envelopes, and I used the Blossom for my project. I created a liner (see the first picture) and stamped the flowers and centers in a random pattern. As a tip, when adhering the liner, only use adhesive on the flap, not the entire liner (I've made that mistake before--ugh!).

On the envelope closure, I stamped the seal. Here's a close-up:

Happy Mail


Want to see some other samples using the Happy Mail set?


Here are the links for the hop:


Jocelyn <--You are here!

There's a giveaway, too!


Nicole will be giving away three sets of the stamp on her Instagram account (@rightathome). The giveaway ends on Friday, July 24th at 8:00 pm EST. Be sure to see her Instagram post for details!

Next up in the hop is Holly!! Thanks so much for stopping by!

Friday, May 15, 2015

Altenew Ink Pad Blog Hop

Hi everyone! It's Friday--yeah!


It's also the release of the new Altenew Dye inks. Yeah! To celebrate, we're having a special blog hop. If you're hopping along, you should be coming from May's blog. Here's the complete list:

Jocelyn Olson <-- You are here.

I made two projects showing the inks. First up, a card:

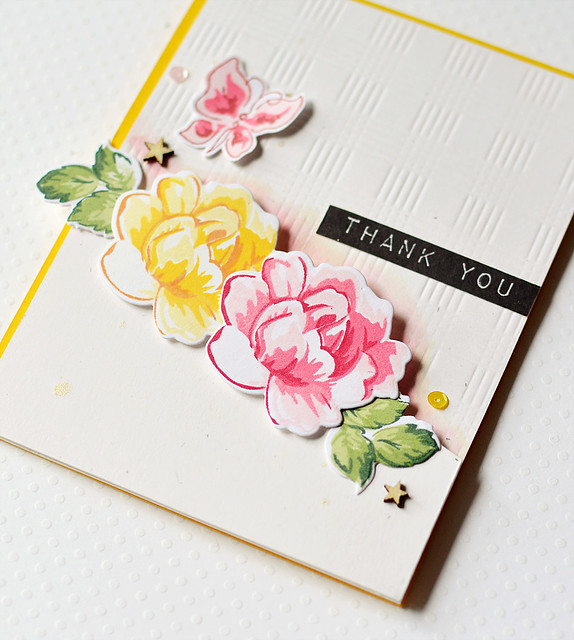
Vintage Flowers Thank You


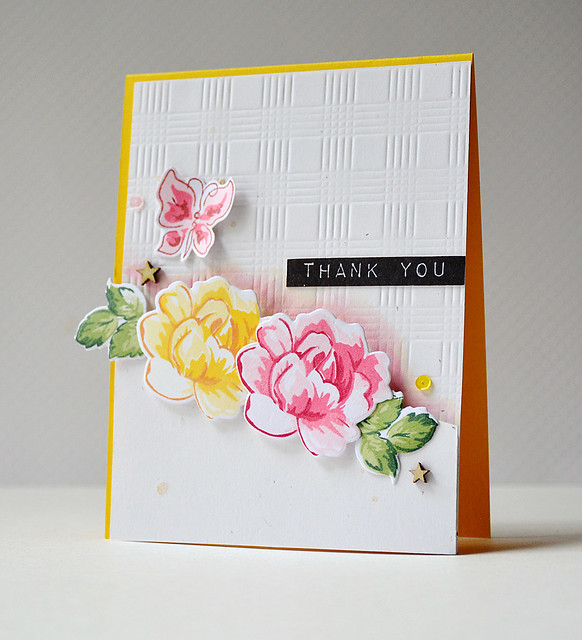
I used the Vintage Flowers Stamps and Vintage Flowers Dies for the flowers and leaves. The new inks are made to work with multi-step flowers--there are four coordinating red inks and four yellow. Plus, there are three coordinating green inks that are perfect for leaves and a black. I've used 11 of the 12 inks on this card.

Vintage Flowers Thank You

For the pink flower, I used Ruby Red, Coral Berry, and Frosty Pink. For the yellow flower, I used Caramel Toffee, Warm Sunshine, and Buttercream. On both cards, I stamped off the final (fourth) layer (Frosty Pink and Buttercream). The Jet Black I used for the Label Love sentiment is very dark and has great coverage.

Here's another close-up:

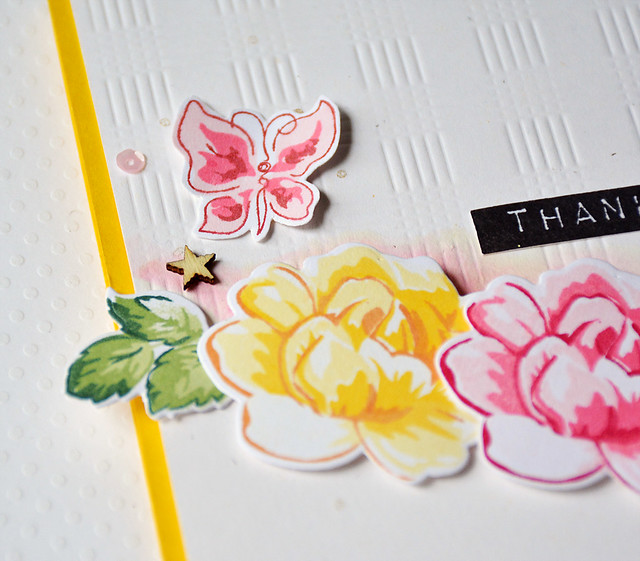
Vintage Flowers Thank You

I also stamped and fussy cut a butterfly from the Painted Butterflies set. For the outline, I used the Grapevine ink. It's a gorgeous color and unlike any other I have. Behind the panel, I did a little watercoloring using the Coral Berry and Buttercream inks to look like a shadow.

Next, I have a CAS tag:

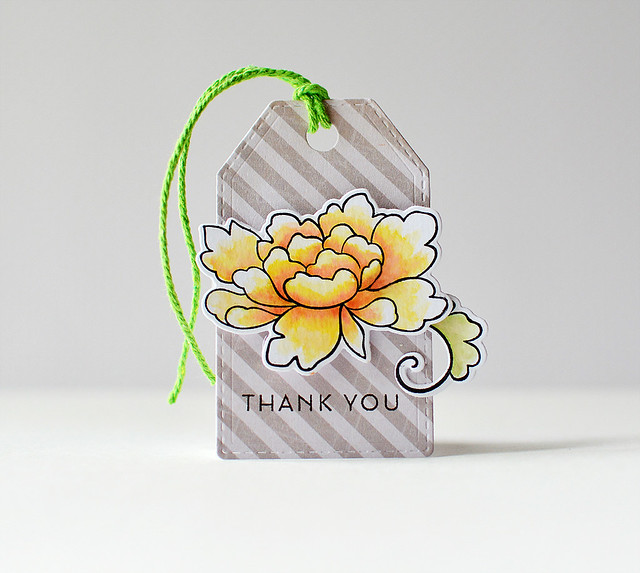
Thank You Tag

I used the dye inks to watercolor the Peony Scrolls flower. I used all three of the yellow inks (Buttercream, Warm Sunshine, and Caramel Toffee) and a small amount of Coral Berry. Now I'm not a stellar watercolorer, but I wanted to show how well the colors blend together.

I have to say, these inks are fantastic! They are very crisp, dry quickly, and I only had light staining from the darkest reds. Something that drives me nuts about some dye inks is ink transfer between colors (even after cleaning). Fortunately, I didn't have any problems with discoloration with the Altenew inks. The coverage is fantastic, even on solid stamps. I typically use pigment inks, but I would definitely buy all of the Altenew inks.

Prizes: There are two ways to win!

To celebrate this release, Altenew will draw three winners who will each receive a $30 gift certificate to their online store. Please leave a comment on the Altenew blog by Friday, May 22nd 11:59pm EST for a chance to win. The winners will be announced on Saturday, May 23rd.

Altenew is also offering a $30 gift certificate for comments on this blog post. For a chance to win this extra gift certificate, please leave a comment on my post by Friday, March 22nd at 11:59pm.

Thanks so much for stopping by! Next up on the hop is the incredible Marika. I'm sure you're in for a treat!


Wednesday, October 22, 2014

Warm Wishes

Hi everyone!

It's day three of Release Week at Neat & Tangled! Today, we're sharing projects using the Warm Wishes stamp set. It's a gorgeous set featuring Danielle's lettering. Danielle is sharing pictures of the stamp on the Neat & Tangled blog.

Here's how I used the mini set:

Warm Wishes

I'm one of those people who doesn't hesitate to cut up stamps. So, I cut apart the Warm Wishes  sentiment and mug, and I only used the sentiment as a frame. I love this set, and I'm going to use it for more holiday cards. I used a cute Crate Paper Bundled Up die-cut in the center, but I love how the sentiment is a great frame for many elements.

I embossed and added a Crystal Clear sequin and some die-cuts. Here's a close-up:

Warm Wishes


There's a giveaway! Comment on the Neat & Tangled blog to win the Warm Wishes set.

Thanks for stopping by! Have a great day!


Supplies
Stamps: (sentiment from Warm Wishes) Neat & Tangled
Cardstock: (white) Papertrey Ink
Patterned paper: (chevron from Bundled Up 6x6; girl on sled from Bundled Up Ephemera) Crate Paper
Ink: (Ocean dye ink) Hero Arts; (Dewey, Opaque White Mister Huey's) Studio Calico
Dies: (Snowflakes) Paper Smooches; (star from Cozy Christmas) Ellen's Essentials; (Plaid Impression Plate) Papertrey Ink
Embellishments: (Crystal Clear sequin) Neat & Tangled; (coarse clear glitter) Martha Stewart

Monday, August 11, 2014

Scribbles and Doodles

Hi everyone! I hope you had a great weekend. We went to the county fair this weekend, and the kids had fun on the rides and playing the games. I even got to pet a 4-day-old pig, who was pretty darn cute. :)

I'm up on the Glitz blog today sharing projects related to a trend. I've got to tell you, I thought a lot about different trends (I'm so geeky, I even made a spreadsheet). Finally, I settled on scribbles and doodles, which I am suddenly seeing everywhere.

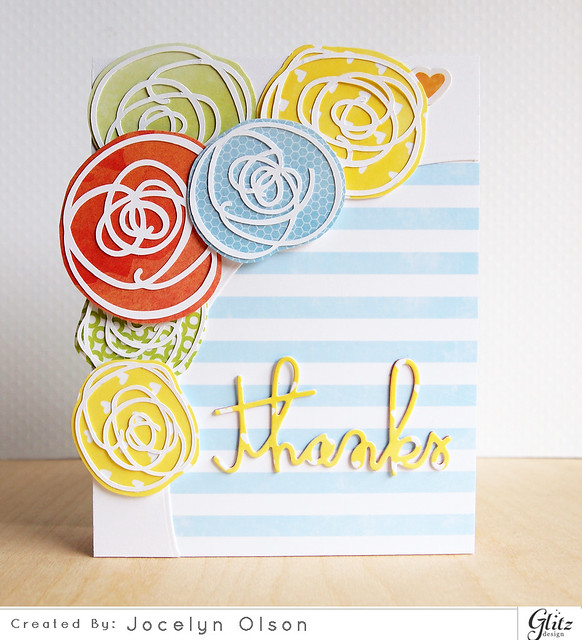
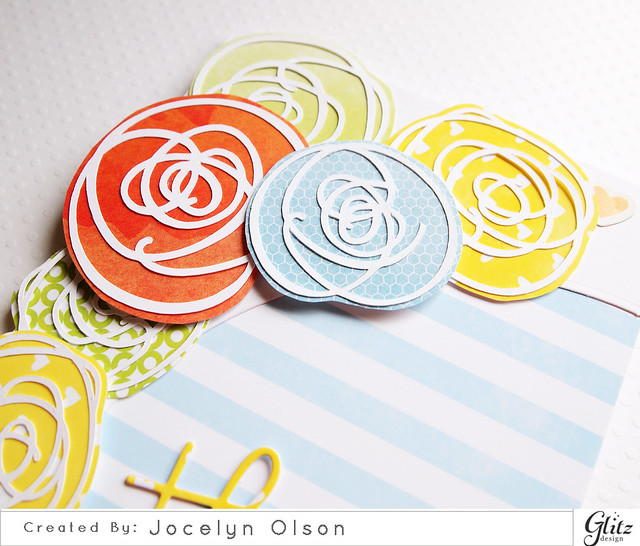
I made a trio of cards with a mix of Glitz lines incorporating the scribble trend. Here's the first card:

Thanks

Using my Silhouette, I die-cut the scribbles in white. I fussy-cut around the die-cuts with papers from Glitz's Brightside, Felicity, and 77 collections. I finished the card with the Thanks Word die from Paper Smooches.

I used the Avery Elle Custom Panels die to cut the arc and then popped up some of the scribble flowers for a little dimension:

Thanks


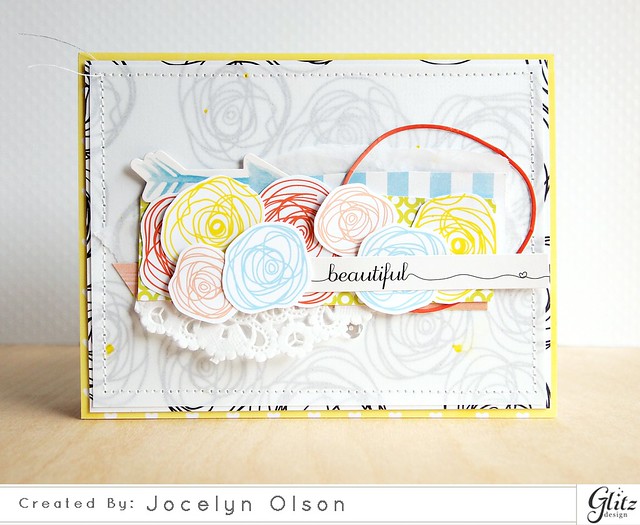
The next card is a little softer, and I used some hybrid elements:

Beautiful

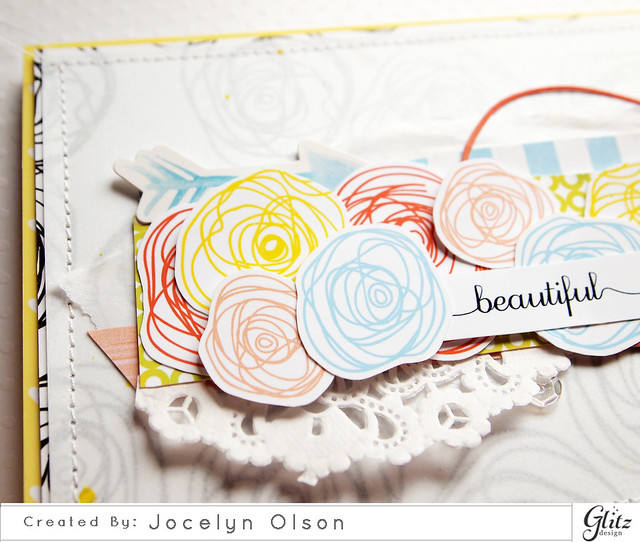
The Glitz Black and White collection has an awesome scribble Floral paper. Using the digital version of the paper, I recolored a few of the scribbles, resized them, and fussy-cut them. The black and white paper competed with the colored flowers, so I added some vellum.

The sentiment sticker from the Felicity collection has a cute little heart doodle. Love it!

Beautiful


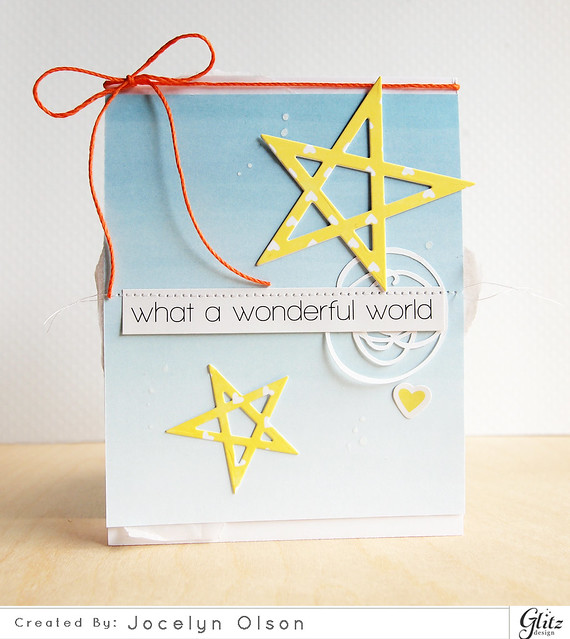
I went CAS for the last card:

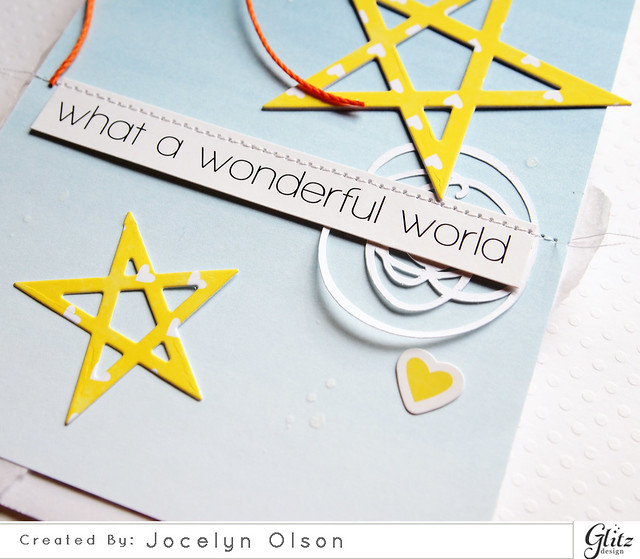
What a Wonderful World


I die-cut the Sketched Stars from Brightside papers and layered it over Felicity paper. I had a left-over die-cut scribble and added it under the sentiment sticker from Carpe Diem.

What a Wonderful World


You can see the project (and others!) on the Glitz blog.

Thanks for stopping by! Have a great day. :)

Supplies
Cardstock: (white, linen vellum) PTI
Patterned paper: (Floral 12x12 from Black and White collection; 6x6 Brightside papers; 6x6 Felicity papers; 6x6 77 papers) Glitz Design
Stickers: (Felicity Stickers Titles and Accents; Carpe Diem Stickers Titles and Accents; Brightside Stickers Titles and Accents) Glitz Design
Digital elements: (Black and White paper pack 2; Brightside paper pack 1) Glitz Design
Dies: (Thanks Word die) Paper Smooches; (Sketched Stars) Papertrey Ink; (Custom Panel die) Avery Elle
Embellishments: (doily) Freckled Fawn; (Crystal Clear sequins)  Neat & Tangled; (Neon Orange twin) Hemptique twine
Ink: (Opaque White Mr. Huey's) Studio Calico

Tuesday, March 18, 2014

Chocolate Easter Bunnies

Hi everyone! I hope you're having a great week. I was in Mobile last week for work, and I still feel like I'm catching up. ;) I did want to share my Glitz project that was on their blog last week.

I'm in Easter mode now, and I made three treat hybrid treat boxes:

Easter Treat Boxes


The Glitz Color Me Happy collection has mostly rainbows, but there are some pastels in the collection, too. I used the CMH Element Pack 2 for the yellow paper base and die-cut it with a Sizzix Milk Carton die. I was inspired to tie the cord like THIS pin.

For the tags, I made all three all three almost the same. I layered some die-cut papers and cut the bunnies out on my Cameo. The woodgrain paper is from the Color Me Happy Paper Pack. I love how it looks like chocolate. :)

Here's the blue one:

Easter Treat Boxes


I used the Color Me Happy Paper Pack for the blue paper and lightened it just a pinch. [Don't you love the technical terms? Ha!]

Here's the pink one:

Easter Treat Boxes


For the pink carton, I created my own patterned paper by stamping the paper with the woodgrain digital brush in the Element Pack 2. I had to stamp the brush about 5 times to make it large enough, but the woodgrain is pretty forgiving for lining it up.

You can check out how the rest of the Digital Team used this collection on the Glitz blog.

Thanks so much for stopping by!


Supplies
Digital elements: (papers and elements from the Color Me Happy Element Pack 2 and Paper Pack) Glitz Design
Dies: (scalloped circle from Button Stacks) PTI; (tag from Timeless Tags 2 Dies) WPlus9; (bow from Dainty Bows) Mama Elephant; (bunny from Silhouette) Silhouette America
Fibers: (green neon twine) Hemptique

Monday, February 17, 2014

You Are Here Mini Album

Hi everyone! I hope you had a great weekend! We are still on Spring Break until tomorrow, and today, we're finally having a thaw. Woo hoo! I cannot WAIT for spring!


This week on the Glitz blog, we're sharing daily life projects. I have been wanting to make a mini album with some photos I took one day last September, and I decided this week's theme worked well for a mini. As a warning, this is a photo-heavy post!

Here's the cover:


You Are Here Mini Album


I'm not sure what I was thinking...a hybrid mini was a ridiculous amount of work. ha ha I love how it turned out, though! I mostly used the Finnley digital collection, although I also used elements from the Color Me Happy, the new Black and White, and the Wild and Free collections. Most of the papers and elements were altered, such as the geotag on the cover (I removed the background on the Color Me Happy journaling card and layered it over a Finnley patterned paper before printing). 

Here's a close-up:

You Are Here Mini Album


I die-cut the tags on my Cameo, embossed them, and arranged them so the album would read vertically. I'm showing you the side-by-sides, although they are really top and bottom.

Here are the first pages:

You Are Here Mini Album

I went a little more masculine on the pages with my little guy. The calendar and alphabet journaling cards are from the Finnley collection.

Here's a close-up:

You Are Here Mini Album


Here are the next pages:


You Are Here Mini Album


For these pages, I obviously went more girly. The "you will always be my sunshine" is a journaling card from Color Me Happy. I traced it in the Silhouette program and die-cut it on Finnley paper. The gorgeous flowers are from Finnley, and the cool scribble paper is from the new Black and White papers.

Here's a close-up:


You Are Here Mini Album


Here are the next pages:


You Are Here Mini Album


I struggled with these pages and ended up redoing them completely. I removed the background of the Wild and Free "gotcha" journaling card and layering it over Finnley papers. I also die-cut the circles and used the negative to make a banner.

Here's a close-up:

You Are Here Mini Album


Here are my last pages:

You Are Here Mini Album


I took a pocket protector and made a shaker card out of it with punched stars. For the "you are loved" strip, I again removed the background and layered it over Finnley paper. 

Here's the pocket:


You Are Here Mini Album


I used a journaling card and fussy cut some flowers to pop up over the photo. The flowers don't line up exactly (they are two different elements), but I kind of liked that look. I layered the photo over tissue paper to lessen the journaling lines...I'm addicted to tissue paper lately. ;) 

Here's a close-up:

You Are Here Mini Album


Phew! Still with me?

I wanted to pass along that Glitz is having a month-long challenge where you play along with our weekly themes. The prizes are awesome! It's a great way to win the new collections. You can find the details HERE. You can also enter to win a full Black and White digital collection HERE. 

Thanks for looking! Have a great week!


Supplies
Cardstock: (white) PTI
Digital elements: (Finnley collection, Black and White paper pack 2, Black and White element pack 2, Color Me Happy element pack 1, Color Me Happy element pack 2, Wild and Free element pack 1, Wild and Free element pack 2) Glitz Design
Fibers: (twine) May Arts
Embellishments: (wood veneer) Studio Calico; (resin flower, arrow wood veneer) Freckled Fawn; (flower sequin) Lawn Fawn; (red sequin) Neat & Tangled; (stick pin) BasicGrey; (doily) Wilton; (flair) Two Peas in a Bucket; (pocket protector) Simple Stories
Stamp: (date stamp) American Crafts
Dies: (tags) Silhouette America; (heart) Simon Says Stamp); (Circles Die Cover Plate) Papertrey Ink
Punch: (star Punch Around the Page) Martha Stewart


Thursday, January 23, 2014

Make It Happen Card Set

Hi everyone! Any plans for the weekend? We're going on a quick trip to the other side of the state for an arts reception for a long-time friend of my husband's. He's worked for years to land this particular show, so we're excited for him. :)


I was on the Glitz blog this week sharing my card set using the Bits and Pieces. While they differ by collection, the Bits and Pieces are mostly journaling cards or journaling spots. Of course, using digital, you can alter them larger or smaller. I did a little of both. :)

I made a set of three cards:

Make It Happen Card Set


Kind of cheerful, right? I used the Glitz Design Color My Happy digital collection, and I focused more on the white, yellow, and blue elements. I printed several of the papers from the Paper Pack for layering.

Here they are:

Make It Happen Card Set 3

On the Bits and Pieces (the globe and sentiment), I removed the heart on the globe and added one of the rainbow hearts from the Element Pack 1. I had to add a few more hearts, too.

Here's the second card:

Make It Happen Card Set 4

For this card, I removed the heart and clipped a patterned paper from the Element Pack 2 to the Bits and Pieces. I also recolored the sentiment.

Here's the last card:

Make It Happen Card Set 2


For this last card, I left the Bits and Pieces alone, but I added the fussy cut the banner. I could have digitally added the "make it happen," but I kind of liked the hand-cut look.

If you get a chance, stop by the Glitz blog. :)

Thanks so much for stopping by! Have a great weekend!!


Supplies
Cardstock: (white) PTI
Digital: (all papers and elements from the Color Me Happy collection) Glitz Design at JessicaSprague.com
Ink: (Dewey, Taxi, Opaque White Mister Huey's) Studio Calico
Dies: (Tag Toppers) Paper Smooches; (stars from Large Holiday Shapes) Simon Says Stamp
Embossing: (Plaid Impression Plate) PTI
Embellishments: (pink washi tape from Hello, Friend collection) Glitz Design; (sequins) Neat & Tangled; (doily) Wilton; (aqua baker's twine) May Arts

Tuesday, October 15, 2013

Happy Howl-idays!

Hi everyone! **This is my second post of the day. If you're looking for my Runway Inspired guest post, please click HERE.


This is day two of the Newton's Nook Designs holiday release. All of the sets will be for sale on Friday (10/18) in the store.

Today, we're sharing projects for the Canine Christmas set. Want some dogs to go with the kitties? This one is for you! Here's what I created:


Isn't the Scottie adorable? The very first stamp I ever owned (when I was 8) was a Scottie stamp. Yes, I still own it. ;) I think it was from the Lillian Vernon catalog. Remember that catalog (and all of their personalized items)?

Anyways, I colored the Scottie with Copics, paper pieced the cape and bow, and fussy cut him. I paired him with the awesome sentiment from the set. Here's a close-up:


Would you like to win Canine Christmas? This set will be given away to two lucky winners!

 Here's how to win:
1. Comment on Newton's Nook Design blog.
2. Comment on the Design Team member and guest blogs (see the list below).

You have until Thursday (10/17) at 9 pm CST to comment, and the winners will be announced on the NND blog on Friday.


Thanks for stopping by! Have a great day!


Supplies
Cardstock: (White Linen) Ellen Hutson; (white) PTI
Patterned paper: (red and green from 25th and Pine) BasicGrey
Clear stamps: (sentiment and dog from Canine Christmas) Newton's Nook Designs
Die: (Tag Sale #4) Papertrey Ink
Twine: (Ivory) May Arts
Copics

Monday, February 21, 2011

Oh My Stars!

I am a die cutting junkie. All metal dies in my Cuttlebug....marvelous. But, I have a Cricut Expression that hasn't been used nearly enough. I even have several cartridges, so there are no excuses.  It was becoming a Provocraft show-down.

I decided to take a Cricut 101 class at a "local" scrapbook store (about 45 min. away) taught by Betsy Veldman. Of course she was great and I learned a ton about the Cricut! I finally figured out all of the functions, or at least enough to use my machine.

So...the Cricut stays. And I've finally made a card I'm happy with using the Cricut and some my other dies, and I decided to enter it into the Die Cuttin Divas stars challenge:


I used the Plantin Schoolbook and Joys of the Season Cricut cartridges for the big star and the little stars. The die is Papertrey Ink's Fillable Frames #10, and the doily die is My Favorite Thing's  Dainty Lace Doily Die.  Isn't this Fancy Pants paper pretty?


 There is a strip of pink glitter separated by score lines (can't quite see them on the photo).


I added a little stitching using denim thread....love that thicker thread...too bad my machine doesn't!

Thanks for looking!

Here are the details on the card:
Cardstock: pink (Core'dinations); green and red (AC Cardstock)
Patterned Paper: Wishful Thinking (Fancy Pants)
Stamps: Fillable Frames #5 (PTI)
Ink: Warm Red (ColorBox); Brilliance Peacock (Tsukineko); white (ColorBox)
Dies: Plantin Schoolbook & Joys of the Season (Provocraft); Fillable Frames #10 (PTI); Dainty Lace Doily (MFT)
Other: glitter (Michaels); aqua mist button (PTI); pink denim weight thread (YLI)
Blog Design by Caked Designs