Showing posts with label encouragement. Show all posts

Monday, February 2, 2015

Getting Happy with Maya Road

Hi everyone! Happy Monday! Can you believe it's February? Ack! 


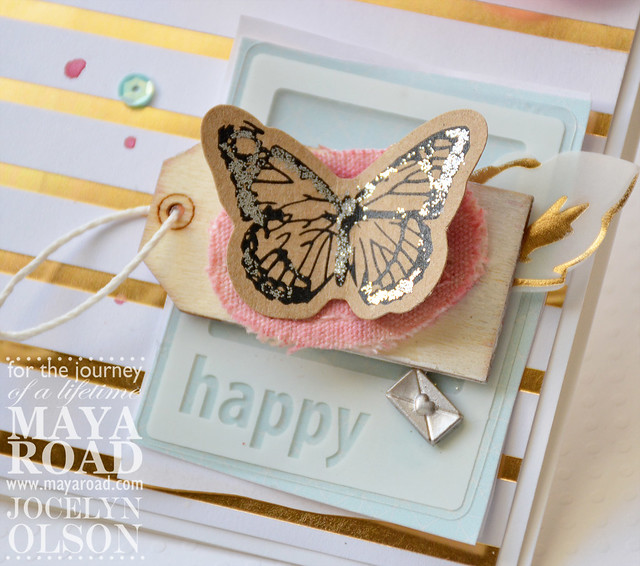
Happy

I'm excited to be sharing my first post on the Maya Road blog. I have a couple of cards with a lot of altered Maya Road supplies. I hope you'll swing by and check it out! :)

Thanks for stopping by! Have a great day!


Thursday, January 29, 2015

January Paper Smooches DT Blog Hop

**This is my second post of the day. For my Maya Road post, please click HERE. 

Hi everyone! 

It's Pep Rally week and we are here today to share a sampling of the NEW Paper Smooches February release with you! FOUR new stamps and EIGHT new dies will be available to purchase on January 31st at 8:00pm PT. Once our release goes live, you will find our new products HERE.

To add extra fun to our blog hop...we are offering up a prize! 
The prize - a $25 gift code to choose what you like at the PS online store. Here are the details:
  • FOUR winners will be chosen at random from any of the design team blogs and the PS Blog to win the $25 prize. 
  • Just leave a comment on any of the design team blogs listed above or the PS blog for your chance to win (you do not need to comment on all blogs to qualify, but it increases your chances). 
  • Deadline: You have until midnight PT on Sunday, February 1st to leave a comment. 
  • Please check the Paper Smooches blog on Monday, February 2nd to see if you are one of the FOUR lucky winners. 
Here's the order of the hop:
To increase your chance of winning:
  • Tell us that you Facebooked about our blog hop (leave another comment) 
  • Tell us that you Tweeted about the hop (leave another comment) 
  • Tell us that you posted on your blog about our blog hop (leave another comment) 
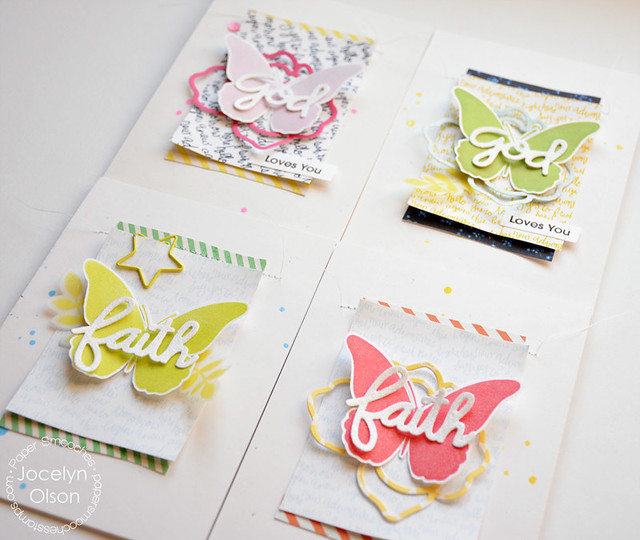
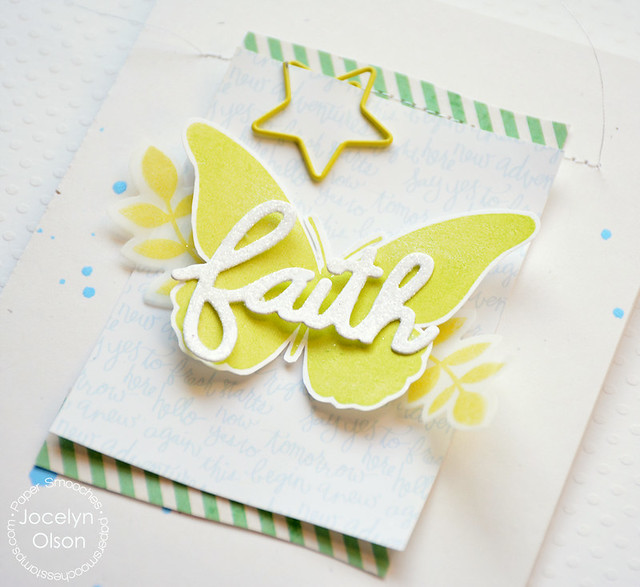
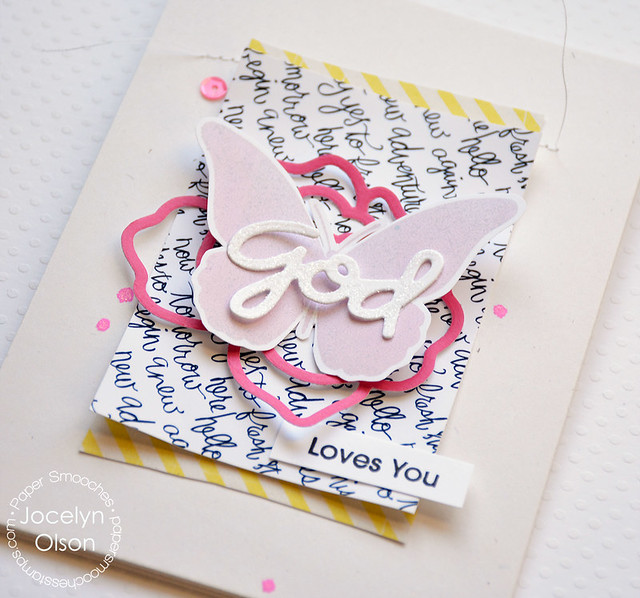
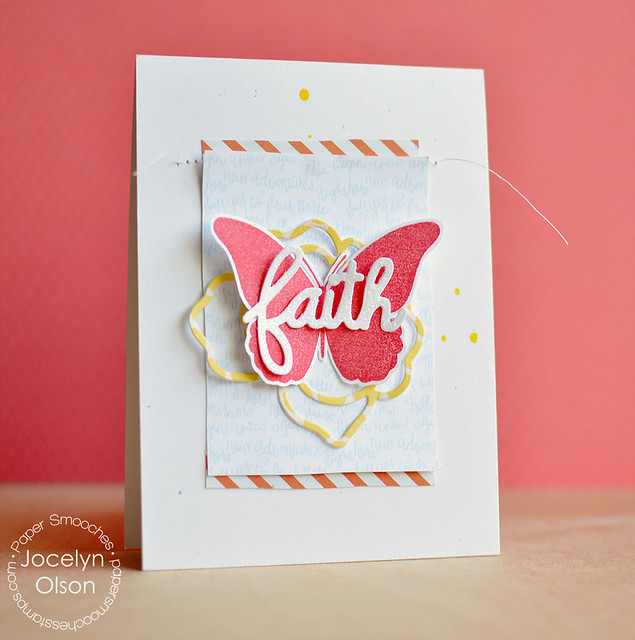
I made a card set using Religious Words dies. Here's one:


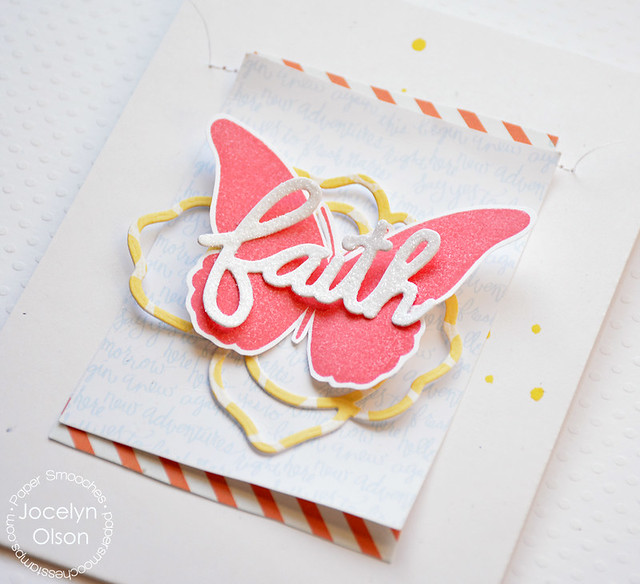
Faith


I used the "faith" die from the Religious Words dies and glittered it with white glitter. I layered it over the huge butterfly from the new Graceful Beauties stamps and a left-over Roses die-cut from THIS card. I was going to double-stamp the butterfly, but I kind of liked the more rustic look. The papers are hand-cut...my paper cutter isn't that bad. ;) 

Here's the set of cards:


Religious Words

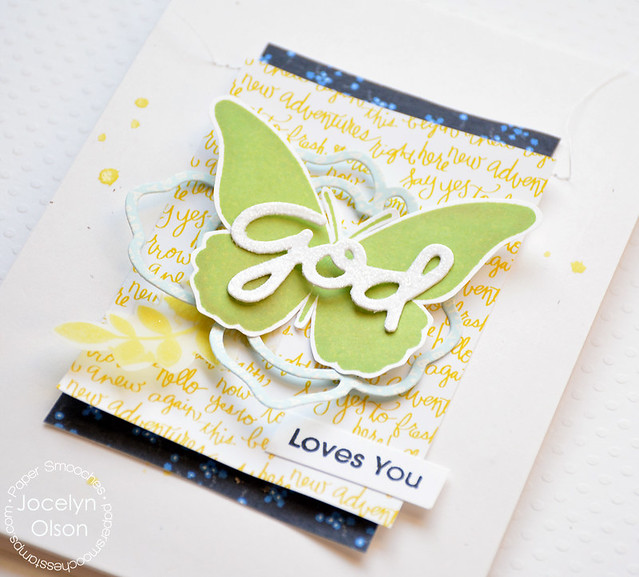
Each card has a different color scheme. They weren't really meant to match...I just used a bunch of left-over die-cuts and scraps to determine the colors. :) I figured they would work as sympathy or encouragement cards.

See the "God" die-cut? That's from the new Religious Words, too. I used Reflections stamps and Reflections Leaves dies on two of the cards, and the "loves you" from the new Have Faith set.

Here are close-ups of each:


Religious Words


Religious Words


Religious Words


Religious Words


Thanks for stopping by! Next up is my sweet and very talented friend Kalyn!


Supplies
Dies: (Faith, God from Religious Words dies; flowers from Roses dies; leaves from Reflections) Paper Smooches
Stamps: (butterfly from Graceful Beauties; sentiment from Have Faith; leaves from Reflections) Paper Smooches
Cardstock: (Rustic White) PTI; (White Solarcrest) Neenah; (vellum) Hobby Lobby
Digital: (script papers, navy/light blue papers from Paislee Press) The Lilypad
Patterned papers: (stripes) My Mind's Eye
Ink: (Versafine Onyx Black) Tsukineko; (Grass, Lemonade) Fresh Ink; (Red Hot Hybrid) My Favorite Things; (Grass Chalk) Hero Arts
Glitter: Martha Stewart
Clip: (yellow star) Freckled Fawn


Tuesday, August 26, 2014

Every Cloud...

**If you're looking for my Hero Arts/A2Z Scrapbooking post, please click HERE. 

Hi all! It's hump day....well, almost. LOL!

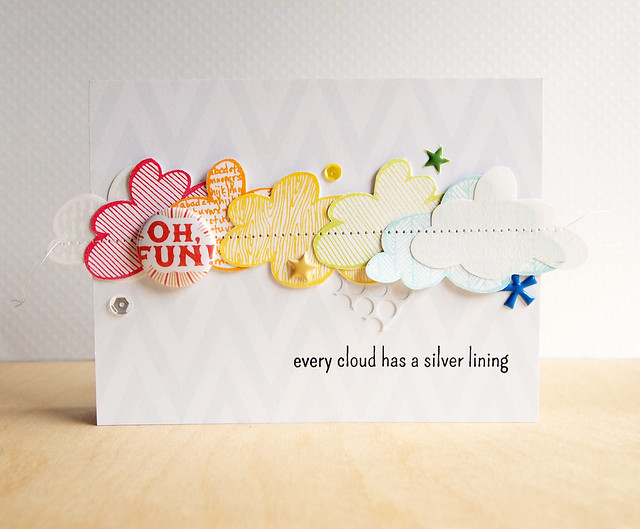
I'm on the Neat & Tangled blog today sharing this card:

Every Cloud

I used the Clouds set designed by my friend, Miriam Prantner. I have more pictures on the Neat & Tangled post HERE. I'd love it if you would check it out!

Have a great day! Thanks for stopping by!


Supplies
Cardstock: (white; Linen Vellum) PTI
Stamps: (Clouds) Neat & Tangled
Patterned paper: (zigzag by Sugar Rush Scrapbook Add-On) Studio Calico
Embellishments: (Crystal Clear, Pink Lemonade sequins) Neat & Tangled; (White Punchinella) Neat & Tangled; (green star from Daily Flash) October Afternoon; (yellow puffy heart, blue star, flair from Studio Calico kits) Studio Calico

Monday, June 23, 2014

Shine Bright

Hi everyone!


Each day this week, the Neat and Tangled and Scrapbook Adhesives by 3L teams are sharing projects. Today, Joni and I are sharing projects on the Neat & Tangled blog.

Here's my project:

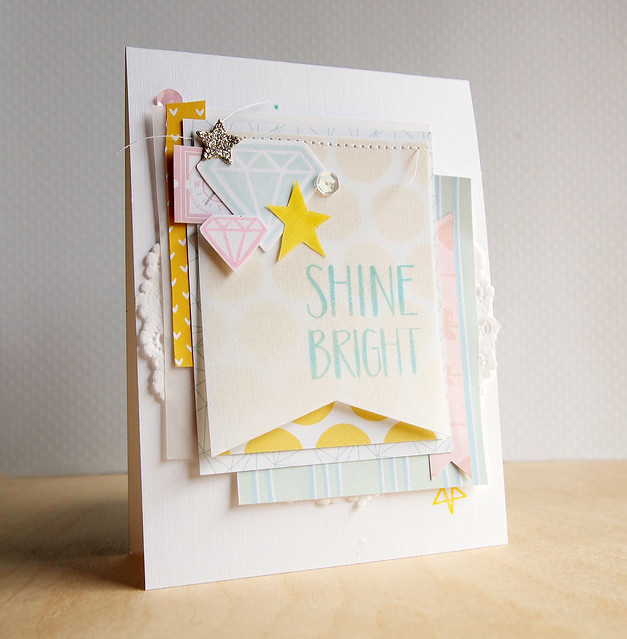
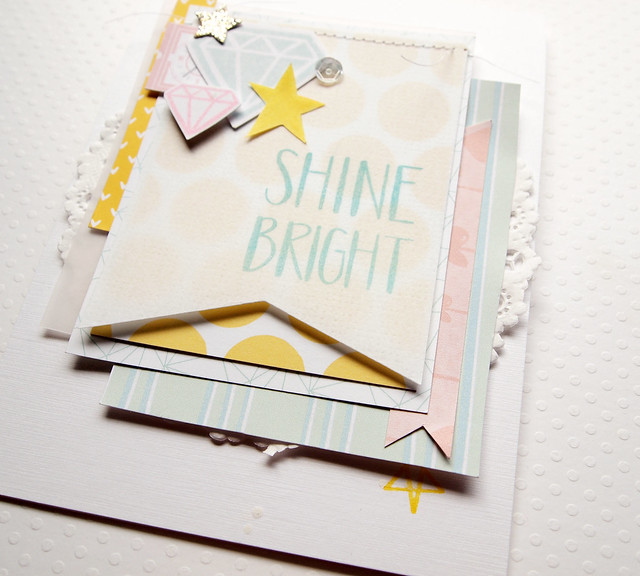
Shine Bright


I started by stamping some stars and diamonds from the Neat & Tangled Sparkle and Shine set on cardstock and linen vellum. I clustered them on the banner using the Scrapbook Adhesives EZ Foam Dots and  Dodz Medium. 

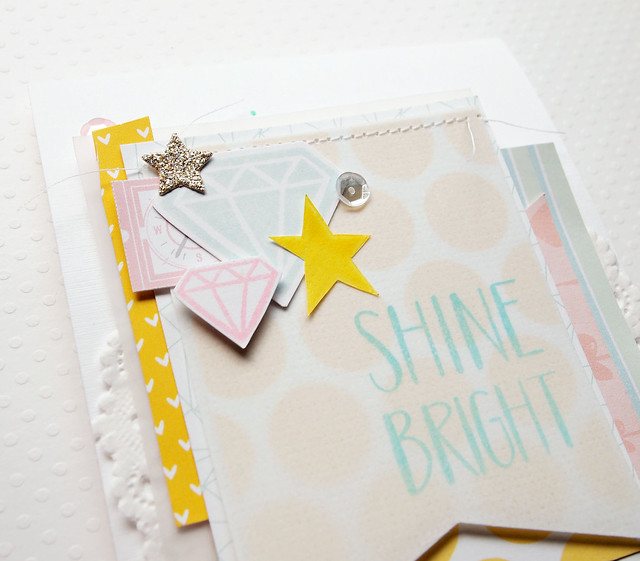
I thought I needed one more element, so I used the Adhesive Transfer sheets and die-cut the glitterstock from it. That is one cool adhesive...it didn't get globby around the edges (yes, that's a technical term ;). I finished off the panel with a sentiment from Sparkle and Shine and a Neat & Tangled Crystal Clear sequin. Here's a close-up:

Shine Bright


I layered some American Crafts, Webster's Pages, and Studio Calico papers and a Freckled Fawn doily. I also stamped one little star from the Sparkle and Shine set on the card base. Here's another angle:


Shine Bright

What's a hop without prizes? There are two prize packs each containing a selection of Neat & Tangled stamps and sequins and Scrapbook Adhesives by 3L products. That's two prizes worth over $50 each! One winner will be chosen from Neat & Tangled blog comments and one by Scrapbook Adhesive blog comments.

Thanks for stopping by! Have a great day. 


Supplies
Cardstock: (white linen) Ellen Hutson; (linen vellum) PTI; (glitter cardstock) Best Creations
Stamps: (Sparkle & Shine) Neat & Tangled
Ink: (yellow Brilliance; Pink Angel Luxe) Tsukineko; (Pool) Fresh Ink
Embellishments: (doily) Freckled Fawn; (ticket from Daydreamer) American Crafts

Wednesday, May 28, 2014

Chin Up, Beautiful

Hi everyone! I hope you're having a great week. My husband left for a trip this morning, and I'm going to be doing the single-parent thing through the weekend. My poor daughter was up until about 1am this morning--I think she was anxious about my husband leaving. My son didn't even get up to say goodbye. I think that pretty much sums up their personalities. ha ha

It's One Buck Wednesday over at Snap Click Supply, and today, the Glitz Design Vintage Blue Elements and Paper Pack on sale. The Digital Team is sharing projects using this collection on the Glitz blog today. You can check that out HERE.

I made a card using the Vintage Blue collection:

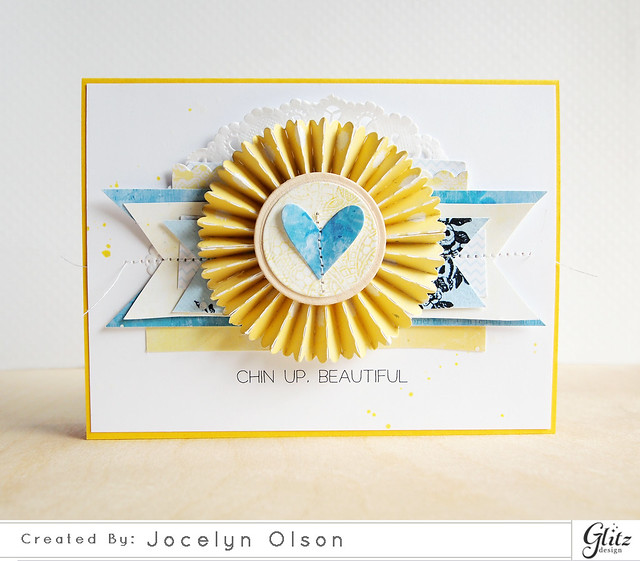
Chin Up, Beautiful

Most of the time, I'm pretty meh about my cards. You know how it goes about being your own worst critic. For some reason, this card came together easily, and I really like how it turned out. I think it's the happy yellow. :)

I started with the fab sentiment from the Carpe Diem Element Pack 2. I cropped the sentiment and simply printed it on the main panel.

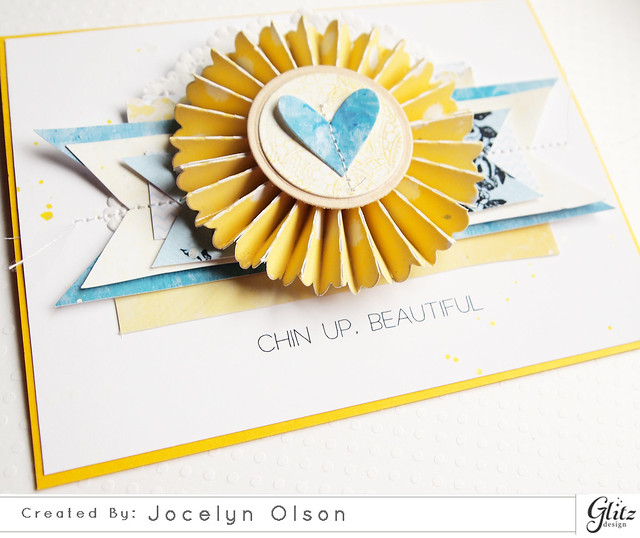
I re-sized and lightened several of the papers from the Vintage Blue paper pack. I die-cut the rosette on my Cameo, although I thought the edges of the rosette needed something else. I die-cut the edge of the rosette with the Paper Smooches Borders 2 die. I layered a circle of wood veneer and more papers from Vintage Blue. The heart was die-cut using the Paper Smooches Hearts die. Here's a close-up:


Chin Up, Beautiful


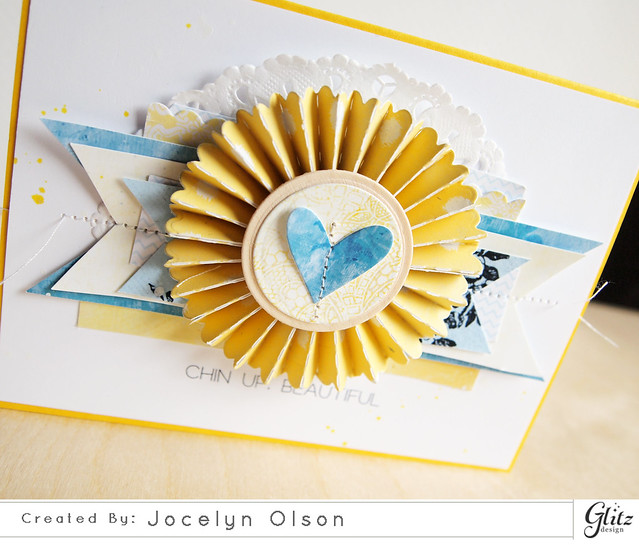
For the layers, I hand-cut loose banners and strips from the Vintage Blue and Sunshine in My Soul collections. I used half of a Freckled Fawn doily at the top (they have the whitest doilies--yeah!).

Here's another close-up:


Chin Up, Beautiful

If you want to try digital, the One Buck Wednesday is a great way to pick up some papers and elements for very little money. :)

Thanks for stopping by! Have a super day!


Supplies
Cardstock: (yellow) Avery Elle; (wood veneer) Impress
Digital elements: (blue and white zigzag, yellow scallop from Sunshine in My Soul; light blue banner from Vintage Blue Element Pack; all other papers from Vintage Blue Paper Pack; sentiment from Carpe Diem Element Pack 2) Glitz Design
Dies: (Borders 2, Hearts Dies) Paper Smooches; (rosette) Silhouette America
Ink: (Taxi, Opaque White Mister Huey's) Studio Calico
Tuesday, May 6, 2014

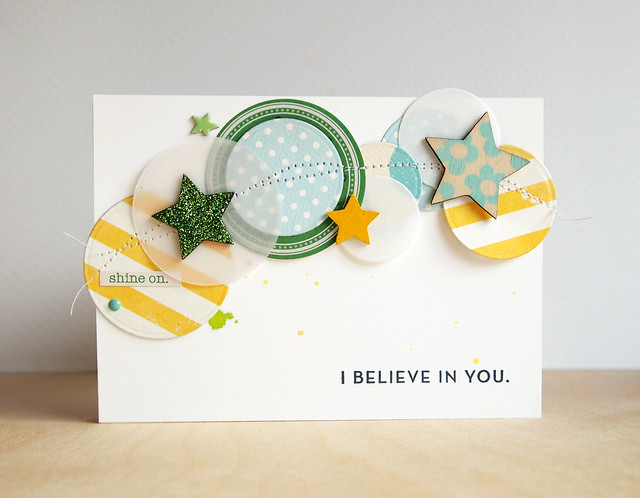
I Believe in You

Hi everyone! I hope you are having a good week. We're getting down to the wire--8 more days of school. Woo hoo!

I'm blogging on the Scraptastic Club blog today with a card and a tutorial. On the post, I've shared 11 different ways to alter wood veneers. You can check it out HERE.

Here's a card I made based on the tutorial:

I Believe in You


I used the Scraptastic Club's May Daylight Kit and Daylight Kit Add-On for this card. I punched circles from the papers, two different types of vellum, and used one of the pre-made circle die-cuts. On top, I layered the altered stars.

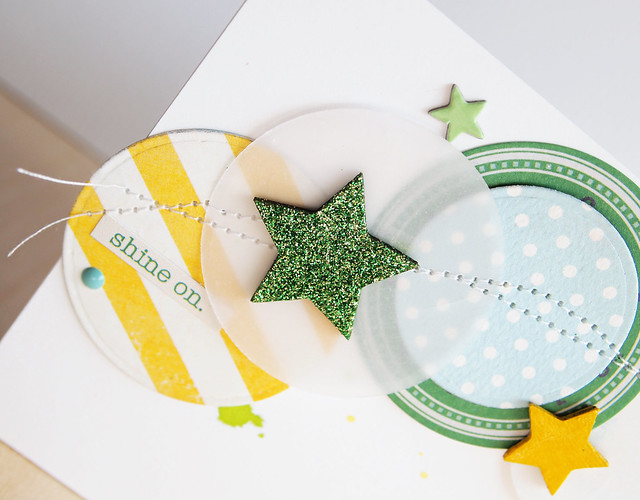
Here's a close-up:

I Believe in You Close-Up


For the green star, I inked it, painted on Multi Matte Medium, and sprinkled glitter on top. For the yellow star, I painted it and added Glossy Accents. I also added one of the Studio Calico stars, enamel dots, and Simple Stories sticker that came in the kit.

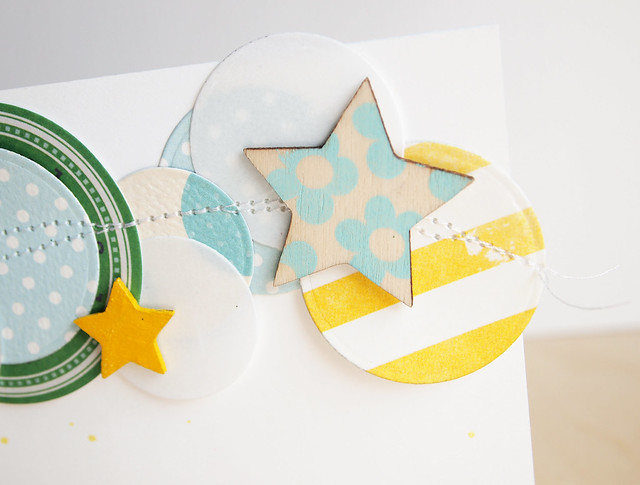
I stamped on the last star with one of the stamps in the Scraptastic Club's The Story I Heard set. Their stamps are super cute! For the sentiment, I used a stamp from the SSS You Can Do Anything set. 

Here's another close-up:

I Believe in You Close-Up


Thanks for stopping by! Have a great day!


Supplies
Cardstock: (white) Avery Elle; (vellum, linen vellum) PTI
Patterned papers: (Daylight Kit and Daylight Add-On) Scraptastic Club
Stamps: (flower from The Story I Heard) Scraptastic Club; (sentiment from You Can Do Anything) Simon Says Stamp
Ink: (Grass, Pool) Fresh Ink; (Tuxedo Black) Tsukineko
Dies: (Circle STAX) My Favorite Things
Embellishments: (enamel dot, sticker die-cut, chipboard, wood veneer from Daylight Kit and Add-On) Scraptastic Club


Thursday, January 23, 2014

Make It Happen Card Set

Hi everyone! Any plans for the weekend? We're going on a quick trip to the other side of the state for an arts reception for a long-time friend of my husband's. He's worked for years to land this particular show, so we're excited for him. :)


I was on the Glitz blog this week sharing my card set using the Bits and Pieces. While they differ by collection, the Bits and Pieces are mostly journaling cards or journaling spots. Of course, using digital, you can alter them larger or smaller. I did a little of both. :)

I made a set of three cards:

Make It Happen Card Set


Kind of cheerful, right? I used the Glitz Design Color My Happy digital collection, and I focused more on the white, yellow, and blue elements. I printed several of the papers from the Paper Pack for layering.

Here they are:

Make It Happen Card Set 3

On the Bits and Pieces (the globe and sentiment), I removed the heart on the globe and added one of the rainbow hearts from the Element Pack 1. I had to add a few more hearts, too.

Here's the second card:

Make It Happen Card Set 4

For this card, I removed the heart and clipped a patterned paper from the Element Pack 2 to the Bits and Pieces. I also recolored the sentiment.

Here's the last card:

Make It Happen Card Set 2


For this last card, I left the Bits and Pieces alone, but I added the fussy cut the banner. I could have digitally added the "make it happen," but I kind of liked the hand-cut look.

If you get a chance, stop by the Glitz blog. :)

Thanks so much for stopping by! Have a great weekend!!


Supplies
Cardstock: (white) PTI
Digital: (all papers and elements from the Color Me Happy collection) Glitz Design at JessicaSprague.com
Ink: (Dewey, Taxi, Opaque White Mister Huey's) Studio Calico
Dies: (Tag Toppers) Paper Smooches; (stars from Large Holiday Shapes) Simon Says Stamp
Embossing: (Plaid Impression Plate) PTI
Embellishments: (pink washi tape from Hello, Friend collection) Glitz Design; (sequins) Neat & Tangled; (doily) Wilton; (aqua baker's twine) May Arts

Monday, January 13, 2014

On the Corner Blog Hop

Hi everyone! I hope you had a great weekend!


Today, some crafty friends and I are having a blog hop using the Neat & Tangled's On the Corner set. This set was designed by Miriam Prantner, and it is so creative and different than any other stamp set I've seen--I LOVE that! If you're hopping along, you should be coming from the super-duper talented JJ's blog. 

I made two projects. The first is a card I made with my 3-year-old son in mind:


On the Corner Superhero Panda


I want to squeeze the panda! Since I have a little guy, I think my favorite sentiments are the "Super" and "Hero" sentiments. They are great for any super heroes. :)

For the On the Corner, I stamped, colored, and fussy cut the pole. I stamped the street signs a second time and popped them up with foam tape. I fussy cut the panda from the Superheroes patterned paper, and I die-cut the Memory Box moon and stars.

Since I went very boyish for my first project, I decided to show a more feminine way to use the set:


On the Corner Straw Topper


Truth be told, I was going to use the "Super" and "Hero" for straw flags (wouldn't that be cute for a superhero birthday party?), but I couldn't find a red straw. LOL!

I used some Love Notes papers, a sticker, and rosette to make the jar decoration. I stamped the sentiments on one of the papers--these sentiments are angled, which work great for flags. The flag on this straw has two sides:

On the Corner Jar Close-Up


I love how versatile this set is! You can check it out here.

As part of the hop, TWO people will win one of these sets. You can comment to win through Saturday, January 18th (winners will be announced on the 20th). You can comment along the way to increase your chances. :)

Jocelyn <--You are here!

Thanks for stopping by! Next up is my sweet and talented friend Joscie!


Supplies
Panda card
Cardstock: (yellow) Avery Elle; (white, Pure Poppy) PTI
Patterned paper: (panda, blue from Superheroes) Reminisce
Stamps: (sentiments, street signs from On the Corner) Neat & Tangled
Ink: (Tuxedo Black) Tsukineko
Marker: (Clear Wink of Stella)
Dies: (Celestial Bodies) Memory Box
Copics

Jar and Flag
Patterned paper, stickers: (grey, aqua, red stripe, rosette, pink label from Love Notes) Crate Paper
Stamps: (sentiments, street signs from On the Corner) Neat & Tangled
Ink: (Strawberry) Fresh Ink
Dies: (Cameo) My Favorite Things
Twine: (gold) Lawn Fawn

Monday, January 6, 2014

Be Awesome Today

Hi everyone!


This week, the Glitz teams are sharing projects based on "thoughts on the new year." Admittedly, I don't make New Year's resolutions, but it is a good time to reflect and plan for the year. I wanted something inspirational; something about being a good person.

Here's what I came up with:

Be Awesome Today

I ran across the sentiment digital brush in the Hello Friend Element Pack 2 and had to use it. I stamped the sentiment in pink on the bokeh paper (from the Hello Friend Paper Pack) and then stamped the frame around the sentiment. Isn't that bokeh paper stunning? *sigh*

Glitz has great small elements, and I used a few of those on the card (the "happy," "true" and "never give up"). Here's a tip: To remove the background colors of the sentiments, I selected the area in Photoshop that I didn't want to show (with the magic wand), and hit the backspace key.


Be Awesome Today CU

I also stamped striped washi and a butterfly in the bottom right corner, and a third string of doilies in the top right, and I lowered the opacity on all of the elements. These Hello Friend brushes are awesome! For the card base, I used the pretty pink paper from the Cashmere Dame paper pack.

You can check out the other New Year's projects on the Glitz blog. :)

Thanks for stopping by! Have a great day!!


Supplies
Cardstock: (white) PTI
Digital elements: (bokeh paper, digital brushes, sentiments from Hello Friend collection; pink background paper from Cashmere Dame paper pack) Glitz Design digital at JessicaSprague.com
Mists: (Opaque White, Mary Mary Mr. Huey's) Studio Calico
Sequins: (pinks from Avery Elle; white flat from Kelly Purkey)

Saturday, November 9, 2013

A Moxie Fab Thanks

Hi everyone!


Are you here for the monster blog hop for Cath Edvalson? There are almost 300 of us participating as a way to say "thank you" for all she has done for the papercrafting community. We're going to miss her! *sniff * *sniff*

If you want to start from the beginning, you can go to the Moxie Fab World blog. You should be coming from my dear friend JJ Bolton's blog.

Since there are about 270 blogs to go, let's get to it!


Cath lives in New Hampshire, and the folk art look of the houses and hills in the Odl-lay-hee paper remind me of her photos. I thought the sentiment was fitting for the occasion. :)

Here's a close-up:


Cath, you've touched so many people. Your encouragement, photos, and words have inspired many, and you've brought people together. Moxie Fab World is much more than a blog--it's a community, and it's because of you. I will miss you terribly at Paper Crafts! I know that you will inspire others in whatever you do next.

I hope you'll hop along and give Cath a big Moxie Fab thanks! Next up is the fabulous Daniela!

Thanks for stopping by!


Supplies
Cardstock: (Rustic White) PTI
Clear stamps: (sentiment) Swissgirl Designs--no longer available
Ink: (Strawberry) Fresh Ink
Digital element: (paper from Odl-lay-hee) Deena Rutter

Friday, September 27, 2013

Wild & Free Blog Hop

Hi everyone! Today, the Glitz Digital Team is having a blog hop!


We're showing projects using the new Wild and Free collection. Here's the line-up for today's hop:


Jocelyn Olson <--You are here!

Okay, if you haven't seen the Wild & Free collection yet, you *need* to check it out. Seriously. The kit has so many great elements and papers--there are tons of possibilities!

I'm sharing two hybrid cards. First up:


For this CAS card, I simply resized the fab Wild & Free patterned paper for the background. I recolored the background of the "wander" sentiment from Wild & Free Element Pack 1 to layer on the white background. There are several sentiment in the kit that would work well for this same design. :)

Here's a close-up:


*sigh* Isn't that paper gorgeous?

For my next card, I did more layering:


The "LOVE" journaling card started out white with an ombre (top right in the picture below):


First, I printed the pink and yellow Wild and Free paper. Then, I recolored the journaling card black and white in Photoshop to increase the contrast. Finally, I traced the image on my Cameo and die-cut it.

For the layering, I added some papers from the collection and hand-cut tissue paper for the edge. I also added a little splatter in the background with some mists. Here's a close-up:


Want to win the full digital collection? Just leave a comment, and comment along the way to increase your chances! Or, you can buy the Wild and Free kit at Jessica Sprague HERE. :) It's such a beautiful collection!

The next stop on the hop is the super-talented Kym! Thanks for stopping by!


Supplies
Wander
Cardstock: (blue) Stampin' Up
Other paper: (Premium Matte Photo Paper) OfficeMax
Digital elements: (paper from Wild & Free Paper Pack; sentiment from Wild & Free Element Pack 1) Glitz Designs

LOVE
Cardstock: (White Woodgrain) Simon Says Stamp
Other paper: (Premium Matte Photo Paper) OfficeMax
Digital elements: (papers from Wild & Free Paper Pack; journaling card from Wild & Free Element Pack 1) Glitz Designs
Mists: (Pink Guava) Maya Mists; (Dandelion Fireworks) Tsukineko
Twine: Lawn Fawn
Silhouette Cameo

Thursday, September 5, 2013

Not Your Typical Back-to-School Card

Hi everyone! I'm not going to lie--I want to do some online shopping, so I'm going to make this post short. ;)

It's the first CAS-ual Fridays challenge of the term, and we have four new designers. Woo hoo!


It's a two week challenge to share your back-to-school projects.

I have little kids, but I made a school card for an older girl:


Other than the stars, I did all of the design work myself. In Photoshop, I simply used different fonts and colors to create the sentiment. I love the scrolly font for the "punch." hee hee

For the stars, I recolored the star image from One Little Bird's Crazy for You digital kit. I thought the stars worked with the back-to-school theme.

Here's a close-up:


Yup. Pretty non-traditional for back-to-school.

Do you want to make a school project? The winner of this week's CAS-ual Fridays challenge will win a gift certificate to Ellen Hutson.


You can link up your projects HERE.

Have a great weekend!


Supplies
Cardstock: (Night) Paper Source
Digital element: (stars from Crazy for You) One Little Bird for The Lilypad
Fonts are from Dafont.com

Sunday, August 11, 2013

I'm Impressed

Hi everyone! I hope you had a great weekend! We had a pretty quiet weekend, but I did start a blog make-over. It's still in transition. :)


This week is Designer Drafts at Paper Smooches SPARKS. Here is the sketch for this week's challenge:


I love that the sketch is pretty open, and yet, I still managed to deviate a little. I went with a literal interpretation of the balloon for my card:


There was a lot of Paper Smooches on this card. I started with the using the Borders 1 Dies to make the hill and stamped a sentiment from Squeaky Clean. For the tree, I paper pieced a tree from Spring Groves and colored the trunk.

For the basket, I used a laundry basket from the Squeaky Clean set, masked it, and stamped the squirrel from Spring Groves over it. I fussy cut the image and placed it in front of the balloon from the Hullabaloo set. Here's a close-up:


When I was making this card, I thought I had a Paper Smooches acorn, but I didn't. I improvised with the button instead, and now I kind of like it.

If you'd like to play along with this week's SPARKS challenge, you can link up your projects HERE.

Be sure to check out the rest of the DT's projects (I'm sure they're awesome because they're really fab card makers):


Thanks so much for stopping by! Have a great day!


Supplies
Cardstock: (white) PTI; (Paver) My Favorite Things
Patterned paper: (orange houndstooth from About a Boy) Echo Park; (green block from Acorn Avenue) Crate Paper
Clear stamps: (basket, sentiment from Squeaky Clean; tree, squirrel from Spring Groves; balloon, string from Hullabaloo) Paper Smooches 
Dies: (Borders 1 Dies) Paper Smooches
Copics

Blog Design by Caked Designs