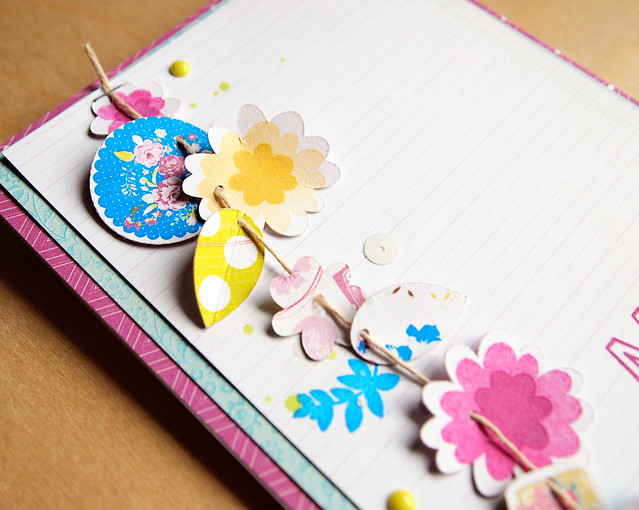
Hi everyone! I hope you're having a great week! I'm ready for the weekend. My daughter has her first volleyball game, and she just learned to serve this week. It should be pretty good. ;)
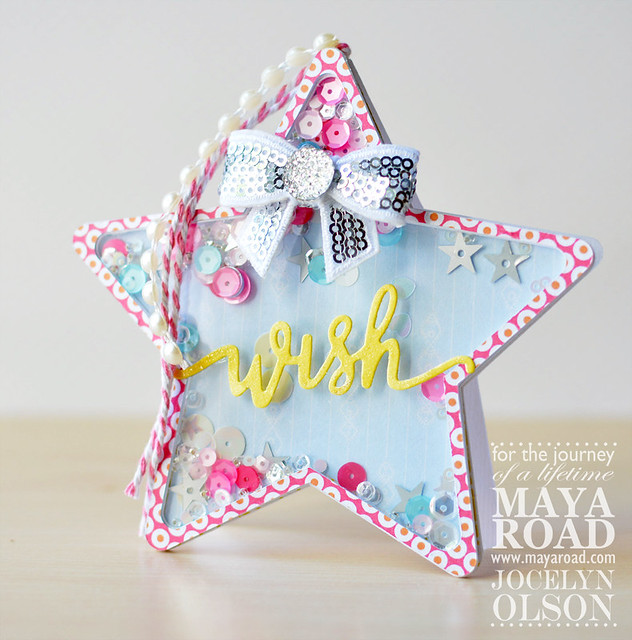
Maya Road has new DIES they're releasing in October. The dies are blue (yep, blue). They look a little different, but they cut beautifully. I was able to cut thick felt with a dainty die--yeah! Most of the dies are script words in a fabulous font. There are going to be some pretty awesome holiday dies, too.
I'm up on the Maya Road blog today sharing a couple of cards with the new dies. Isn't the "wish" die-cut pretty? I haven't made a shaker card in a long time, so I made a shaped one with some older Webster's Pages papers on my Cameo.
I have another card on the Maya Road blog showing two more of the dies. I hope you'll check it out!
Thanks for stopping by. Have a great weekend!
Showing posts with label Webster's Pages. Show all posts
Friday, September 18, 2015
Wednesday, June 17, 2015
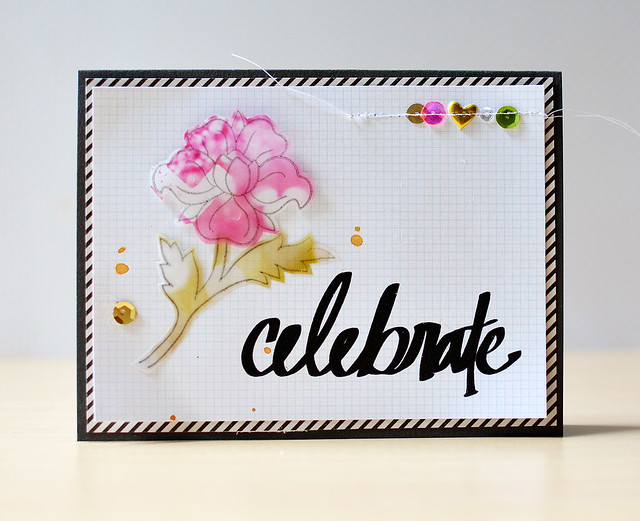
Stamping on Patterned Vellum
Hi! Happy Wednesday!
I'm on the Altenew blog today sharing a card and some tips for stamping on patterned vellum. I hope you check it out!
Thanks so much for stopping by! Have a great day!
Supplies
Stamps: (Super Script, Floral Motifs) Altenew
Ink: (Jet Black) Altenew; (Brilliance Lightning Black) Tsukineko; (gold splatter) Lindy's Stamps Gang
Patterned paper: (grid 6x6) Studio Calico; (vellum from All That Glitters) Webster's Pages; (stripe from Shimelle) American Crafts
Embellishments: (Gold Metallic, Flat Gold, Lime sequins) Neat & Tangled; (Strawberry Burst, Clear 4mm) Pretty Pink Posh; (gold puffy heart) Studio Calico
Monday, March 16, 2015
Altenew March Blog Hop
Hi everyone! Sorry to be so absent....I was on an 11-day work trip. Yikes! Now that I'm home, I'm trying to catch up on posts. Today, I'm participating in a special Altenew blog hop:
Yep, Altenew is releasing dies and new antique trims! Altenew is releasing 12 stamp-matching dies this month, and the antique trims include foiled frames. You can check them out in the shop HERE. To celebrate, we're having a blog hop. If you're hopping along, you should be coming from May's blog. Here's the complete list:
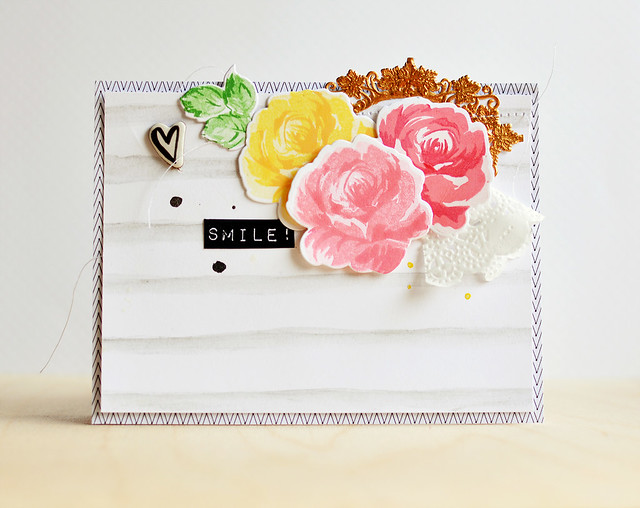
I made two projects, both using the Vintage Flowers Dies. First up, a card:
Truth time: I don't stamp too many floral multi-step stamps, and therefore I don't have go-to ink combinations. So, I played around with pretty much every dye ink I own and stamped several flowers. Okay, maybe 50. ;) Here are the inks I used (all combinations are from the darkest layer to the lightest layer):
I used the Vintage Flowers Stamps and Vintage Flowers Dies for the flowers and leaves. The dies make these flowers easy to use and are perfect for layering flowers. For the sentiment, I used the new Birthday Greetings set. In the background, I watercolored some stripes with a (ground-down) Silver Gelato.
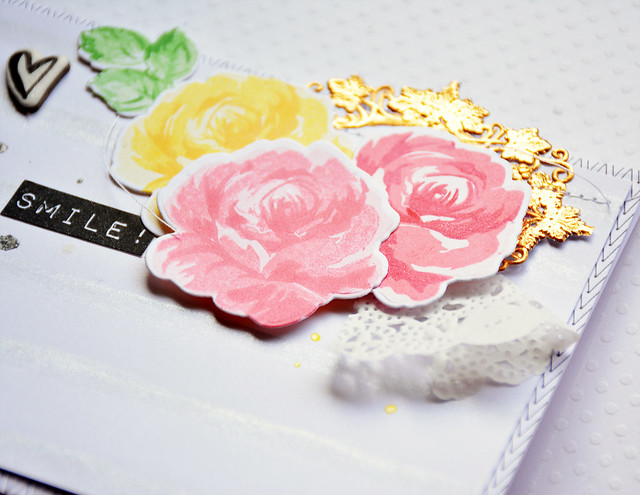
Here's a close-up:
See the gold Vineleaf Frame? I trimmed the inner layer of the frame, and now I have a second frame for a future project. :) This frame is a pretty rich-gold color that's so popular right now. They're great for layering, or you could add a sentiment for a CAS card.
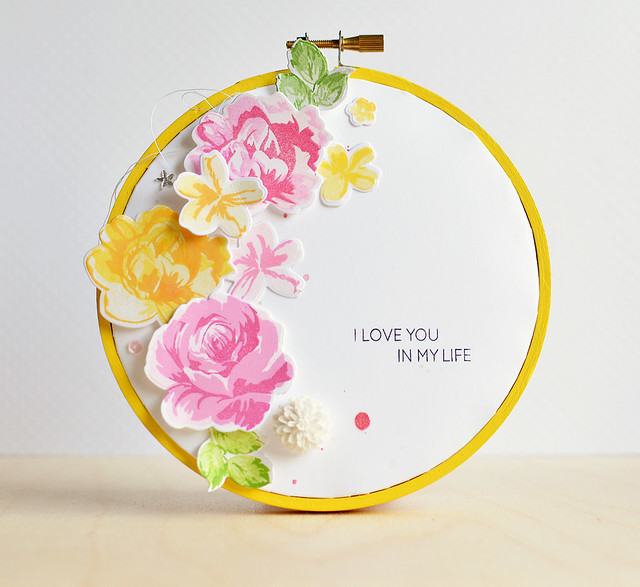
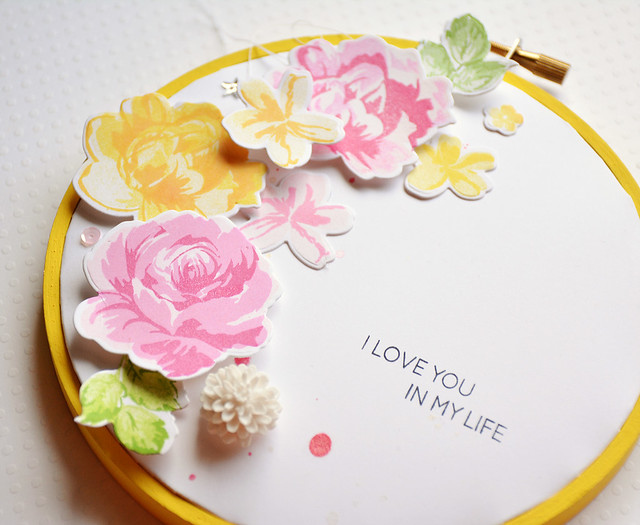
Next, I have an altered hoop:
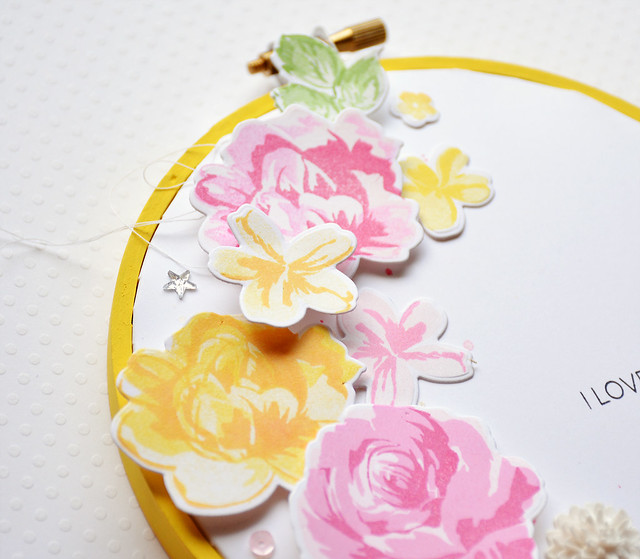
It's been a while since I've made a hoop, but I wanted to make one for my daughter. I used the same Vintage Flowers stamps and Vintage Flower dies for the flowers and leaves. For the sentiment, I masked off two sentiments from To the Moon.
The ink colors I used here were:
I painted the hoop and then followed THIS tutorial for the background. Once I had the base completed, I added the die-cuts and a few embellishments. The flowers are so cheerful!
Prizes: There are two ways to win!
To celebrate this release, Altenew will draw three winners who will each receive a $30 gift certificate to their online store. Please leave a comment on the Altenew blog by Friday, March 20th 11:59pm EST for a chance to win. The winners will be announced on Saturday, March 21st.
Altenew is also offering a $30 gift certificate for comments on this blog post. For a chance to win this extra gift certificate, please leave a comment on my post by Friday, March 20th at 11:59pm.
Yep, Altenew is releasing dies and new antique trims! Altenew is releasing 12 stamp-matching dies this month, and the antique trims include foiled frames. You can check them out in the shop HERE. To celebrate, we're having a blog hop. If you're hopping along, you should be coming from May's blog. Here's the complete list:
Jocelyn Olson <-- You are here.
I made two projects, both using the Vintage Flowers Dies. First up, a card:
Truth time: I don't stamp too many floral multi-step stamps, and therefore I don't have go-to ink combinations. So, I played around with pretty much every dye ink I own and stamped several flowers. Okay, maybe 50. ;) Here are the inks I used (all combinations are from the darkest layer to the lightest layer):
- Yellow: Hero Arts Butter Bar, Stampin Up! YoYo Yellow stamped off once, SU! Barely Banana
- Pink: Hero Arts Pale Tomato, Hero Arts Pale Tomato stamped off once, SU! Pink Pirouette
- Darker pink: SU! Strawberry Slush, Hero Arts Pale Tomato, SU! Pink Pirouette
I used the Vintage Flowers Stamps and Vintage Flowers Dies for the flowers and leaves. The dies make these flowers easy to use and are perfect for layering flowers. For the sentiment, I used the new Birthday Greetings set. In the background, I watercolored some stripes with a (ground-down) Silver Gelato.
Here's a close-up:
See the gold Vineleaf Frame? I trimmed the inner layer of the frame, and now I have a second frame for a future project. :) This frame is a pretty rich-gold color that's so popular right now. They're great for layering, or you could add a sentiment for a CAS card.
Next, I have an altered hoop:
It's been a while since I've made a hoop, but I wanted to make one for my daughter. I used the same Vintage Flowers stamps and Vintage Flower dies for the flowers and leaves. For the sentiment, I masked off two sentiments from To the Moon.
The ink colors I used here were:
- Yellow: Hero Arts Butter Bar, Stampin Up! YoYo Yellow stamped off once, SU! Barely Banana
- Pink: My Favorite Things Razzle Berry Hybrid, Hero Arts Bubblegum stamped off once, SU! Pink Pirouette
I painted the hoop and then followed THIS tutorial for the background. Once I had the base completed, I added the die-cuts and a few embellishments. The flowers are so cheerful!
Prizes: There are two ways to win!
To celebrate this release, Altenew will draw three winners who will each receive a $30 gift certificate to their online store. Please leave a comment on the Altenew blog by Friday, March 20th 11:59pm EST for a chance to win. The winners will be announced on Saturday, March 21st.
Altenew is also offering a $30 gift certificate for comments on this blog post. For a chance to win this extra gift certificate, please leave a comment on my post by Friday, March 20th at 11:59pm.
Thanks so much for stopping by! Next up on the hop is the incredible Marika. I'm sure you're in for a treat!
Monday, December 8, 2014
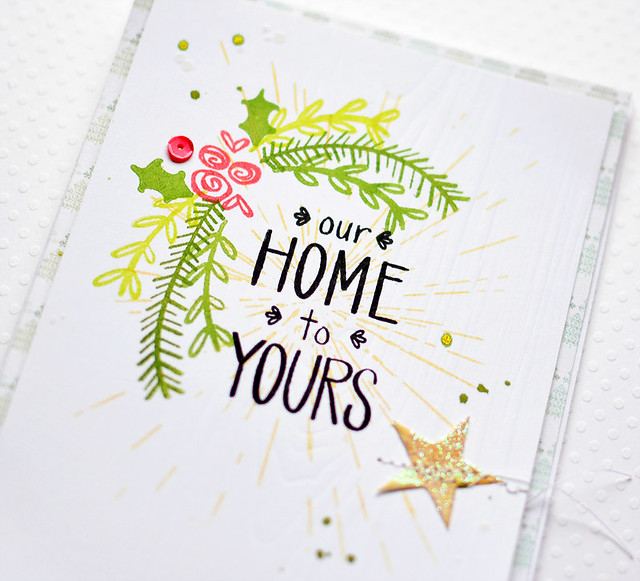
Our Home to Yours
Hi everyone!
I'm up on Neat & Tangled blog today sharing a card and quick tutorial.
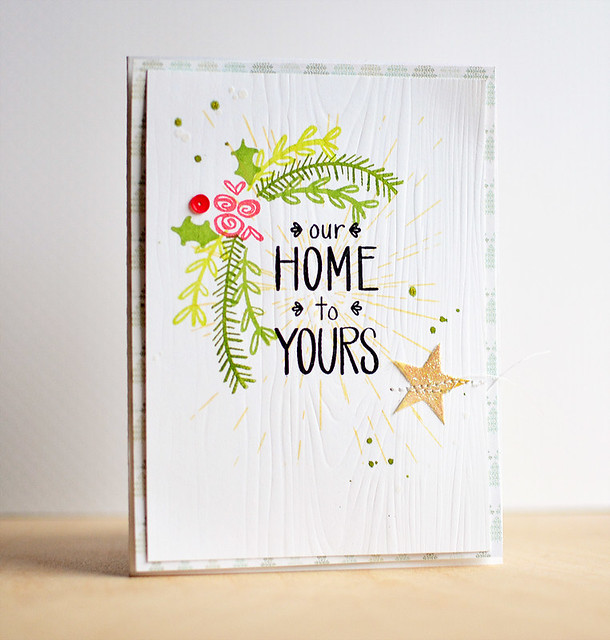
Here's the final card:
I used three different Neat & Tangled sets to make this card: Simple Christmas, So Very Blessed, and Time Warp. There are step-by-step pictures on the Neat & Tangled blog that show how I combined the different sets.
After I was done stamping, I dry embossed the panel with a PTI Woodgrain plate--I love the subtle texture. I finished the card by adding glitter to a BasicGrey die-cut, a sequin from the Classic Christmas Sequin Mix, and some spray mists.
Here's a close-up:
If you want to play along, the Little Tangles team has an embossing challenge right now. You can check it out HERE.
Sadly, this post is my last one for Neat & Tangled. I wanted to give a shout-out to Danielle for being an awesome leader. Thanks for asking me to be on the team, Danielle! *hugs* Also, thank you to my fantastic and supportive teammates! You all are a super talented bunch!!
Thanks for stopping by! Have a great day!
I'm up on Neat & Tangled blog today sharing a card and quick tutorial.
Here's the final card:
I used three different Neat & Tangled sets to make this card: Simple Christmas, So Very Blessed, and Time Warp. There are step-by-step pictures on the Neat & Tangled blog that show how I combined the different sets.
Here's a close-up:
If you want to play along, the Little Tangles team has an embossing challenge right now. You can check it out HERE.
Sadly, this post is my last one for Neat & Tangled. I wanted to give a shout-out to Danielle for being an awesome leader. Thanks for asking me to be on the team, Danielle! *hugs* Also, thank you to my fantastic and supportive teammates! You all are a super talented bunch!!
Thanks for stopping by! Have a great day!
Monday, November 24, 2014
25 Days of Christmas Tags + A Giveaway
Hi everyone! I hope you had a great weekend! I got home at the end of the week after another week of work travel. I got home in time to see my four-year-old's preschool holiday program...it was so cute. :)
My blogging friend Tracey from In My Creative Opinion has been hosting her fourth annual 25 Days of Christmas Tags. Tracey invited the Paper Smooches team to share tags, and I'm happy to be playing along.
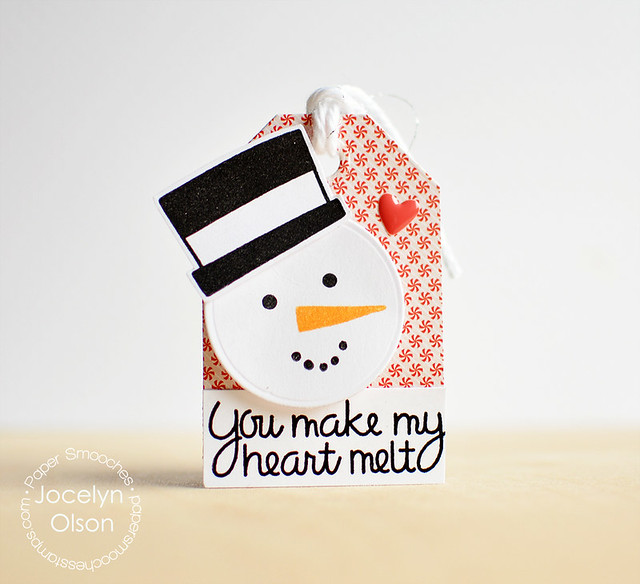
Here's my tag:
I used Paper Smooches' new Cool Dudes set to make the snowman. I die-cut a circle and then stamped the different features and hat. It was really fun to build the different snowmen--much better than getting cold in real snow. ;)
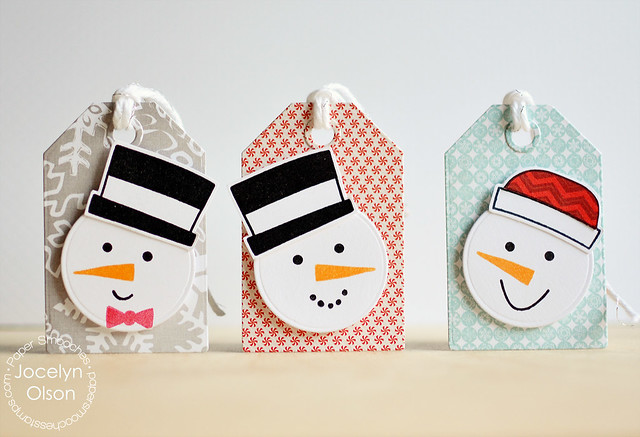
I die-cut some Webster's Pages papers using the Paper Smooches' Gift Tags die. I can't get enough of this die--it's a must-have! Here's a few of the finished tags:
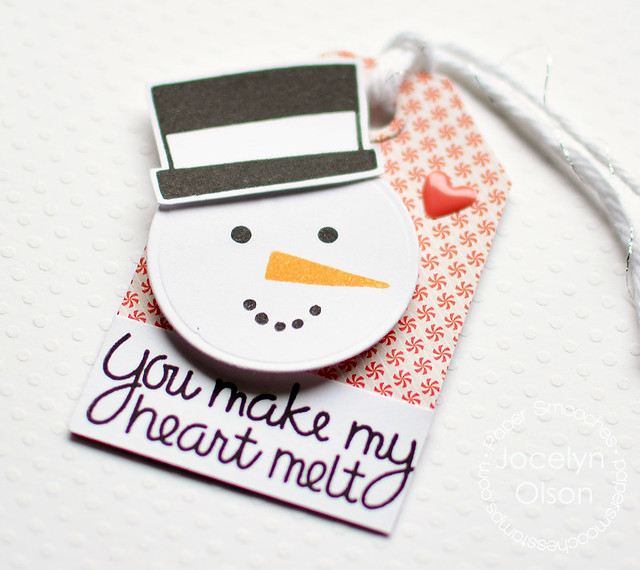
I added the sentiment from the Warm Hearts set on a couple of the tags. Here's a close-up:
As part of the 25 Days of Christmas Tags, there are lots of prizes! Be sure to check out Tracey's blog for details. To enter, comment on Tracey's blog, and for an extra chance to win, comment on my blog below. The comment-to-win ends at 11:59pm ET on 11/27.
My blogging friend Tracey from In My Creative Opinion has been hosting her fourth annual 25 Days of Christmas Tags. Tracey invited the Paper Smooches team to share tags, and I'm happy to be playing along.
Here's my tag:
I used Paper Smooches' new Cool Dudes set to make the snowman. I die-cut a circle and then stamped the different features and hat. It was really fun to build the different snowmen--much better than getting cold in real snow. ;)
I die-cut some Webster's Pages papers using the Paper Smooches' Gift Tags die. I can't get enough of this die--it's a must-have! Here's a few of the finished tags:
I added the sentiment from the Warm Hearts set on a couple of the tags. Here's a close-up:
As part of the 25 Days of Christmas Tags, there are lots of prizes! Be sure to check out Tracey's blog for details. To enter, comment on Tracey's blog, and for an extra chance to win, comment on my blog below. The comment-to-win ends at 11:59pm ET on 11/27.
Wednesday, November 19, 2014
Sharing a Sneak
Hi everyone!
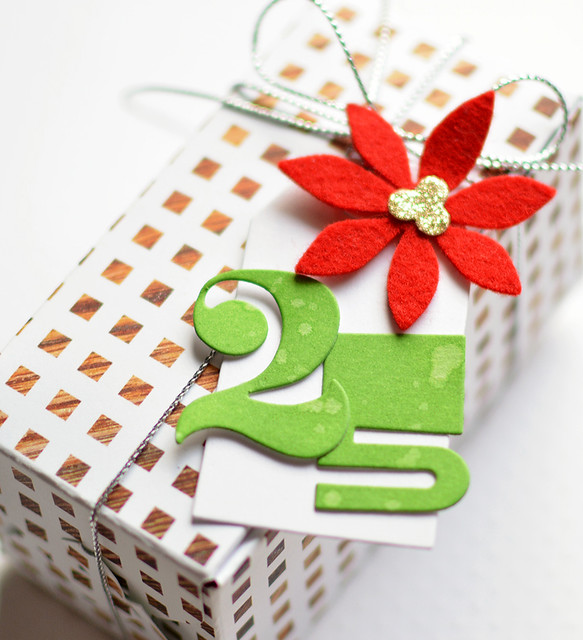
I'm up on the Simon Says Stamp blog today (eek!!). I'm sharing some gift wrapping and tags using Paper Smooches. All of the products I used are available at SSS.
Here's a peek:
If you get a chance, please check out the SSS post and leave some love. Thank you!!! And thanks to Stephanie for asking me! :)
I'm up on the Simon Says Stamp blog today (eek!!). I'm sharing some gift wrapping and tags using Paper Smooches. All of the products I used are available at SSS.
Here's a peek:
If you get a chance, please check out the SSS post and leave some love. Thank you!!! And thanks to Stephanie for asking me! :)
Friday, October 24, 2014
Very Merry
Hi everyone!
It's the final day of Release Week at Neat & Tangled! All of the sets and dies are on sale today at the Neat & Tangled store. Today, we're sharing projects using the Very Merry stamp set and Tiny Triangles die. I also have a second card featuring the Winter Trees set. Danielle is sharing pictures of the release on the Neat & Tangled blog.
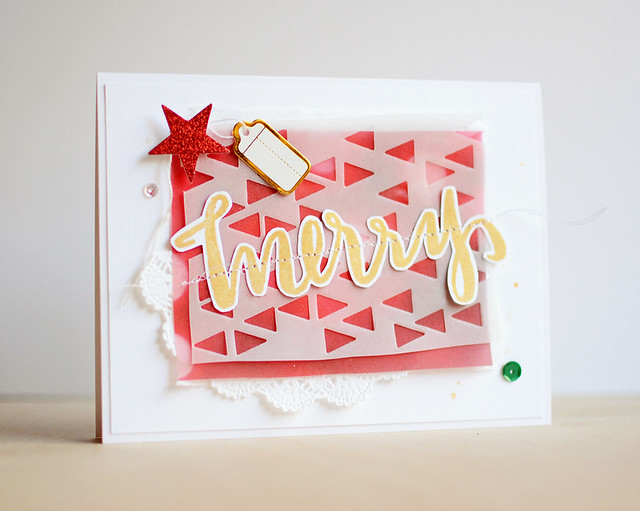
Here's how I used the Very Merry stamp and Tiny Triangles die:
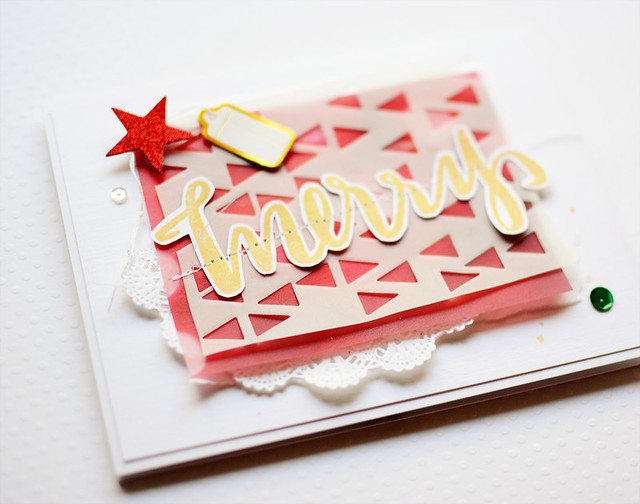
I stamped and fussy cut the large "merry" from the Very Merry stamp set. I layered the sentiment over the die-cut Tiny Triangles and a piece of red bokeh vellum from Webster's Pages, a doily, and tissue.
I added an Emerald Green sequin, a Pink Paislee star, and a little tag from Inspire Lovely. Here's a close-up:
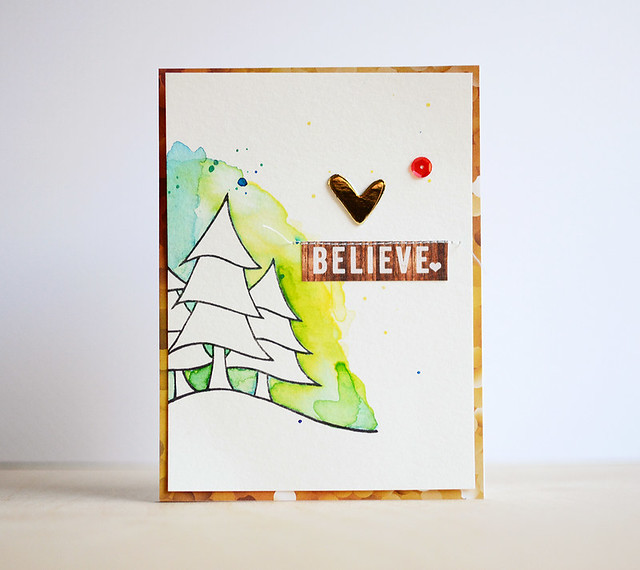
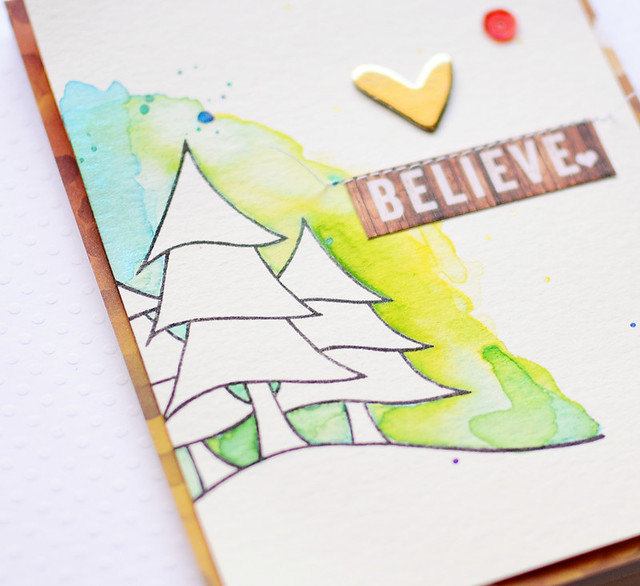
I was inspired by the watercoloring on Debby's card. I stamped the Winter Trees image and used spray mists for watercoloring. The trees have so much movement!
I finished the card with a Raspberry Red sequin and a gold puffy heart. Here's a close-up:
There's a giveaway! Comment on the Neat & Tangled blog to win the Very Merry stamp set.
Thanks for stopping by! Have a great day!
It's the final day of Release Week at Neat & Tangled! All of the sets and dies are on sale today at the Neat & Tangled store. Today, we're sharing projects using the Very Merry stamp set and Tiny Triangles die. I also have a second card featuring the Winter Trees set. Danielle is sharing pictures of the release on the Neat & Tangled blog.
Here's how I used the Very Merry stamp and Tiny Triangles die:
I stamped and fussy cut the large "merry" from the Very Merry stamp set. I layered the sentiment over the die-cut Tiny Triangles and a piece of red bokeh vellum from Webster's Pages, a doily, and tissue.
I added an Emerald Green sequin, a Pink Paislee star, and a little tag from Inspire Lovely. Here's a close-up:
Here's my second card:
I was inspired by the watercoloring on Debby's card. I stamped the Winter Trees image and used spray mists for watercoloring. The trees have so much movement!
I finished the card with a Raspberry Red sequin and a gold puffy heart. Here's a close-up:
Thanks for stopping by! Have a great day!
Tuesday, October 21, 2014
Happy Holidays!
Hi everyone!
It's day two of Release Week at Neat & Tangled! Today, we're sharing projects using the Little Santa Girl stamp set. She's so cute! Danielle is sharing pictures of the stamps on the Neat & Tangled blog, so be sure to check it out.
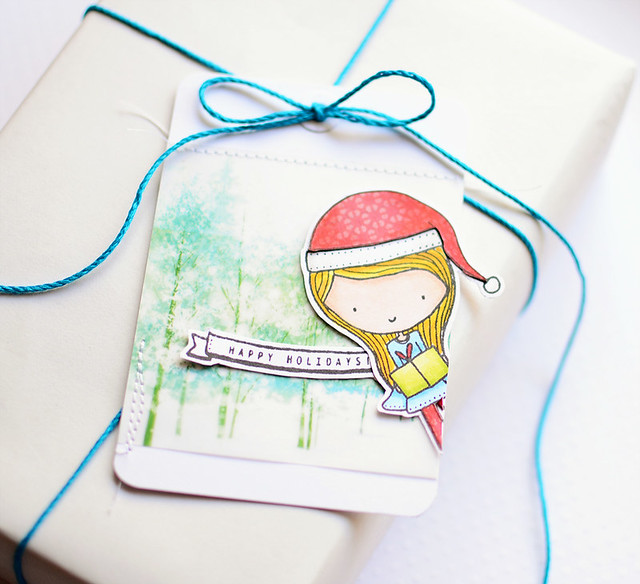
I used the mini set for a tag:
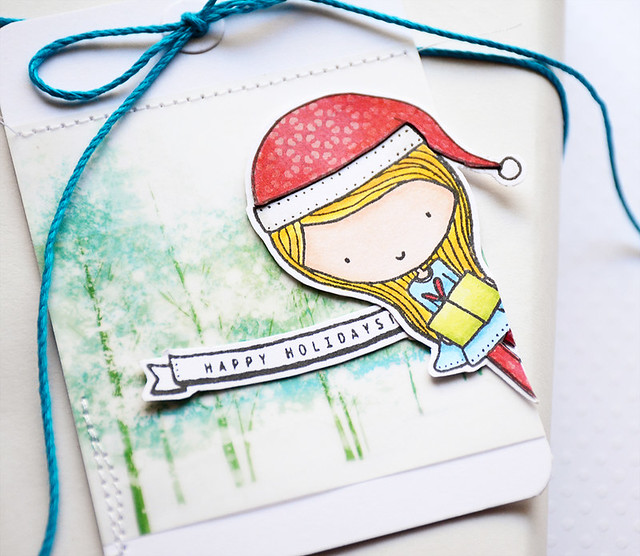
Do you ever have those projects where you start creating but have no plan in mind? Yep, this tag was one of those projects. I started by coloring the Little Santa Girl with Copics, but I felt like she needed an oomph. So, I paper-pieced her hat and tights and used colored pencils to add shading to the patterned paper.
At first, she was going to be standing, and then I was going to have two girls coming from the edges. After playing around, I decided to have one girl peeking into the scene. I had to cut off her legs, which was kind of weird. But, it looked weirder to have the legs hanging off. ;)
I added some Webster's Pages All That Glitters vellum and stitching. Here's a close-up:
There's a giveaway! Comment on the Neat & Tangled blog to win the Little Santa Girl set.
Thanks for stopping by! Have a great day!
Supplies
Stamps: (girl, sentiment banner from Little Santa Girl) Neat & Tangled
Cardstock: (white) Papertrey Ink
Patterned paper: (Loved vellum from All That Glitters) Webster's Pages
Ink: (Tuxedo Black Memento) Tsukineko
Copics
Embellishments: (blue twine) Hemptique
It's day two of Release Week at Neat & Tangled! Today, we're sharing projects using the Little Santa Girl stamp set. She's so cute! Danielle is sharing pictures of the stamps on the Neat & Tangled blog, so be sure to check it out.
I used the mini set for a tag:
Do you ever have those projects where you start creating but have no plan in mind? Yep, this tag was one of those projects. I started by coloring the Little Santa Girl with Copics, but I felt like she needed an oomph. So, I paper-pieced her hat and tights and used colored pencils to add shading to the patterned paper.
At first, she was going to be standing, and then I was going to have two girls coming from the edges. After playing around, I decided to have one girl peeking into the scene. I had to cut off her legs, which was kind of weird. But, it looked weirder to have the legs hanging off. ;)
I added some Webster's Pages All That Glitters vellum and stitching. Here's a close-up:
Thanks for stopping by! Have a great day!
Supplies
Stamps: (girl, sentiment banner from Little Santa Girl) Neat & Tangled
Cardstock: (white) Papertrey Ink
Patterned paper: (Loved vellum from All That Glitters) Webster's Pages
Ink: (Tuxedo Black Memento) Tsukineko
Copics
Embellishments: (blue twine) Hemptique
Tuesday, September 16, 2014
Feeling Fall
Hi everyone!
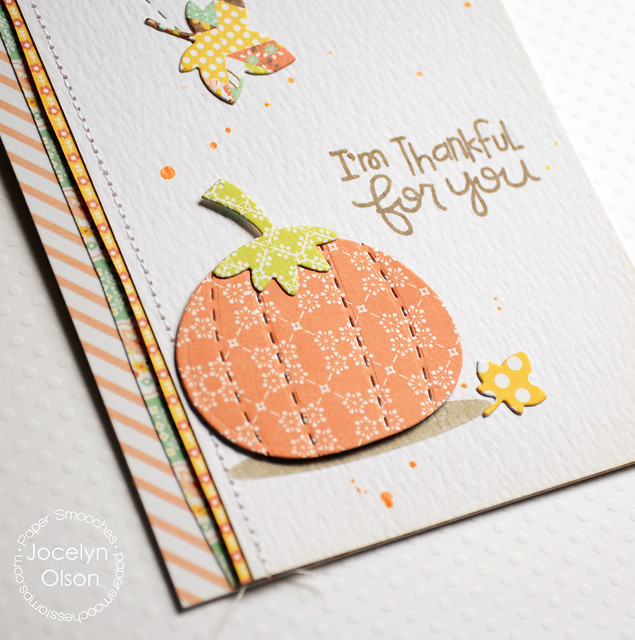
I'm sharing a couple of Paper Smooches projects from the last release. I don't know if it's still hot where you are, but it's definitely early fall here--changing leaves, 40s in the morning, short days...you know the drill. So I thought it was time to share some of the fall Paper Smooches projects.
First up:
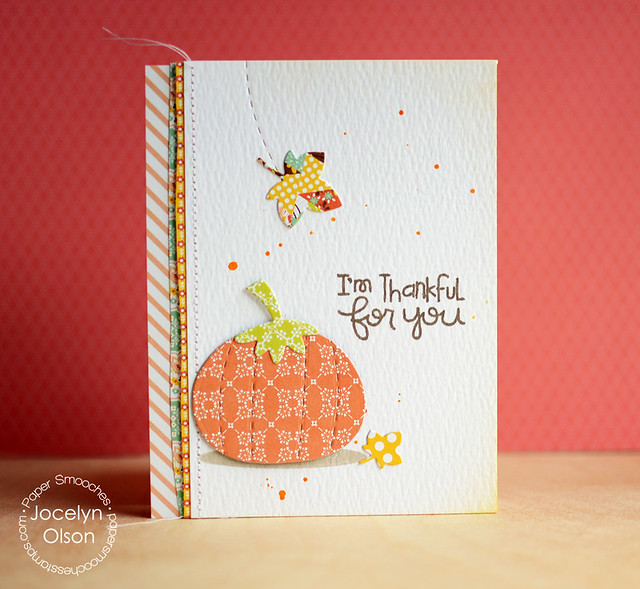
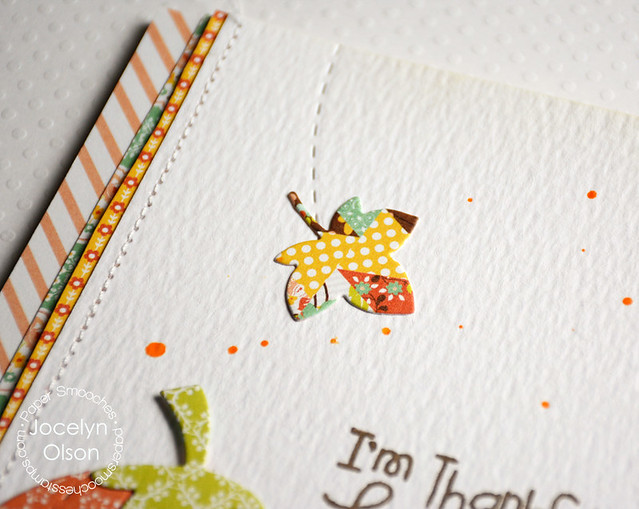
I used the Halloween Icons dies for the pumpkin and little polka dot leaf. The pumpkin doesn't have the stitches, but I added them using the Stitched die. Underneath the pumpkin, I stamped the shadow from the Shadows set.
The sentiment is from Turkey Jive. For the larger leaf, I used Leaves 1 die and added the Stitched die. I can't get enough of that die. :) The papers are from Webster's Pages.
Next up, I did some positive and negative die-cutting:
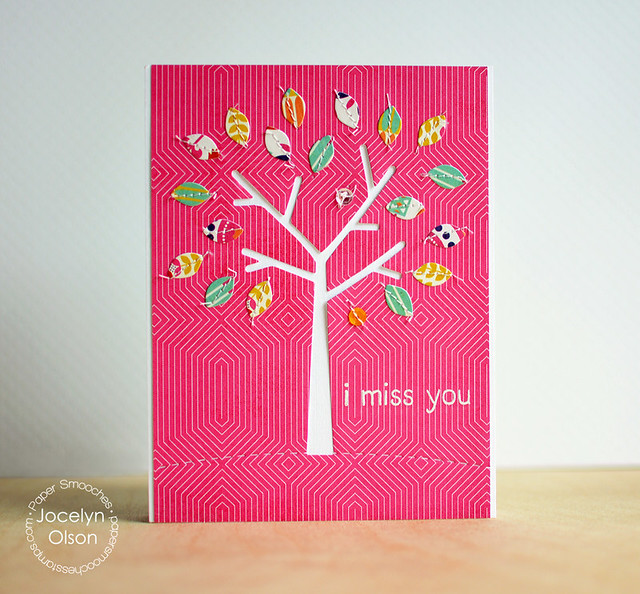
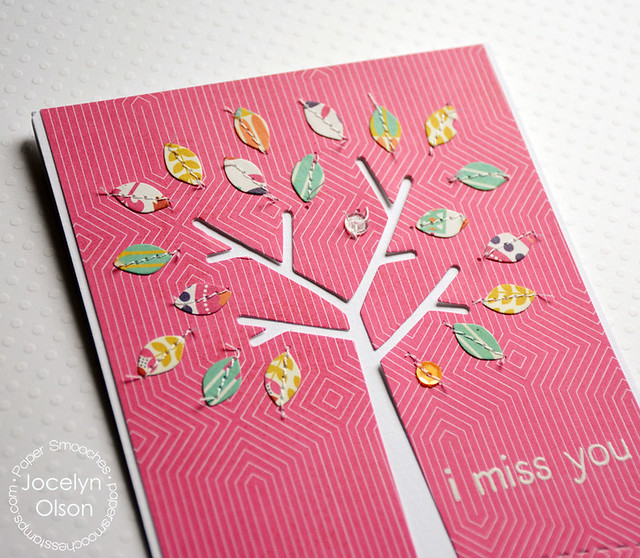
I die-cut the Seasonal Tree from the BasicGrey Grand Bazaar paper and layered it over the white base. I added the Stitched die for a ground and embossed a sentiment from the I Blank You set.
The Seasonal Tree leaves were die-cut from other Grand Bazaar papers and stitched on.
Thanks for stopping by! Have a great day!
Supplies
Thankful for You:
Cardstock: (Distress Watercolor) Ranger
Patterned paper: (Family Traditions) Webster's Pages
Stamps: (shadow from Shadows; sentiment from Turkey Jive) Paper Smooches
Dies: (pumpkin, small leaf from Halloween Icons; larger leaf from Leaves 1; Stitched die) Paper Smooches
Ink: (Wet Cement) Hero Arts; (Chocolate Chip) Stampin' Up; (Antique Linen Distress Ink) Ranger
I Miss You:
Cardstock: (white) PTI
Patterned paper: (Grand Bazaar) BasicGrey
Stamps: (sentiment from I Blank You) Paper Smooches
Dies: (tree, leaves from Seasonal Trees; ground from Stitched dies) Paper Smooches
Ink: Versamark
Embossing powder: (White) Wow!
Sequins: Pretty Pink Posh
I'm sharing a couple of Paper Smooches projects from the last release. I don't know if it's still hot where you are, but it's definitely early fall here--changing leaves, 40s in the morning, short days...you know the drill. So I thought it was time to share some of the fall Paper Smooches projects.
First up:
I used the Halloween Icons dies for the pumpkin and little polka dot leaf. The pumpkin doesn't have the stitches, but I added them using the Stitched die. Underneath the pumpkin, I stamped the shadow from the Shadows set.
The sentiment is from Turkey Jive. For the larger leaf, I used Leaves 1 die and added the Stitched die. I can't get enough of that die. :) The papers are from Webster's Pages.
Next up, I did some positive and negative die-cutting:
I die-cut the Seasonal Tree from the BasicGrey Grand Bazaar paper and layered it over the white base. I added the Stitched die for a ground and embossed a sentiment from the I Blank You set.
The Seasonal Tree leaves were die-cut from other Grand Bazaar papers and stitched on.
Thanks for stopping by! Have a great day!
Supplies
Thankful for You:
Cardstock: (Distress Watercolor) Ranger
Patterned paper: (Family Traditions) Webster's Pages
Stamps: (shadow from Shadows; sentiment from Turkey Jive) Paper Smooches
Dies: (pumpkin, small leaf from Halloween Icons; larger leaf from Leaves 1; Stitched die) Paper Smooches
Ink: (Wet Cement) Hero Arts; (Chocolate Chip) Stampin' Up; (Antique Linen Distress Ink) Ranger
I Miss You:
Cardstock: (white) PTI
Patterned paper: (Grand Bazaar) BasicGrey
Stamps: (sentiment from I Blank You) Paper Smooches
Dies: (tree, leaves from Seasonal Trees; ground from Stitched dies) Paper Smooches
Ink: Versamark
Embossing powder: (White) Wow!
Sequins: Pretty Pink Posh
Sunday, August 3, 2014
Smooth Sailing
Hi everyone! I hope you're having a great weekend. :) I finally got my computer back (my computer was down for six days). Yeah!
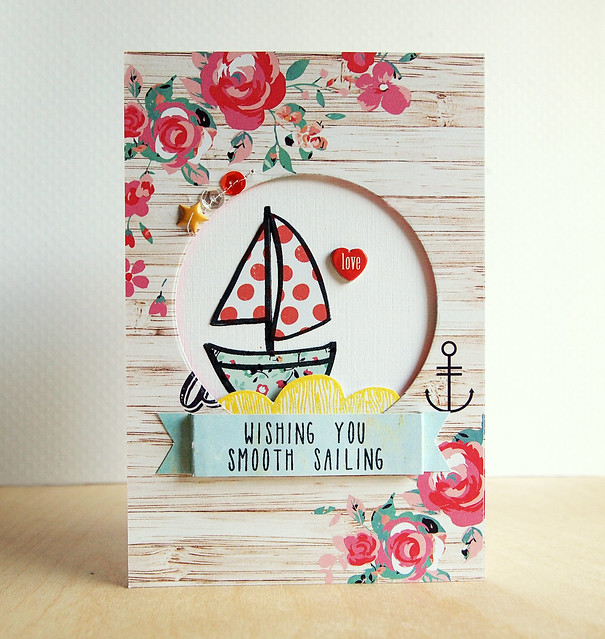
I wanted to share a card that was on the Neat & Tangled blog earlier this week:
I was going to hide the bottom of the boat under the banner, but when I was playing around with the Clouds set, I realized the woodgrain looked a little like ocean swells. I have no idea why I stamped the ocean in yellow--ha ha. Creative license I suppose. ;)
I added Crystal Clear and Pumpkin Satin sequins at the top and stitched through them. I added a Twine + Ink puffy star....love those little puffy stickers.
Thanks for stopping by! I hope you have a great day!
Supplies
Cardstock: (linen white) Ellen Hutson; (white) PTI
Stamps: (boat, sentiment from Sailmates; waves from Clouds) Neat & Tangled
Ink: (Black hybrid) My Favorite Things; (Yellow Brilliance) Tsukineko
Patterned paper: (Ocean Melody) Webster's Pages
Die: (circle) My Favorite Thigns
Embellishments: (sequins) Neat & Tangled; (puffy star) Twine + Ink; (chipboard love) Webster's Pages
I wanted to share a card that was on the Neat & Tangled blog earlier this week:
Pardon the greenish photo--like I said, I was without my regular computer and editing software.
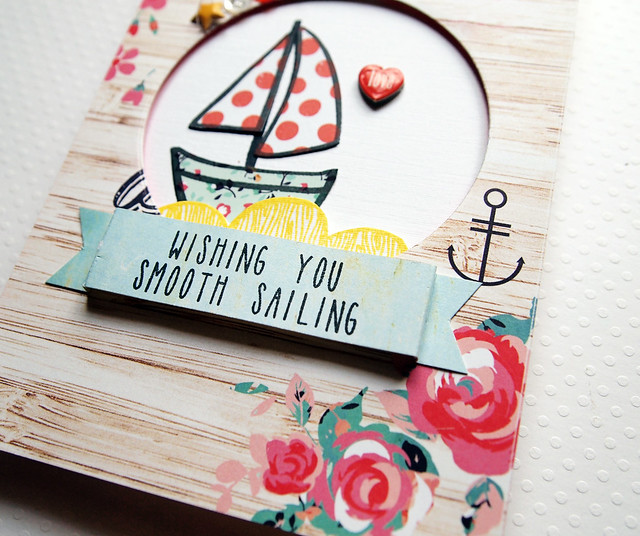
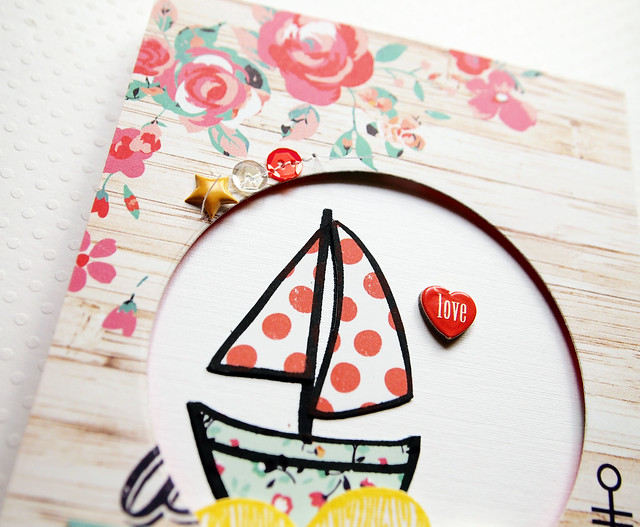
I die-cut a hole in a Webster's Pages Ocean Melody journaling card--isn't it pretty? Then, I stamped and paper pieced the boat from the Neat & Tangled Sailmates set. Love those polka dots!
I was going to hide the bottom of the boat under the banner, but when I was playing around with the Clouds set, I realized the woodgrain looked a little like ocean swells. I have no idea why I stamped the ocean in yellow--ha ha. Creative license I suppose. ;)
I added Crystal Clear and Pumpkin Satin sequins at the top and stitched through them. I added a Twine + Ink puffy star....love those little puffy stickers.
Thanks for stopping by! I hope you have a great day!
Supplies
Cardstock: (linen white) Ellen Hutson; (white) PTI
Stamps: (boat, sentiment from Sailmates; waves from Clouds) Neat & Tangled
Ink: (Black hybrid) My Favorite Things; (Yellow Brilliance) Tsukineko
Patterned paper: (Ocean Melody) Webster's Pages
Die: (circle) My Favorite Thigns
Embellishments: (sequins) Neat & Tangled; (puffy star) Twine + Ink; (chipboard love) Webster's Pages
Tuesday, July 15, 2014
Smooth Sailing
Hi everyone! I hope you're having a great week! I had my first piece of Lilikoi cheese pie today. Yum. :)
It's release week at Neat & Tangled. Yeah! Today, we're sharing projects with the very sweet Sailmates set. Want to see?
I knew I had to use the boat (love!):
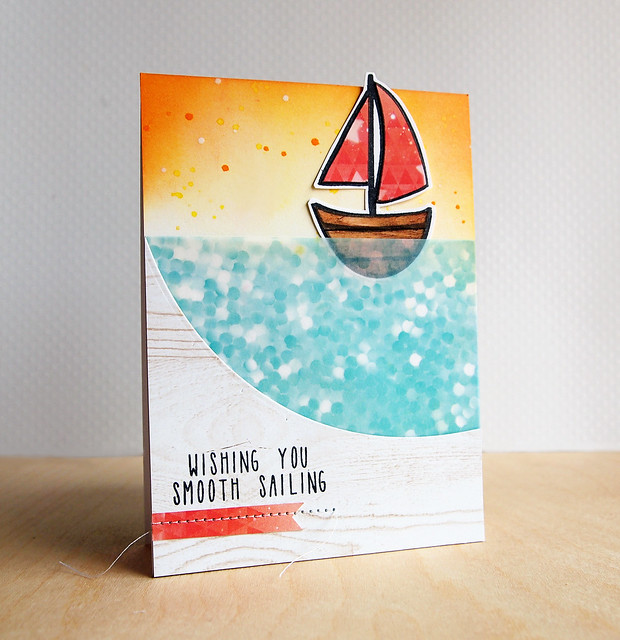
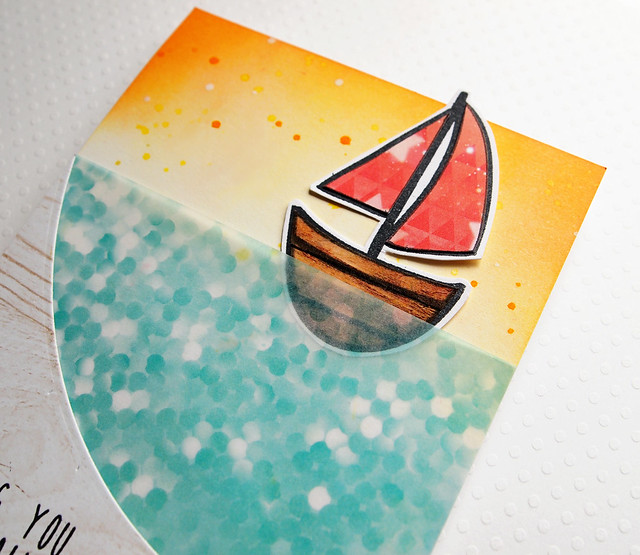
I paper pieced the Sailmates boat using Ocean Melody paper, and I partially covered it with vellum from the same collection. Originally, I was going to leave the vellum, but it didn't feel like enough (ever feel that way?). I die-cut the swoop, which reminded me a little of a porthole, and stamped the sweet sentiment from the Sailmates set.
Here's a close-up:
Want to win the set? Be sure to pop over to the Neat & Tangled blog and comment to win.
Thanks for stopping by!
Supplies
Stamps: (sentiment, sailboat) Neat & Tangled
Cardstock: (white) PTI
Patterned paper: (vellum, woodgrain, triangles from Ocean Melody) Webster's Pages
Ink: (Distress Inks) Ranger; (Black) My Favorite Things; (Double Yellow, Custard, Opaque White Mister Huey's) Studio Calico
Dies: (swoop from Custom Panels) Avery Elle
It's release week at Neat & Tangled. Yeah! Today, we're sharing projects with the very sweet Sailmates set. Want to see?
I knew I had to use the boat (love!):
I paper pieced the Sailmates boat using Ocean Melody paper, and I partially covered it with vellum from the same collection. Originally, I was going to leave the vellum, but it didn't feel like enough (ever feel that way?). I die-cut the swoop, which reminded me a little of a porthole, and stamped the sweet sentiment from the Sailmates set.
Here's a close-up:
Want to win the set? Be sure to pop over to the Neat & Tangled blog and comment to win.
Thanks for stopping by!
Supplies
Stamps: (sentiment, sailboat) Neat & Tangled
Cardstock: (white) PTI
Patterned paper: (vellum, woodgrain, triangles from Ocean Melody) Webster's Pages
Ink: (Distress Inks) Ranger; (Black) My Favorite Things; (Double Yellow, Custard, Opaque White Mister Huey's) Studio Calico
Dies: (swoop from Custom Panels) Avery Elle
Friday, June 13, 2014
Confetti Pockets
Hi everyone! I hope you had a great week! I finally got the draft of a big grant done, and I'm playing catch-up. Phew!
Kim shared my project using the Pocket Dies on the Paper Smooches blog today. I wanted to share how I made the pockets, so let's get down to it. :)
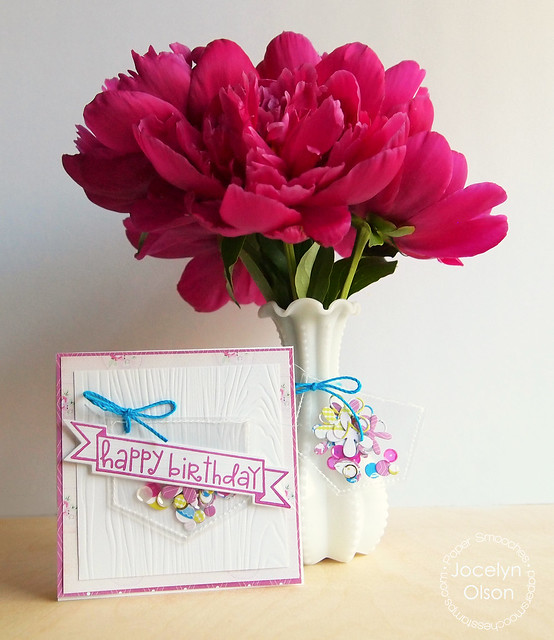
Here is the final project:
Paper Smooches Pocket Dies, Neat and Tangled Pixie Dust sequins, Project Life page protectors, Webster's Pages Sweet Routine papers, and Hemptique cord.
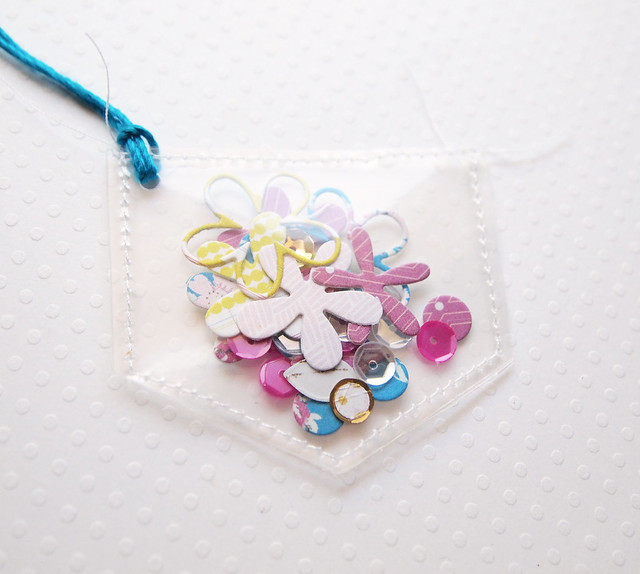
Next, I started on the pockets:
I had to set my sewing machine tension very low and stitch slowly. I removed the washi tape along the way.
Next, I die-cut and stamped:
I picked a few paper colors and ran all of the dies through at once to save time. I didn't use the largest flower in the Pocket Dies. I also die-cut and stamped two sentiments with the new Blissful Banners stamps and matching Streamers dies. That set is super cool!
The final steps for the pocket:
I filled each pocket with die-cuts and a mix of sequins and then stitched it closed. As a tip, don't clump the flowers together for stitching. I did that and had to take out the stitching on one to loosen the flowers. They aren't really shakers, though.
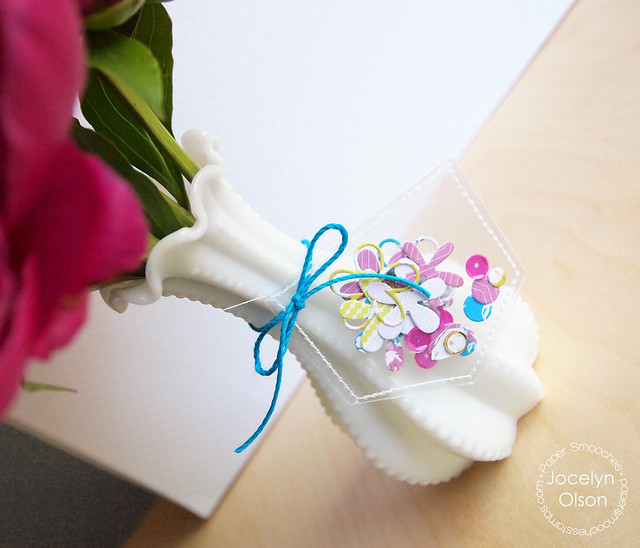
I punched a hole at the top for the cord and tied the cord bow. Isn't it fun?
Here is one on a vase:
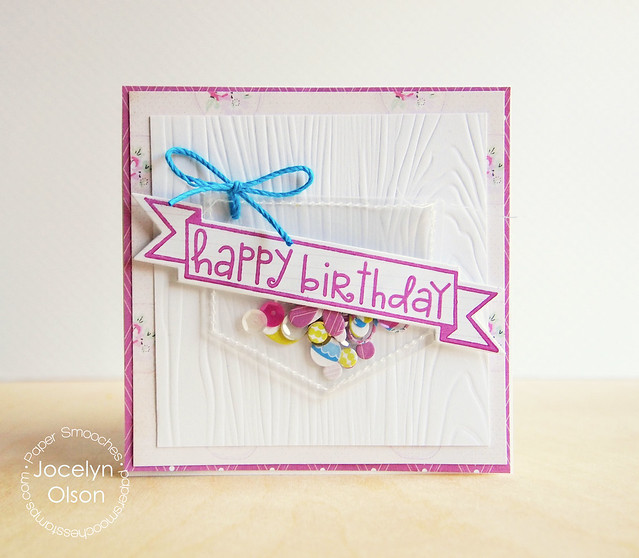
I made a quick matching card:
I attached the Streamers die-cut with foam tape onto one of the pockets, and layered some of the matching papers from the same Sweet Routine collection.
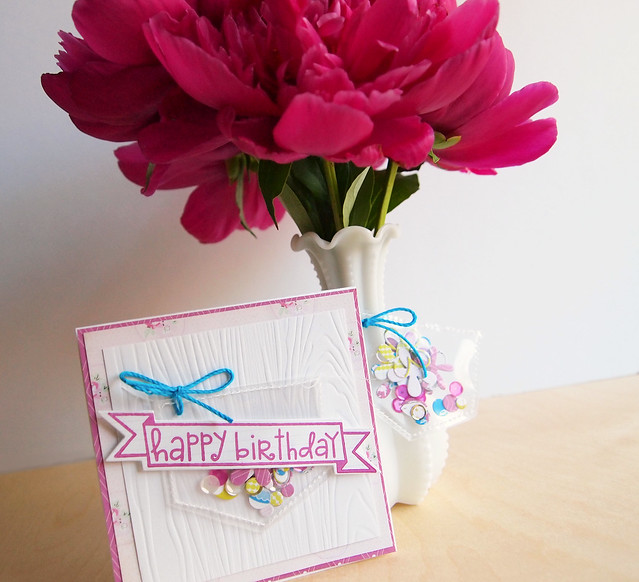
Here is a final shot:
Thanks for making it through this *long* post!
Have a great weekend!
Supplies
Cardstock: (white) PTI
Patterned paper: (Sweet Routine) Webster's Pages
Stamps: (Blissful Banners) Paper Smooches
Dies: (Pocket Dies, Streamers) Paper Smooches
Impression plate: (Woodgrain) PTI
Sequins: (Pixie Dust) Neat & Tangled
Cord: Hemptique
Kim shared my project using the Pocket Dies on the Paper Smooches blog today. I wanted to share how I made the pockets, so let's get down to it. :)
Here is the final project:
*sigh* Aren't the peonies pretty? They're from my mother-in-law's garden, and in reality, they look about the color of the violet papers.
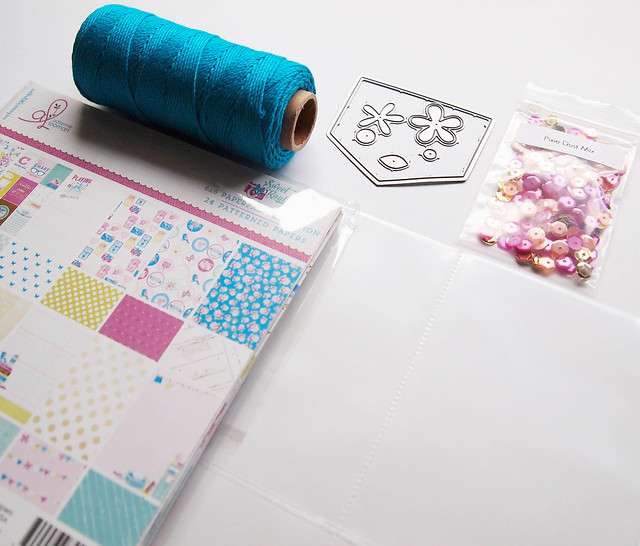
To make the project, I first gathered my supplies:
Paper Smooches Pocket Dies, Neat and Tangled Pixie Dust sequins, Project Life page protectors, Webster's Pages Sweet Routine papers, and Hemptique cord.
Next, I started on the pockets:
I die-cut each side one at a time....I wasn't getting great results cutting both sides of the pocket at one time, even with a shim.
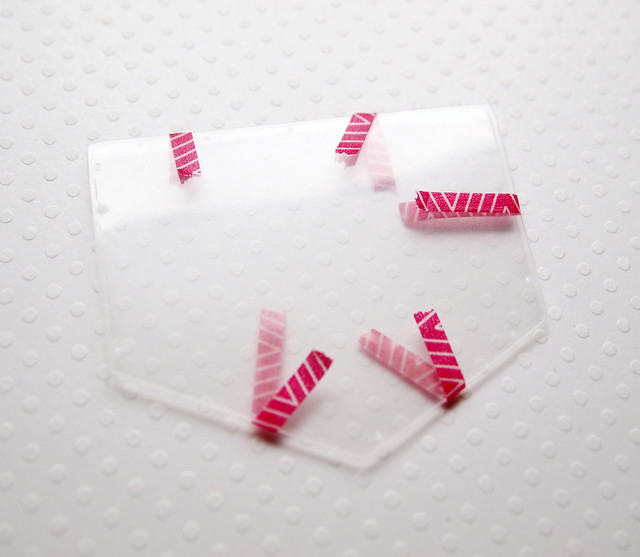
I then taped up three of the sides with washi tape. This step is important for stitching! Don't ask me how I know that. ;)
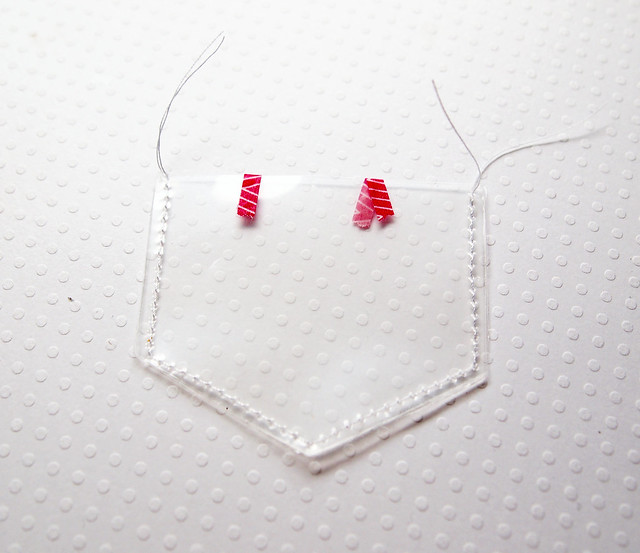
I had to set my sewing machine tension very low and stitch slowly. I removed the washi tape along the way.
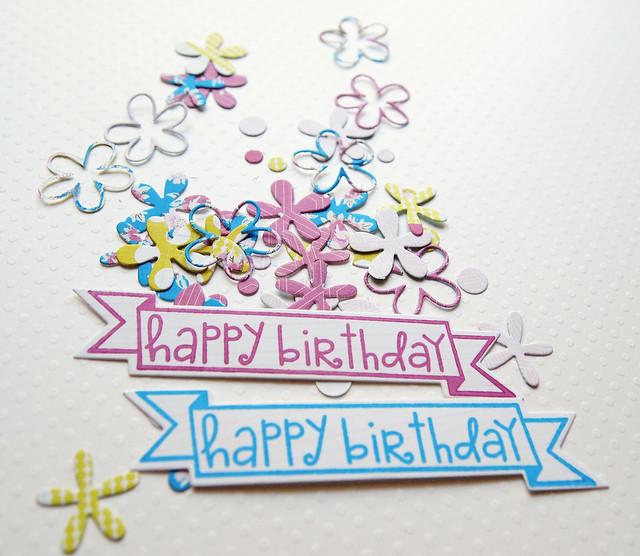
Next, I die-cut and stamped:
I picked a few paper colors and ran all of the dies through at once to save time. I didn't use the largest flower in the Pocket Dies. I also die-cut and stamped two sentiments with the new Blissful Banners stamps and matching Streamers dies. That set is super cool!
The final steps for the pocket:
I filled each pocket with die-cuts and a mix of sequins and then stitched it closed. As a tip, don't clump the flowers together for stitching. I did that and had to take out the stitching on one to loosen the flowers. They aren't really shakers, though.
I punched a hole at the top for the cord and tied the cord bow. Isn't it fun?
Here is one on a vase:
I made a quick matching card:
I attached the Streamers die-cut with foam tape onto one of the pockets, and layered some of the matching papers from the same Sweet Routine collection.
Here is a final shot:
Thanks for making it through this *long* post!
Have a great weekend!
Supplies
Cardstock: (white) PTI
Patterned paper: (Sweet Routine) Webster's Pages
Stamps: (Blissful Banners) Paper Smooches
Dies: (Pocket Dies, Streamers) Paper Smooches
Impression plate: (Woodgrain) PTI
Sequins: (Pixie Dust) Neat & Tangled
Cord: Hemptique
Wednesday, April 30, 2014
Make a Wish
Hi everyone! I hope you're having a dandy week. :)
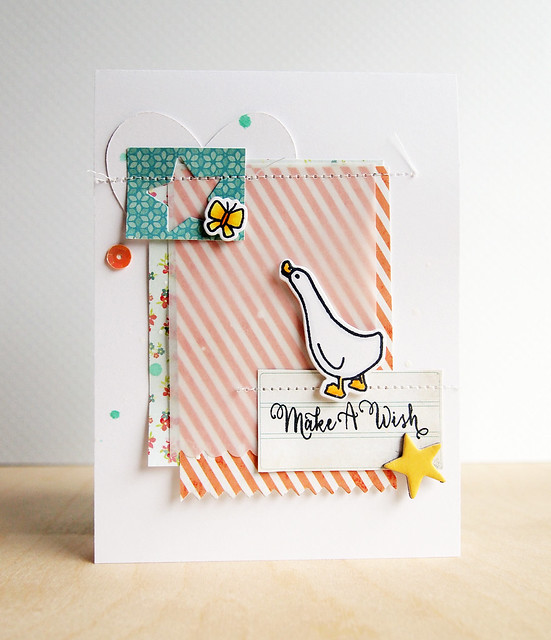
Today, I have another GDT card for i {heart} papers. I've been dying to use my new Storybook stamps, which are available at IHP. The stamps were designed by my friend Heather Campbell, and I think she knocked it out of the park! They are such sweet designs. :)
Here's my card:
I'm linking the card up to the Simon Says Stamp Anything Goes Challenge!
Thanks for stopping by! Have a great day!
Supplies
Cardstock: (white, vellum) PTI
Patterned paper: (floral from Fresh Cut) BasicGrey, (stripe and label from Izzy collection) My Mind's Eye; (turquoise from Oh Darling) Crate Paper
Stamps: (duck, sentiment, butterfly from Storybook) Avery Elle
Dies: (duck, butterfly from Storybook dies) Avery Elle; (scallop from Borders 2; star from Stars) Paper Smooches; (pinking from Pinking Squares Dies) WPlus9; (heart) Silhouette America
Ink: (Tuxedo Black) Tsukineko; (Opaque White, Dewey Mister Huey's) Studio Calico
Embellishments: (sequin) Webster's Pages; (chipboard star from Daily Flash) October Afternoon
Today, I have another GDT card for i {heart} papers. I've been dying to use my new Storybook stamps, which are available at IHP. The stamps were designed by my friend Heather Campbell, and I think she knocked it out of the park! They are such sweet designs. :)
Here's my card:
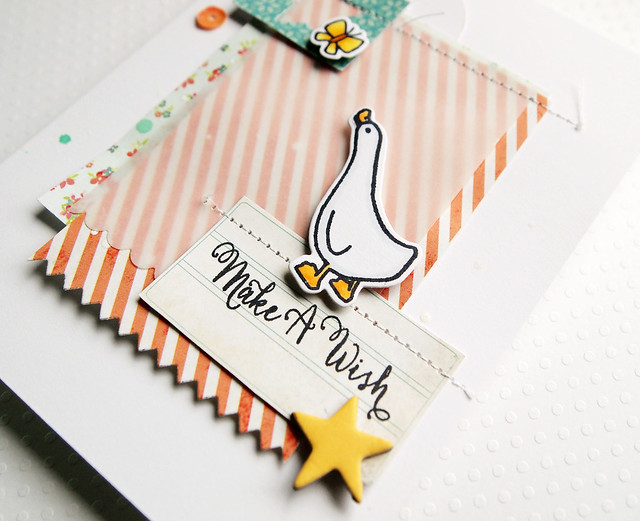
I stamped, colored, and die-cut the duck and butterfly using the Storybook stamps and dies (thanks Heather!). It took me pretty much forever to come up with the design...I must have nudged those papers 100 times. ;)
I used the WPlus9 Pinking Squares Die on the bottom of the My Mind's Eye striped paper. The pretty floral is from BasicGrey's Fresh Cut collection. On the vellum, I used the Paper Smooches Borders 2 die for a scallop. Here's a close-up:
The sentiment is from the Storybook set. I stamped it on a label from the MME Izzy paper and fussy cut the label from a larger sheet.
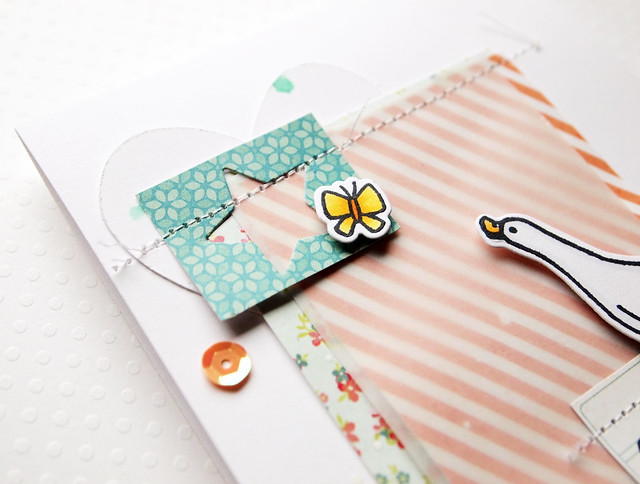
For the clustering at the top, I dripped too much mist on the heart. Oops! Usually I'm pretty haphazard with my misting and am okay with the randomness, but these splotches looked bad. :( To cover them up, I die-cut a Paper Smooches Stars heart and put the negative on the top. Yeah for saving the project! Wa hoo!
Here's a close-up:
For the clustering at the top, I dripped too much mist on the heart. Oops! Usually I'm pretty haphazard with my misting and am okay with the randomness, but these splotches looked bad. :( To cover them up, I die-cut a Paper Smooches Stars heart and put the negative on the top. Yeah for saving the project! Wa hoo!
Here's a close-up:
I'm linking the card up to the Simon Says Stamp Anything Goes Challenge!
Thanks for stopping by! Have a great day!
Supplies
Cardstock: (white, vellum) PTI
Patterned paper: (floral from Fresh Cut) BasicGrey, (stripe and label from Izzy collection) My Mind's Eye; (turquoise from Oh Darling) Crate Paper
Stamps: (duck, sentiment, butterfly from Storybook) Avery Elle
Dies: (duck, butterfly from Storybook dies) Avery Elle; (scallop from Borders 2; star from Stars) Paper Smooches; (pinking from Pinking Squares Dies) WPlus9; (heart) Silhouette America
Ink: (Tuxedo Black) Tsukineko; (Opaque White, Dewey Mister Huey's) Studio Calico
Embellishments: (sequin) Webster's Pages; (chipboard star from Daily Flash) October Afternoon
Wednesday, April 23, 2014
Guesting with Winnie + Walter
Hi everyone! I hope you're having a great week. I *finally* got a big work report submitted at the end of last week. I had been working on it for about six months, and the last few weeks have had some very late nights (you know it's bad when you fall asleep in the middle of typing a sentence--ha ha). It's going to be a busy week on the blog, and I hope you'll check it out. :)
Today and Friday I'm guesting with the awesome stamp company Winnie + Walter. Yeah! You can check out the Winnie + Walter blog HERE. I'm featuring stamps from their second release--four fab stamp sets and matching cut files.
Here's what I came up with:
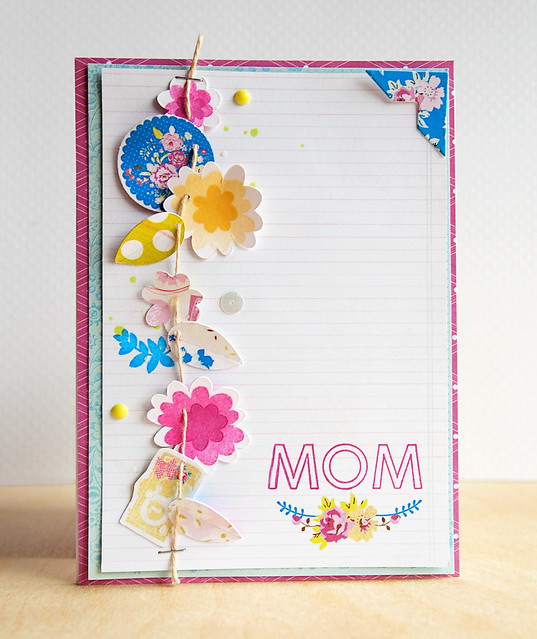
I really worked with the Webster's Pages papers to make this card. I stamped the "MOM" from the Leave It to Mom set. This set is great for Mother's Day, and they are not just for moms. :)
I used the Leave It to Mom Cut Files to cut out the leaves and flowers. I stamped the three sizes of flowers from the Leave It to Mom set on some of the blank cuts. I also stamped the leaves in blue.
Here's a close-up:
After I finished all of the pieces, I punched holes and threaded them loosely on the cord. Aren't those flower and leaf stamps pretty?
Thanks to Shay and Julie at W+W for having me. They are so cool and generous and sweet...love them and love their stamps!
Supplies
Stamps: (sentiment, flowers, leaves from Leave It to Mom) Winnie + Walter
Cardstock: (white) PTI
Patterned paper: (Sweet Routine) Webster's Pages
Ink: (Lilac Posies, Bahama Blue Luxe Inks) Tsukineko; (Chamomile) Fresh Ink; (Butter Bar) Hero Arts; (Razzberry) Colorbox; (Lime spray mist) Tattered Angels; (Opaque White Mister Huey's) Studio Calico
Die-cutting: (flowers and leaves from Leave It to Mom Cut Files) Winnie + Walter; (photo corner from Toppers Dies) Paper Smooches
Embellishments: (enamel dots) My Mind's Eye; (Natural cord) Hemptique
Today and Friday I'm guesting with the awesome stamp company Winnie + Walter. Yeah! You can check out the Winnie + Walter blog HERE. I'm featuring stamps from their second release--four fab stamp sets and matching cut files.
Here's what I came up with:
I really worked with the Webster's Pages papers to make this card. I stamped the "MOM" from the Leave It to Mom set. This set is great for Mother's Day, and they are not just for moms. :)
I used the Leave It to Mom Cut Files to cut out the leaves and flowers. I stamped the three sizes of flowers from the Leave It to Mom set on some of the blank cuts. I also stamped the leaves in blue.
Here's a close-up:
After I finished all of the pieces, I punched holes and threaded them loosely on the cord. Aren't those flower and leaf stamps pretty?
Thanks to Shay and Julie at W+W for having me. They are so cool and generous and sweet...love them and love their stamps!
Supplies
Stamps: (sentiment, flowers, leaves from Leave It to Mom) Winnie + Walter
Cardstock: (white) PTI
Patterned paper: (Sweet Routine) Webster's Pages
Ink: (Lilac Posies, Bahama Blue Luxe Inks) Tsukineko; (Chamomile) Fresh Ink; (Butter Bar) Hero Arts; (Razzberry) Colorbox; (Lime spray mist) Tattered Angels; (Opaque White Mister Huey's) Studio Calico
Die-cutting: (flowers and leaves from Leave It to Mom Cut Files) Winnie + Walter; (photo corner from Toppers Dies) Paper Smooches
Embellishments: (enamel dots) My Mind's Eye; (Natural cord) Hemptique
Subscribe to:
Posts (Atom)