Thursday, November 28, 2013

Glitz Finnley Blog Hop

Hi everyone! If you're in the U.S., happy Thanksgiving!! I hope you're enjoying a good meal and some time with family and friends.


To celebrate Thanksgiving, Glitz Design is having a blog hop! Both the traditional and digital teams are sharing projects with the Finnley collection.

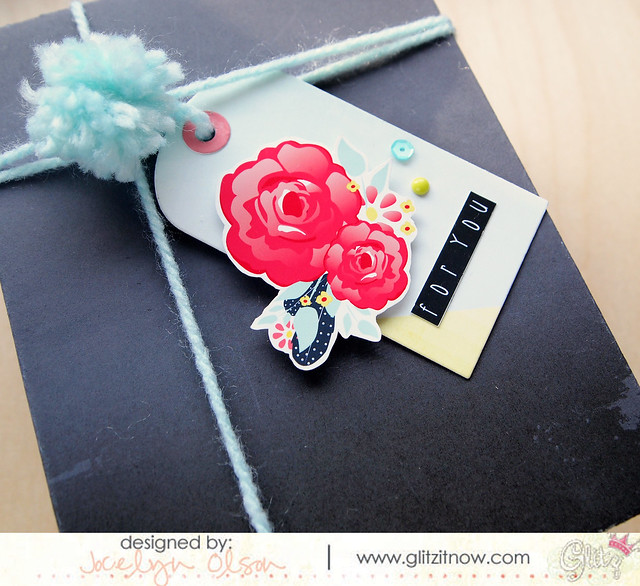
With the holidays right around the corner, I made a gift box and tag with a present inside. First up is the box and tag:

Winter Gift Box


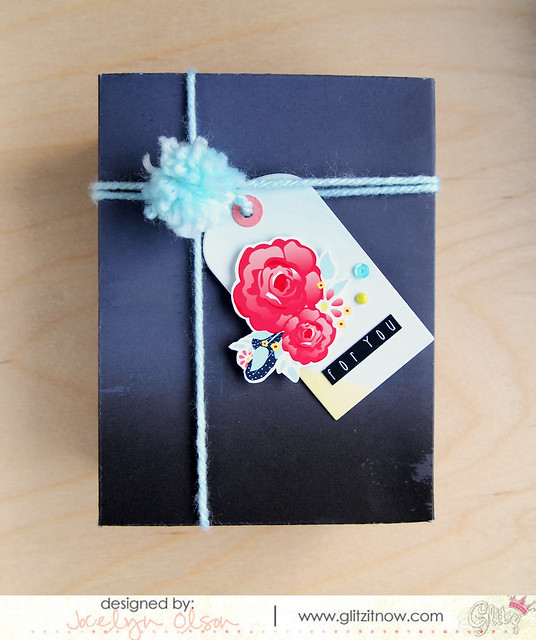
I started by printing the gradient charcoal grey paper from the Finnley Paper Pack. Using a scoring board, I folded the paper to create a box lid and bottom that is A2 card-size.

For the tag, I resized and printed one of the layering papers in the Finnley Element Pack #2. I die-cut the tag and tag topper, and I printed and fussy cut the floral grouping. I cropped the letters from the Element Pack #1 to create the sentiment.

Here's a close-up:

Winter Gift Box Close-Up


I made the pom pom using my new pom pom maker. My daughter and I had fun making several of them for decorating presents. :)

So what's inside? I made two notepads for my mother-in-law:


Glitz Finnley Notepads


The pretty flowers come from a journaling card in the Element Pack #1, and I paired them with my own sentiment. I layered four different papers as backgrounds. 

I trimmed and then gummed the top edge of the papers. Here's a close-up of the inside:
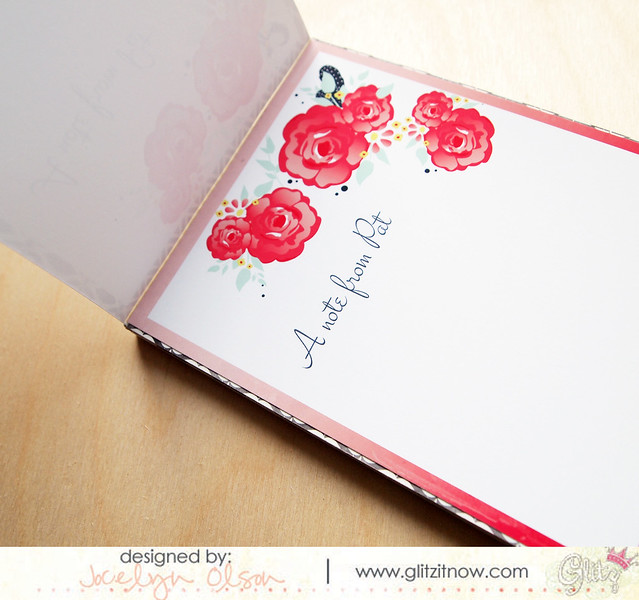

Glitz Finnley Notepads Close-Up


I'll be sharing a step-by-step photo tutorial next week (there are a lot of photos--I thought too many for a blog hop), so if you're interested, please check back later next week. 

As part of the hop, Glitz is giving away the Finnley collection--one paper and one digital to two lucky winners! The winner will be chosen randomly from the entire hop, so to increase your chances, you can comment on the other blogs. Be sure to only comment once, though. :)

Here's the line-up for the hop:

Jocelyn Olson <--You are here!


Thanks for stopping by! Next up on the hop is the fabulous Karine!


Supplies
Cardstock: (Steel Grey) My Favorite Things; (white) Avery Elle; (lightweight photo paper) OfficeMax
Digital elements: (all papers and elements from the Finnley digital colllection) Glitz Design
Font: (Sante Pro) MyFonts.com
Embellishments: (yarn) Hobby Lobby; (aqua sequin) Avery Elle; (enamel dot) My Mind's Eye
Dies: (Timeless Tags 2 Dies) WPlus9; (Toppers Dies) Paper Smooches


Sunday, November 24, 2013

Why Is There a Cow?

Hi everyone! Happy Monday.

It's my last post with Paper Smooches SPARKS. :( It's been such a great team! I want to thank Kim for giving me a chance...she is such a sweet person. Savannah has been a fantastic DT Coordinator, and I'll miss my awesome teammates, too. The new SPARKS team will be fab, and I'm looking forward to seeing their projects.

This week, it's the Picture Perfect challenge. Want to see the inspiration picture?


I was instantly drawn to the yellows and the balloons. My card had a few lives, but here's what I ended up making:


I stamped, colored, and fussy cut the cow from Green Acres. For the balloons, I masked, stamped, and colored a balloon from the Hullabaloo set. That set has probably been my most-used Paper Smooches set...I love it! I originally was going to put the balloons wrapped around his tail, but then they looked like some strange gas. Ha ha

For the background, I misted on white paper with a variety of mists, and added a sentiment from Group Hugs. I hand-cut the top of the denim paper to add a little dip...I'm digging that hand-cut look lately. Here's a close-up:


My husband saw the card when it was almost done, and at that point I showed him the inspiration photo. He asked, "Why is there a cow on there?" LOL! I figured it was "big" like the sentiment...I think I over-thought it. ha ha

If you'd like to play along with this week's SPARKS challenge, you can link up your projects HERE.

You can see more inspiration from my fab teammies:


Thanks for stopping by! Have a great week!!


Supplies
Cardstock: (white letterpress), (white) PTI
Patterned paper: (denim from About a Boy) Echo Park
Clear stamps: (sentiment from Group Hugs; cow from Green Acres; balloon from Hullabaloo) Paper Smooches
Copics
Mists: (Taxi, Opaque White, Custard mists) Studio Calico; (Lemon Zest) Tattered Angels; (Tangerine) Lindy's Stamp Gang


Thursday, November 21, 2013

It's a Jumbo Thank You

Hi everyone! Ready for the weekend? Getting ready for Thanksgiving? We had snow today, which made it feel a little more like the holidays. :)

It's time for a new CAS-ual Fridays challenge:


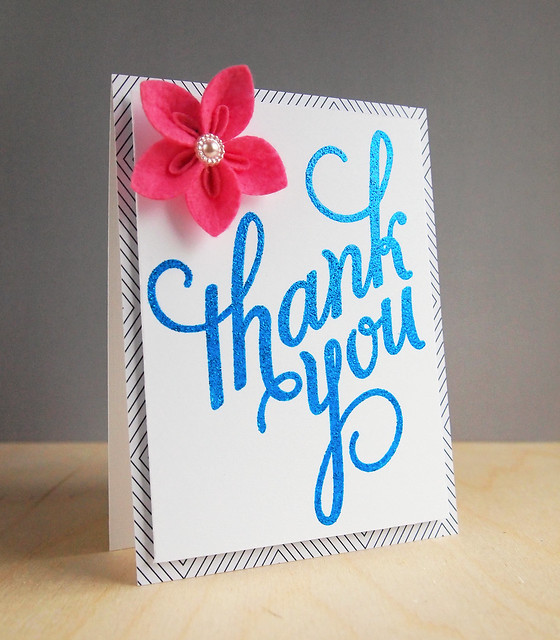
The challenge is to create a project with eight of one item (e.g., sequins, colors, papers, etc.). I went with eight letters on my card:


CFC-121-J.-Olson-B01

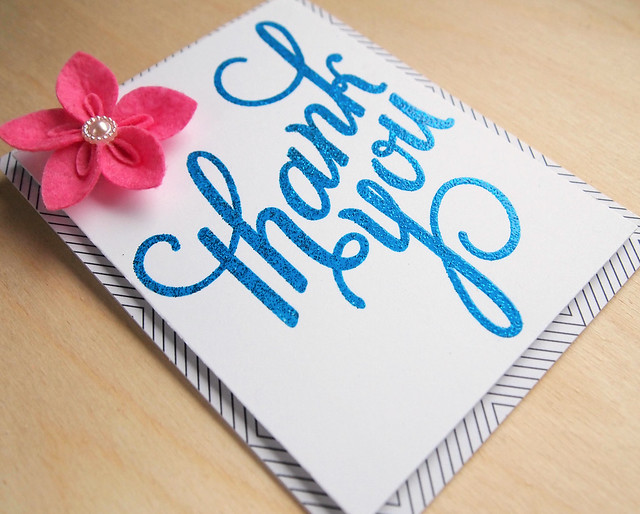
I used a sentiment from Another Thank You and heat embossed it with some glittery blue embossing powder. I love how the color shifts with the embossing (and by the way, I love this embossing powder--I've had it for 5 years and it still embosses without stray flecks). I simply layered the image over some patterned paper.

I still had the felt flowers on my desk that I used from my last post. ;) Ha ha. Do you do that, too?

Here's a close-up:


CFC-121-J.-Olson Thank You CU


ETA: I'm linking up my card in the Runway Inspired Challenge. I think the background, pink flower, and pattern work with the gorgeous image:


If you would like to link up to this week's CAS-ual Fridays challenge, the winner will receive a gift certificate to Simon Says Stamp:


You can link up your projects HERE. I hope you'll play along. Eight is great! (yuck, yuck, I couldn't resist.)

Thanks so much for stopping by!


Supplies
Cardstock: (white) PTI
Patterned paper: (black and white from Simple Surfaces) Cosmo Cricket
Clear stamps: (Another Thank You) Stampin' Up
Ink: (Versamark)
Embossing Powder: (Firecracker Blue) Sparkle and Sprinkle
Flower: (felt flower) Prima

Wednesday, November 20, 2013

The Best Part of Me Is You

Hi everyone! I hope you're having a great week! I've had a cold since this weekend--ugh. Fortunately, no one else in the family is sick.

I'm up on the Glitz  blog today for the One Buck Wednesday at Jessica Sprague. We're showcasing the Finnley digital kit, and which is on sale for today only.

I went with a freestyle/collage approach with this hybrid card:


I had my daughter in mind when I made the card, and I wanted to keep it light and girly.

There was quite a bit of digi work on this card. First, I took the arrow washi tape in the Finnley Element 1 kit, lowered the opacity, and then duplicated the layer. A lot. I ended up with a background paper. Here's what it looked like after printing:


I did a few more steps in Photoshop. I used the digital brushes in the Elements 1 pack to stamp a feather in pink. I also clipped one of the red gradient papers in the Finnley Paper Pack to the deer journaling card to make the sentiment pink/red.

When I printed and fussy cut the elements, I gathered them together:


After I took this photo, I spritzed the doily with pink spray mist. I layered the elements and stitched through the top. Here's a look at the top portion:


And here's a close-up of the bottom clustering with the awesome Finnley Giant Rhinestone:


I'm entering the card in the Simon Says Stamp Challenge using Heather's sketch:


If you've been wanting the Glitz Finnley digital collection or want to try digi, the One Buck Wednesday is a great chance to get this kit. You can check out other samples on the Glitz Design blog.

Thanks for stopping by! Have a great day!


Supplies
Cardstock: (Aqua Mist) PTI; (silver glitterstock) Best Creations
Digital elements: (all elements from Finnley Full Collection) Glitz Design
Ink: (pink mist) Mr. Huey's 
Embellishments: (Finnley Giant Rhinestone) Glitz Design; (felt flower) Prima; (doily) Amuse Studio; (white sequin) Kelly Purkey at Simon Says Stamp
Die: (Holiday Shapes die) Simon Says Stamp
Tiny Attacher

Friday, November 15, 2013

Graphic Christmas

Hi everyone! Are you sick of Christmas cards yet? I hope not because the CAS-ual Friday team is teaming up with the Curtain Call team for a joint challenge.

Both teams are making projects based on the Curtain Call inspiration picture. We're also using CAS-ual Fridays Stamps (although you can use any products to enter the challenge).

I was inspired by the greenery:


I die-cut a wreath from A Little Hut on my Cameo. For the bow, I stamped and heat embossed one of the stars from Christmas Carols, fussy cut it, and added it to the center. I finished the card by stamping the sentiment from the same set.

Here's a close-up:


If you want to join in this week's CAS-ual Fridays/Curtain Call challenges, the winner will receive a prize from CAS-ual Fridays Stamps:


You can link up your projects HERE.

Thanks for stopping by! Have a great weekend!


Supplies
Cardstock: (White Linen) Ellen Hutson; (green, red) Bazzill
Clear stamps: (sentiment, star from Christmas Carols) CAS-ual Fridays Stamps
Ink: Versamark; (Onyx Black) Versafine
Embossing powder: (Gold Ultra Fine) Ranger
Die: (wreath, bow from Wreath Gift Set) A Little Hut

Thursday, November 14, 2013

Cashmere Dame Note Card Set

If you're looking for my Newton's Nook Design's post, please click HERE.

Hi everyone! I'm on the Glitz blog today. :)


This week, the digital team is sharing projects using the Whatnots. The Whatnots are die-cuts that are printed on heavier, glossier paper. In digital form, some of the shaped embellishments are Whatnots.

I haven't done a project with Cashmere Dame yet, and I've been wanting to use this fabulous collection. As part of my Christmas presents, I made a note card set:


I started by embossing all of the card bases and adding mist.

The Cashmere Dame Whatnots I used were the four different girl elements as well as the yellow and black frame. For each card, I removed the center of the digital frame or transparency, and then I clipped the girl Whatnot to it (Control-G if you want to try it). I printed the framed image, a mix of papers, and the longer ephemera to layer underneath.

Here's a picture of each one:


On this card and the card below, I also added stickers from the traditional Puffy Stickers (the yellow zigzag and the "girl").

Here's the next one:


For the next two, I used the yellow and black Whatnot frame:


And last up:


When my husband saw them, he said "Whoa, that's a lot of pattern." Yep, lots of patterns--that's what makes them fun. :)

If you missed the Cashmere Dame collection when it was released in paper but still want to use it for cards, you can get the collection HERE. Be sure to check out the Glitz blog to see the other Whatnots projects.

Have a great day. Thanks for stopping by!


Supplies
Cardstock: (White Linen) Ellen Hutson
Ink: (Overdue, Inky Black, Taxi Mr. Huey's mists) Studio Calico
Digital elements: (all elements from Cashmere Dame digital collection) Glitz Design
Stickers: (Cashmere Dame Puffy Stickers) Glitz Design
Dies/embossing: (Striped Impression Plate, Tab die) Papertrey Ink

Snow-one Like You

Hi everyone! It's the second (and last) day of the Newton's Nook Design's November release!


Today, we're sharing projects using the Frozen Friends set, and you can see the stamps on the Newton's Nook blog.

Here's my card:


I used a bunch of the stamps from the Frozen Friends set on the card--both snowmen, the arm twig, the coffee mug, the heart, the sentiment, and the snowflakes. I did a little masking with the coffee mug on the right to have the snowman holding it. For the snowman in teal, I drew snow lines below him to look like the other one.

Here's a close-up:


Aren't they cute snowmen? This set will be given away to two lucky winners!

 Here's how to win:
1. Comment on Newton's Nook Design blog.
2. Comment on the Design Team member and guest blogs (see the list below).

You have until Thursday (tonight) at 9 pm CST to comment, and the winners will be announced on the NND blog on Friday.

Be sure to check out the rest of the Design Team and the guests!

Jocelyn Olson <--You are here!

Have a great day! Thanks so much for stopping by!


Supplies:
Cardstock: (white) PTI
Patterned paper: (red zigag from It's Christmas) Webster's Pages; (teal zigzag from Bundled Up) Crate Paper
Clear stamps: (all stamps from Frozen Friends) Newton's Nook Designs
Ink: (Sky Blue) Fresh Ink; (Tuxedo Black) Tsukineko; (Opaque White Mr. Huey's mist) Studio Calico
Washi: Freckled Fawn
Copics


Wednesday, November 13, 2013

Warm Wishes

Hi everyone! It's day one of Newton's Nook Design's November release, and we're sharing projects using the Snow Day set.


I've been building my stack of Christmas cards. Even though Newton's Nook already had their holiday release, I'm using their November release for some of my holiday cards. This month might be my favorite release yet! You can check out the full release on their blog.

I'm fickle with my cards. I couldn't decide which images to use, so I made two shaker cards. Here's the first one:


I used the super cute penguin in the Snow Day set for this shaker card and colored him with Copics. I added a few of the snowflakes and a sentiment from the set, too.

Here's a close-up where you can see the penguin, sequins, and glitter inside the shaker.


Okay, truth be told, I kind of messed up on this shaker. I used craft foam to create my ring between the stamped panel and the acetate. Unfortunately, the foam wasn't quite thick enough for some of the sequins. Doh! I must have tapped this card 50 times trying to get some of the larger sequins to drop to the bottom of the card. Lesson learned--check the thickness first!!

I used a second image from the set for a second shaker card:


Yeah, acetate is hard to photograph. For this card, I used the bear snowman--he's so cute! I used the same snowflakes and sentiment from the Snow Day set.

Here's a close-up:


Would you like to win Snow Day? This set will be given away to two lucky winners!

 Here's how to win:
1. Comment on Newton's Nook Design blog.
2. Comment on the Design Team member and guest blogs (see the list below).

You have until Thursday (11/14) at 9 pm CST to comment, and the winners will be announced on the NND blog on Friday.

Be sure to check out the rest of the Design Team and the guests!

Jocelyn Olson <--You are here!

Have a great day! Thanks so much for stopping by!


Supplies:
Cardstock: (white) PTI
Patterned paper: (trees, green, blue circles from It's Christmas) Webster's Pages; (red candy stripe from Silent Night) October Afternoon
Clear stamps: (all stamps from Snow Day) Newton's Nook Designs
Sequins: Avery Elle, Simon Says Stamp, Hobby Lobby
Dies: (Circle STAX) My Favorite Things

Sunday, November 10, 2013

Let's Taco 'Bout It

Hi everyone! I hope you had a great weekend! I got to see a Cirque de la Symphonie show today, which was awesome. The aerial stunts freak me out a little, but I suppose that's the point. :)


It's time for another Paper Smooches SPARKS Designer Drafts. Want to see the sketch?


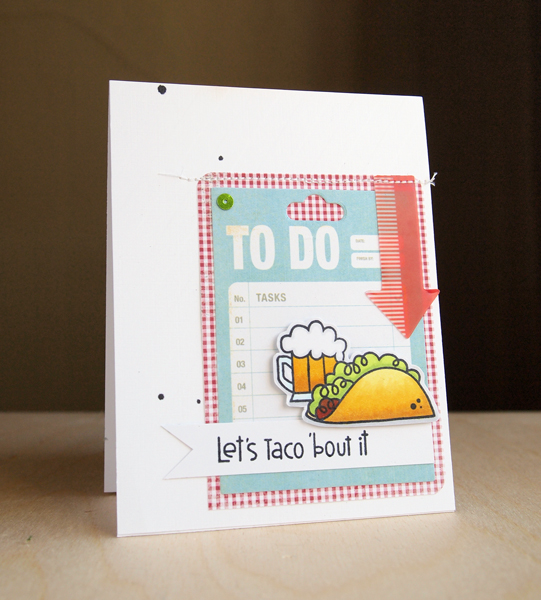
My new Paper Smooches stamps came last week, but since I was in D.C., I haven't had a chance to use them. I've been looking forward to using the Calorie Free set--it's a hoot!


I masked the taco from the Calorie Free set and stamped the beer mug from A Magical Spring. I colored them with Copics and layered them over Glitz paper and a journaling card from BasicGrey.

On the journaling card, I die-cut a hang tab using the Paper Smooches Toppers Dies. I *love* these dies! I will definitely be using them frequently. Here's a close-up:


You can link up your Paper Smooches projects using the sketch HERE. I hope you'll play along. For more inspiration, you can see my fab teammates' projects:


Thanks for stopping by! Have a great week!!


Supplies
Cardstock: (White Linen) Ellen Hutson; (white) PTI
Patterned paper: (red gingham from Cashmere Dame) Glitz Design
Clear stamp: (taco, sentiment from Calorie Free; beer mug from A Magical Spring) Paper Smooches
Ink: (Tuxedo Black) Tsukineko; (Inky Black Mr. Huey's mist) Studio Calico
Embellishments: (journaling card from Fact or Fiction) BasicGrey; (sequin) Kelly Purkey
Die: (hang tag topper from Toppers dies) Paper Smooches
Embossing: (Stripes Impression Plate) PTI
Copics

Saturday, November 9, 2013

A Moxie Fab Thanks

Hi everyone!


Are you here for the monster blog hop for Cath Edvalson? There are almost 300 of us participating as a way to say "thank you" for all she has done for the papercrafting community. We're going to miss her! *sniff * *sniff*

If you want to start from the beginning, you can go to the Moxie Fab World blog. You should be coming from my dear friend JJ Bolton's blog.

Since there are about 270 blogs to go, let's get to it!


Cath lives in New Hampshire, and the folk art look of the houses and hills in the Odl-lay-hee paper remind me of her photos. I thought the sentiment was fitting for the occasion. :)

Here's a close-up:


Cath, you've touched so many people. Your encouragement, photos, and words have inspired many, and you've brought people together. Moxie Fab World is much more than a blog--it's a community, and it's because of you. I will miss you terribly at Paper Crafts! I know that you will inspire others in whatever you do next.

I hope you'll hop along and give Cath a big Moxie Fab thanks! Next up is the fabulous Daniela!

Thanks for stopping by!


Supplies
Cardstock: (Rustic White) PTI
Clear stamps: (sentiment) Swissgirl Designs--no longer available
Ink: (Strawberry) Fresh Ink
Digital element: (paper from Odl-lay-hee) Deena Rutter

Thursday, November 7, 2013

Thinking About the New Year

Hi everyone! I've been in Washington, D.C. for the past few days. I got to meet some crafty friends (JJ Miriam, and Tessa) in Virginia--very cool! I talk to these ladies online pretty much daily, but we had never met in person. Before I asked, my husband asked me if it was safe? I had a good laugh at that. It's funny how we get to know crafty people online so well. :)

Anyhoo, I'm up on the Newton's Nook Designs' blog today. We just finished Halloween, but apparently I'm in holiday mode:


I stamped the background using Newton's Nook Design's Holiday Wishes set in gold. I love the swirly sentiments in this set! For the sentiment, I pieced together four different stamps from the same set to make the sentiment. I frequently cut up my clear sentiments to make them easier to stamp custom sentiments.

For the die-cut snowflake, I used glitter cardstock. It's quite bright. ;) Here's a close-up:


Thanks for stopping by! Have a great weekend!


Supplies
Cardstock: (Aquamarine, White, Raspberry) Avery Elle; (pink glitterstock) DCWV
Clear stamps: (sentiment, "merry" from the Holiday Wishes set) Newton's Nook Designs
Ink: (Tuxedo Black, Delicata Golden Glitz) Tsukineko

Wednesday, November 6, 2013

Rock Chalk Baby Blog Hop

Hi everyone! In blog world, it's often hard to throw someone a baby shower, so instead, we're having a baby blog hop:

The Gallery Idol '12 ladies and I are having a blog hop for Erin Lee Schreiner, who's having a baby boy this month. Yeah! Big congrats, Erin!! If you want to hop along along, you can start at Aga's blog.

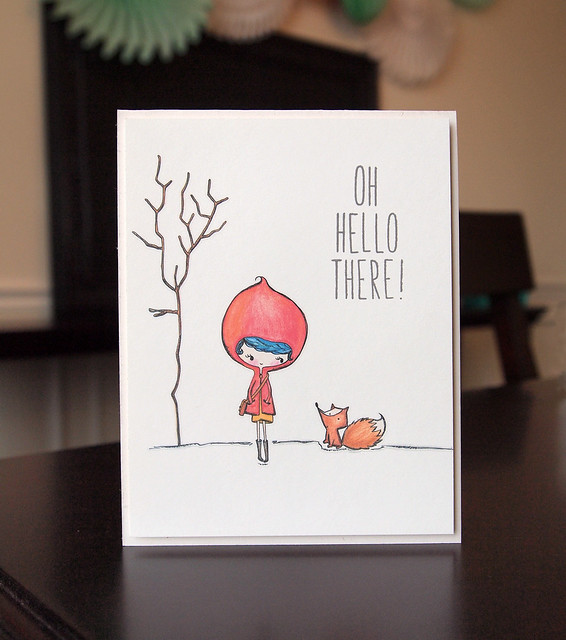
Erin likes forest critters, and I went with the woodland theme for this non-traditional baby card:

Oh Hello There


Isn't that little fox to die for? I love his little face. I made a custom sentiment using the Milo's ABCs from Lawn Fawn.

Want to hop along and wish Erin well? Here are the other peeps participating:


Jocelyn Olson <--You are here.

Thanks so much for stopping by! Next up is my dear friend Joscie!


Supplies
Cardstock: (white) Avery Elle; (Rustic White) PTI
Clear stamps: (sentiment from Milo's ABCs) Lawn Fawn
Ink: (Smokey Grey) Versafine


Merry Holiday Decor

Hi everyone! If you're looking for the Rock Chalk Baby Blog Hop, please click HERE. 

It's One Buck Wednesday at Jessica Sprague, and the Glitz Design's Hello December paper and elements are on sale. Woo hoo! It is a *gorgeous* holiday collection.

I went a little different this week and use the digital elements to make some holiday home decor. I got this idea from CREATE Decor Magazine (I'm sorry, I don't know who it was--I don't have my issue with me!).


It's hard to believe, but this decor started as a block of wood. Want to see how I did it? I have a little tutorial.


  1. First, find a piece of scrap wood (or buy a board). Mine is 5.25" tall, but you could make it as tall as you want. Next, cut angles from the sides (I had my husband do this part). There was a light finish on my piece of wood, so I sanded it lightly.
  2. Paint the block. It doesn't have to be perfect. :)
  3. Resize the Hello December digital papers to a smaller scale. Print them and trim them to fit to your block. I traced them from the back side and then trimmed them slightly smaller to show a border. You could skip this next step, but I covered the papers and block with Matte Mod Podge. It will help smooth the papers at the edges.
  4. Resize the Hello December wreath from the element pack. Crop the heart from the woodgrain paper in the Paper Pack. For the door, layer the polka dot paper under the frame element. Print these items and fussy cut them.

When you're done with the elements, you can add any details. I added coarse glitter to the wreath, spritzed the lace lightly with mist, and added the twine and jingle bell.

Here's a close-up:


If you like the Glitz papers and elements, be sure to take advantage of the sale today at Jessica Sprague.

Thanks so much for stopping by! Have a great day!


Supplies
Digital elements: (wreath from Element Pack 1; green frame, red polka dot, red herringbone, tree paper from Element Pack 2; floral paper, Merry heart from Paper Pack--all from Hello December collection) Glitz Design
Fibers: (Yellow twine) Divine Twine; (lace) May Arts
Mist: (Pearl, Gold Mr. Huey's) Studio Calico
Glitter: Martha Stewart
Other: Mod Podge, craft paint

Blog Design by Caked Designs