Showing posts with label Hero Arts. Show all posts

Tuesday, December 1, 2015

Advent Calendar Extravaganza with Taheerah Atchia

Hi everyone! If you're in the U.S., I hope you had a great Thanksgiving! Today, I'm participating in a special Advent blog hop. :)


Here's a little about the hop:
Advent Calendar Extravaganza is -the- festive event of the season! This 'hop with a twist' was dreamed up by Taheerah Atchia and features surprise destinations each day! Joining in the fun with Taheerah are over 60 special guests - each serving up some fantastic Christmas inspiration! Just like an Advent Calendar, you'll never know where you're going to be visiting next until you 'open the door'!

And that's not all! With 25 *amazing* sponsors taking part as well, your crafty wish list is bound to get a boost with a chance to win a prize EVERY SINGLE DAY!! Join in the fun every day at taheerah-atchia.com to see what special surprises wait behind the door!

Fun, right? Here's what I made:
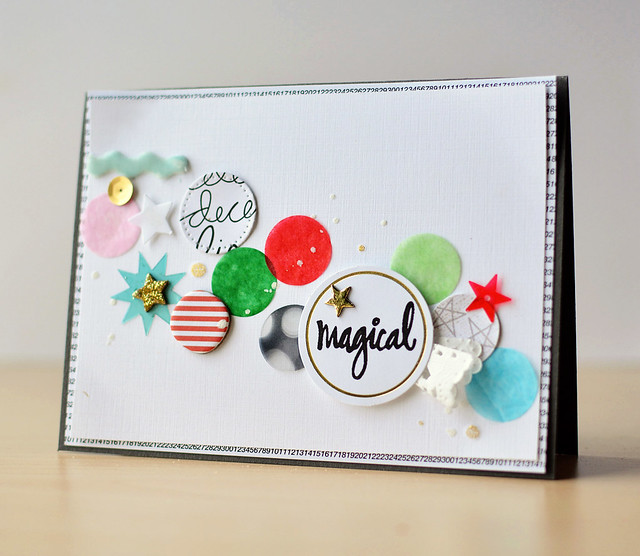
Magical


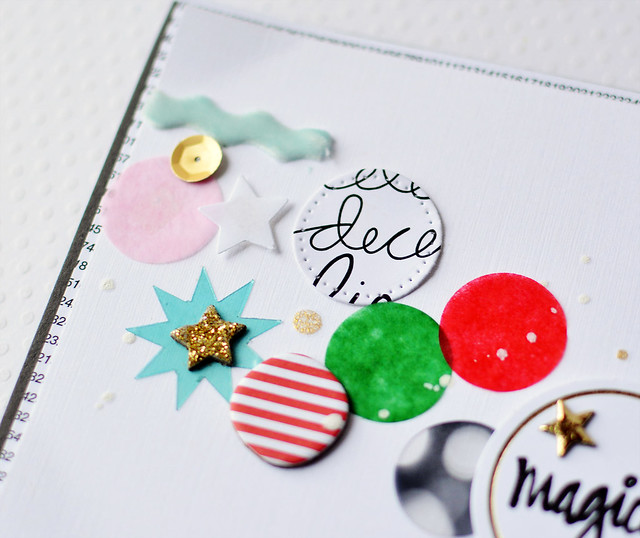
I had leftover supplies from the 2014 Ali Edwards December Daily kit, and I thought they would work for a card. When I saw the tissue paper, I decided to CASE one of my cards from a couple of years ago. 
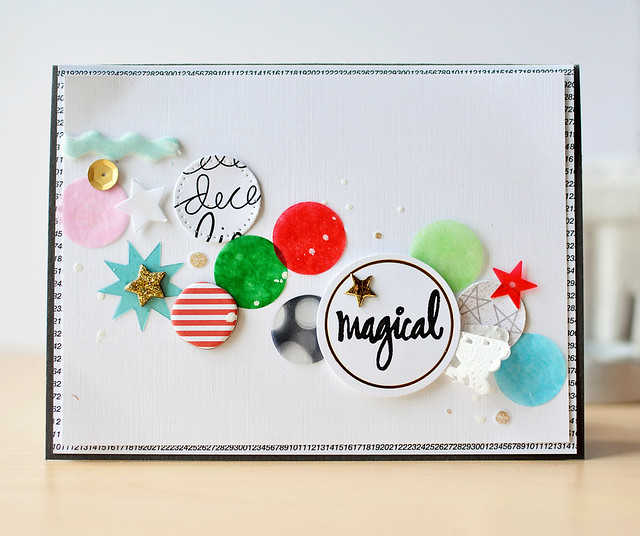

Magical


I started by stamping the "magical" sentiment from the Hero Arts Fa La La La La set on a gold foil tag. The sentiments in this set are beautiful!

After stamping the tag, I tucked a bit of a doily underneath to add texture. I added the tissue circles, part of an acetate die-cut, chipboard pieces, and die-cut papers from the kit using the My Favorite Things Pierced Circles.
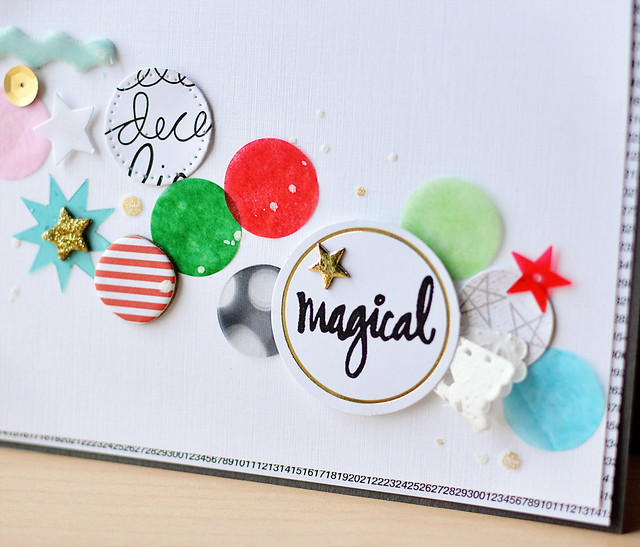

Magical

I finished the card with a few more embellishments. The velvet ric-rac ribbon was a last-minute addition...I love the fuzzy texture. :)


Magical

Here are the details about the giveaway:

It's not a party without a prize - and with prizes every day there are several chances to win! Today's prize is generously supplied by Hero Arts (hello, awesome!)! Simply leave a comment on this post to enter - then head back to taheerah-atchia.com and leave a comment there too to double your chances! Don't forget to grab the other surprise destinations from Taheerah's blog and head over to them to leave comments to improve your odds even more! You have until 7am EST on Thursday, December 31st to leave your comments (winner's will be announced on Taheerah's blog). 

Don't forget the Advent Calendar Extravaganza runs from the 1st-25th, so be sure to visit taheerah-atchia.com every day for fabulous inspiration and amazing prizes throughout the month! 

Thanks so much for stopping by! Have a great day! :)

Monday, August 25, 2014

Hero Arts & A2Z Scrapbooking Digital Blog Hop

Hi everyone! I'm super excited and honored to be participating in a special blog hop today:


A2Z Scrapbooking will be the new Hero Arts digital retailer, and to celebrate the collaboration, we're having a blog hop. If you're just joining the hop, you can start at the Hero Arts blog.

I made a couple of cards using a few digital techniques. Here's the first one:


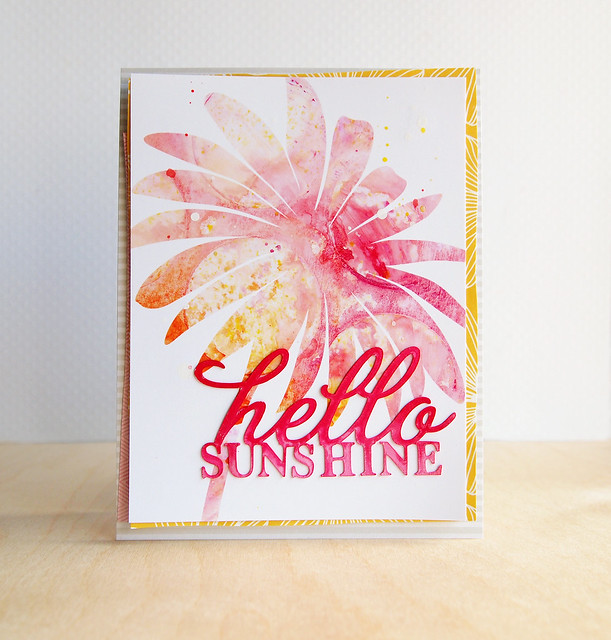
Hello Sunshine

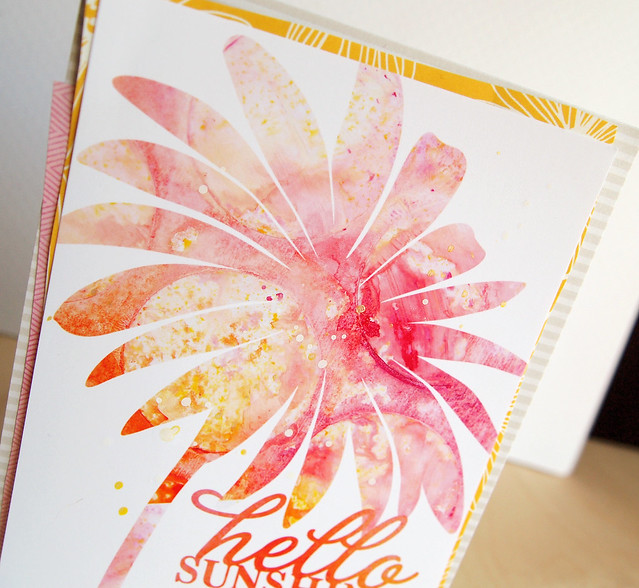
I used the Sunshine Flowers cutting files and digital stamps. Instead of cutting the jumbo flower, I clipped a Just Jaimee digital patterned paper to it in Photoshop. If you wanted a one-layer card for mailing, the clipping technique is the way to go. The sentiment was die-cut on my Cameo out of white cardstock. I used two spray mists to watercolor a gradient on the die-cut.  

I added some splatter over the flower to give the flower some shimmer. 

Hello Sunshine

And yes, the sentiment is different in this card. I made a set of four cards and die-cut two of the sentiments and using the digital clipping technique for the other two. I'm fickle. ;) 

My second card is a little more masculine:

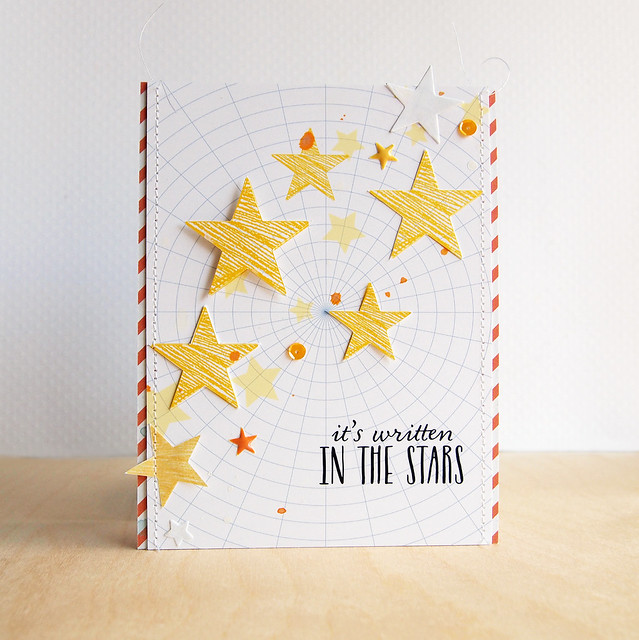
Written in the Stars

For this card, I used the Firmament set and a few different digital techniques. I started with a digital patterned paper and stamped the falling stars with the digital brush. Next, I stamped some of the sketchy stars, rotating the brushes and resizing them. 

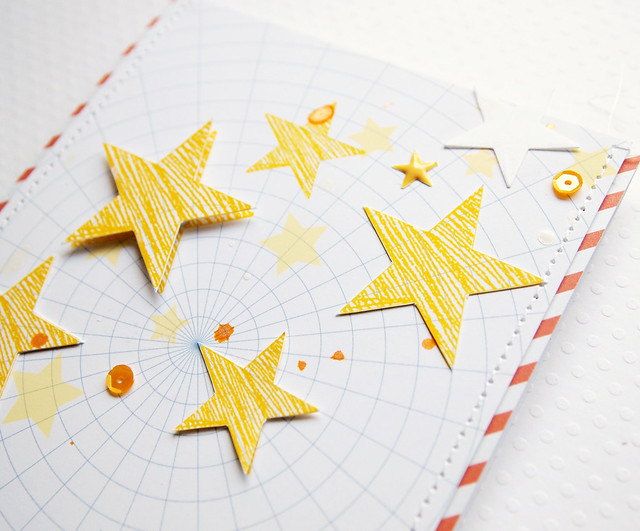
After adding the sentiment from the same set, I printed two copies. I trimmed the stars out of one of the copies and added them on top for some more depth:

Written in the Stars


I also printed one of the stars on vellum and added it to the bottom corner. I love the added translucency of printing on vellum.  

Written in the Stars

As part of the hop, there's also a giveaway! A2Z Scrapbooking is giving away a $50 gift certificate to one lucky commenter. The winner will be selected from all comments on the blogs, so the more comments you leave, the better your chances. The giveaway ends on Sunday, August 31st at 11:59 ET.

Here's a list of the participants:

Thanks for stopping by! Next up on the hop is the fabulous Zoey Scarpelli!


Supplies
Hello Sunshine
Stamps: (flower from Sunshine Flowers) Hero Arts digital
Cardstock: (white) PTI; (Premium Matte Photo Paper) OfficeMax
Patterned paper: (digital Ice Cream Painted Paper from Just Jaimee) The Lilypad; (yellow from Jen Hadfield) Pebbles; (stripe) PTI
Die-cut: (sentiment from Sunshine Flowers) Hero Arts digital
Inks: (Pink Ginger, hot pink) Maya Mists

Written in the Stars
Stamps: (sketchy stars, falling stars, sentiment from The Firmament) Hero Arts digital
Cardstock: (white, linen vellum) PTI; (Premium Matte Photo Paper) OfficeMax
Patterned paper: (digital Stargazer paper by Dawn by Design) Pixels & Co.; (orange stripe from Jubilee) My Mind's Eye
Embellishments: (puffy stars from Daily Flash) October Afternoon; (sequins) Avery Elle
Dies: (stars from Large Holiday Shapes) Simon Says Stamp

Tuesday, January 21, 2014

Just for You + A Video

Hi everyone!

I wanted to share a card that was published in Paper Crafts & Scrapbooking Magazine's January issue (yeah!). You can find the issue HERE.

This card was in the triangles section of the issue:

Just for You


I started by making my own paper digitally (the diamonds) using a 4x6 Photo Template no. 2. I added the cake die-cut from Ruby Rock-It and stamped the Hero Arts sentiment.

I thought the Lucky Charm tiny triangles didn't quite match the diamonds, so I added vellum to soften it. Here's a close-up:

Just for You Close-Up


I made a video that shows how to use digital templates. It wasn't the same process I used on this card (there were a few more steps), but I used the same template. As a forewarning, the patterned paper I made in the end was pretty ugly. LOL!


(Please click on the YouTube icon to watch the video in HD.)


Thanks for stopping by! Have a great day!


Supplies
Cardstock: (Rustic White) Papertrey Ink
Patterned paper: (pink and cream triangles from Lucky Charm 6x6 pad) American Crafts
Clear stamps: (sentiment from All Occasion Messages CL272) Hero Arts
Ink: (Wet Cement Mid-Tone ink) Hero Arts; (White) WPlus9
Accent: (coral pearl) Doodlebug designs; (cake ephemera from Cook It collection) Ruby Rock-It
Digital element:  (triangle template from 4x6 Photo Templates no. 2) Designs by Lili at The Lilypad; (digital overlay from Textured #20) Mommyish at SugarHill Co
Fibers: (white lace; pink/yellow ribbon) May Arts


Thursday, January 9, 2014

Guesting at Paper Crafter's Library

Hi everyone!

I'm excited to be guesting for the Paper Crafter's Library blog today! Woo hoo! I'm sharing two projects on their blog, but I have a sneak peek:


Thank You, "Deer"


I would love it if you would stop by the Paper Crafter's Library blog and see the projects. Thank you!!

Have a great day!

Tuesday, December 31, 2013

Looking Back

Hi everyone! I hope you had a happy holidays! It's been a whirlwind for us--Christmas, my daughter's eighth birthday, and my sister-in-law's family and brother-in-law's family visiting. It's been a great break. :)

With New Year's a day away, I decided to look back at my blog cards for this year and make a top 10 of my favorites. I haven't done a top 10 list before, but I enjoyed it...it was good to look back and remember making the card, the reason for the card, etc. I'm not sure what was going on, but I didn't have any cards in my top 10 before May. ha ha

Here's my list (in chronological order):

Congrats!
Congrats (AC Digitals)


Magical Birthday
Have a Magical Birthday for Gallery Idol Round 1 (Robyn Meierotto)


You Get Me.
You Get Me (BasicGrey, American Crafts, Pixels & Co.)


Love Machine
Love Machine (My Mind's Eye, Paper Smooches)


Grateful for You (Hero Arts, Technique Tuesday)


My Pocket + Silhouette Video
Put You In My Pocket (Glitz Design)


Whitewashed Love

Whitewashed Leaves (Paper Smooches)


Glitz Note Card Set
Cashmere Dame Card Set (Glitz Design)


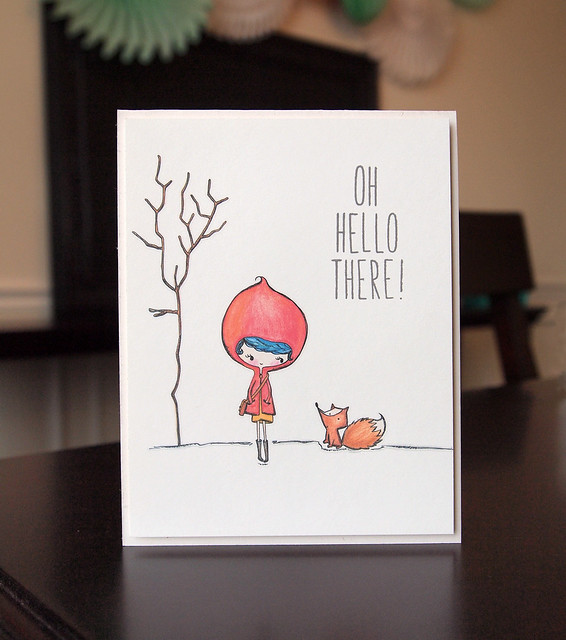
Oh Hello There

Oh, Hello There (Lawn Fawn, Creashens)


Joy to You and Me
Joy to You and Me (Glitz Design)


All of the supplies are linked in the original posts.

Thank you for all of your support and comments this year. Sometimes it's hard to blog--I don't like my photo or the project, or I think my post content sounds lame. But, I'm very grateful for the visits and comments--you are very kind. :)

Have a great New Year's Eve! Happy 2014!!


Thursday, September 19, 2013

Grateful for You

Happy Friday! Any plans for the weekend?

It's been a while since the last CAS-ual Fridays challenge, but this one is a great challenge:


So, fall colors and include a leaf in your CAS projects. This challenge is a two-weeker.

Here's my card:


I started with stamping the Hero Arts' Painted Maple Leaf stamp with Distress Inks and misting it lightly. I fussy cut the leaf ad inked the tips. I stamped the sentiment from Technique Tuesday's I Give Thanks set (love these sentiments!). I splattered different spray mist colors in the background.

Here's a close-up:


 *sigh* Are you looking forward to fall or wanting more summer?

If you'd like to play along with this week's CAS-ual Fridays challenge, this week's sponsor is Simon Says Stamp.


You can link up your projects HERE. I hope you'll play along!

Thanks for stopping by!


Supplies
Cardstock: (Cranberry Crush, Oatmeal) WPlus9; (white for leaf) PTI
Clear stamps: (sentiment from I Give Thanks) Technique Tuesday
Rubber stamps: (Painted Maple Leaf) Hero Arts
Inks: (Spiced Marmalade, Antique Linen on edges; Persimmon, Aged Mahogany, Barn Door Distress Inks) Ranger; (Chocolate Chip) Stampin' Up
Spray Mists--various
Silhouette Cameo

Wednesday, September 18, 2013

Happy Travels Note Card Kit

Hi everyone! I hope you're having a great week!

The Glitz Digital team is sharing projects on the Glitz blog today using the Happy Travels collection. The papers and element packs are part of the One Buck Wednesday at Jessica Sprague today. :)

I found THIS note card set on the Silhouette blog, and I decided to do something similar using the digital papers:


I know I'm always looking for ideas for paper crafted gifts, and I thought all of these items would work as a note card kit. There are the cards, envelopes, vellum confetti, and seals for the envelope.

Here's what the cards look like:


I say "cards," but I actually lazed out and only made two cards. ;) I started by re-szing two of the digital papers from the Happy Travels Paper Kit. I fussy cut one of the airplanes from the patterned paper. Isn't that plane fun? I used a cloud from Simon Says Stamp and backed it with the other patterned paper.  The cute sentiment is from the Up and Away stamp set.

For the background, I stamped the Hero Arts Tweed in white. I love the subtle texture! Here's a close-up:


I also made envelopes:


I used the same airplane paper as the card and printed on the polka dot patterned paper on the backside. I love that with digital, I can put whatever patterns I want together for double-sided papers.

The Happy Travels Element Kit has a cool series of vintage travel posters. I'm thinking about printing a few and framing them for my son's room. I did the opposite here, and shrunk them:


After printing and trimming the images, I stitched them together to make a banner. I thought that with the note card kit, you could trim off whichever image you wanted and use it as a seal on the envelope. It would also make a cute banner. :)

Lastly, I made confetti for the note cards:


I printed two of the digital papers on vellum. As a tip, I always use the "glossy paper" option when I print on vellum. I die-cut planes and hearts out of the papers.

Phew! That was a lot of pictures. If you're still with me, I wanted to mention again if you like the Happy Travels papers and elements, they're on sale $1 and $1.50 today only. Score! You can find them HERE.

You can see my project and other samples from the team on the Glitz blog. :)

Have a great day! Thank you so much for stopping by!


Supplies
Cardstock: (Rustic White) PTI
Other paper: (Premium Matte Photo Paper) OfficeMax
Digital elements: (all papers and travel posters from Happy Travels Paper Kit and Element Kit) Glitz Designs
Rubber stamps: (Tweed Background) Hero Arts
Clear stamps: (card sentiment from Up and Away) Mama Elephant
Ink: (Real Red) Stampin' Up; (White) WPlus9
Dies: (large heart from Large Holiday Shapes; small hearts from Mini Hearts Set; planes from Small Planes; clouds from Flat Bottom Clouds) Simon Says Stamp 
Tool: (Envelope Punch Board) We R Memory Keepers

Monday, June 17, 2013

You Get Me

Hi everyone! Eek! I still cannot believe I'm in the Top 10 of the Paper Crafts Magazine's Gallery Idol contest. Thank you!!


The challenge for Round 4 was to use exactly 10 embellishments on a card. While it was definitely a challenge, I was excited about this theme. I knew right away I wanted to make another freestyle/collage card (like THIS card or THIS card). 

I decided to focus on a color scheme. It took a while to choose the colors, but I settled on this color scheme from The Sweetest Occasion. I focused on the three colors on the left.

I don't have too many embellishments in mustard, grey, and poppy, but I decided to alter some of the embellishments to get the right color. Here is a shot of embellishments before I altered them (there are a couple in the picture I didn't end up using):


I pulled together ink, spray ink, alcohol inks, spray paint, craft paint, glitter cardstock, and stamps, and I went to work altering the items. When I got done, my card looked like this:


I started with the background paper. To make it, I simply made a grey rectangle in Photoshop, duplicated it, and layered the rectangles to make stripes. 

For the embellishments, I focused on shapes and textures. I would have loved to have added two more elements, but I needed to stick to the 10 items. :) Here is what I used:

               1. Keyhole--spray painted and layered silver glitter cardstock underneath
               2. Canvas circle--(it wasn't the right color of yellow) flipped over and misted with Mr. Huey's Taxi
               3. Wood veneer heart--painted white and inked with a reinker
               4-5. Two half-circle chipboard pieces--painted silver
               6. Metal star--spray painted
               7. Ephemera heart die-cut--flipped over and stamped with Hero Arts Houndstooth background stamp
               8. Silver sequin
               9. Yellow transparency banner
               10. Hemptique twine

I have to share that the transparency banner was not what I had planned. I had a similar one, but just before I adhered it to the card, I lost it. Argh!! After spending 20 minutes looking for it, I gave up and cut down a different transparency. I'm sure it will turn up in a Lego bucket or something. ;) 

Here's a close-up:


Before I layered the elements, I created a sentiment strip. Using a sentiment from Pixel's & Co., I printed the sentiment on vellum. I could have easily printed the sentiment directly onto the paper, but I liked the softness of the vellum. Here's a close-up:


As part of the Gallery Idol contest, there's a vote for the Top 5. If you like my card, I would really appreciate it if you vote for my card! You can click on the link at the top of the sidebar or go HERE, click on the image, and vote. You do have to register, but if you have already registered, you can simply log in. Thank you so much!!

Thank you for stopping by and for your support! Have a great week!

Supplies
Cardstock: (white) PTI; (silver glitter cardstock) Doodlebug Designs
Other paper: (Premium Matte Photo Paper) OfficeMax; (vellum) 
Pigment ink: (Provincial, Strawberry) Fresh Ink
Spray ink: (Taxi) Mr. Huey's
Embellishments: (half circle chipboard from Mint Julep collection) BasicGrey; (transparency from Fact or Fiction ephemera) BasicGrey; (die cut heart from Dear Lizzy) American Crafts; (canvas circle from Fact or Fiction) BasicGrey; (metal star from Basics) BasicGrey; (keyhole) Hobby Lobby; (heart veneer) Simon Says Stamp; (sequin) Hobby Lobby
Fibers: (red twine) Hemptique
Digital elements: (sentiment from In Good Company collection) Pixels & Co.
Other: (Picket Fence Distress Paint) Ranger; (yellow spray paint, silver craft paint)

Monday, April 22, 2013

A Birthday Wish

Hi everyone! Today, some of the Girl Fridays at CAS-ual Fridays are having a blog hop for Michele Gross's birthday.


Michele is such a nice, supportive, and generous person. She's a doll! I'm thrilled to be participating to wish her a happy birthday. :) If you would like to start at the beginning of the hop, you can start at Leigh Ann's blog:


Jocelyn <--You're here!

To celebrate, I made a little ray of sunshine:


For this hybrid card, I started with a digital journaling card from Designs by Dani and stamped a digital sentiment from Hero Arts. I printed the image twice and fussy cut the sun to add a little dimension. Isn't the sun cute?

I printed some digital gingham papers from the same collection and stitched around the edges. Easy peasy. Here's a close-up:


The Ink Squad girls from CAS-ual Fridays are also hosting a blog hop for Michele! Is she loved or what?! You can follow along with them too: DanaKarenKellyLaurieLynnMichellePiali, and Virginia

Next on the hop is the fabulous AJ. Thanks for stopping by!


Monday, February 18, 2013

With Sympathy

Hi everyone! If you're in the U.S., happy President's Day.

Anyone else get some crafty time this weekend? Last week when I saw the new Two Peas releases, I almost selected a kit that had bright colors, digital brushes, chevrons and splatters--all elements I gravitate toward. But then I saw another kit...vintage elements, muted colors, flowers. The kit was a little out of my norm, but gorgeous.

I decided to select the kit outside my comfort zone and came up with this card:


Aren't the flowers and butterfly pretty? Except for the Hero Arts sentiment, all of the digital elements are from Jen Reed's Antiquities collection.

I started off by cutting down a 5-panel frame into a 3-panel frame. I often don't think about cutting down supplies, but there was no way I could fit the 5 panels on a card.  Under the frame, I layered distressed patterned paper, the floral/butterfly elements, and the sentiment. There was a lot of rotating and nudging going on. ;)

Here's a close-up:


I finished off the card with a pearl and sequin. I didn't have the right color of sequin, so I colored a white one with a Copic.

Thanks for stopping by! Have a great day!


Supplies
Cardstock: (blue) Stampin' Up
Patterned paper: (cream from Antiquities collection) Jen Reed
Digital brush: (Say It Again) Hero Arts
Digital elements: (flowers, butterfly, frame from Antiquities collection) Jen Reed
Other elements: (grey pearl) Doodlebug; (sequin) Hobby Lobby

Saturday, January 5, 2013

I Am Addicted to Bokeh

Hi everyone! I hope your weekend is off to a great start. We'll be taking down our Christmas decorations (I know, I know...a little delayed, but I love them).

So last week, I was looking through the new Two Peas releases, and my heart stopped when I saw THIS set by Dianne Rigdon. The journaling cards are so dreamy. I enlarged one to make this card:


*sigh* Don't you love that journaling card? I matted it over a light grey paper by JustJaimee and used one of her digital Ornate Circles stamps for the corner.

The stamp was black and distressed, which makes it harder to recolor. In Photoshop, I selected the entire stamp area (using the dotted rectangle tool on the toolbar), clicked on Edit-->Define Brush. Voila, I had a new digital brush when I opened my brushes.

I stamped the circle over the journaling card in white, and over that, I stamped the Hero Arts' Winter Wishes sentiment. Here's a close-up:


I added a little inking around the edges of the card and some embellishing at the top. That awesome wood veneer glittered feather comes from a local home decor store.


Jeez, my twine is really twisted. ha ha. I think it's still pretty even if it's not perfect. :)

For my Season's Givings blog hop post, it's time for the winner. Thank you all for commenting--you're so kind!

The winner is #168:


Blogger Laura Jane said...
I'll have to check out the Paper Crafts Magazine's Creative Card Challenges issue..Your card is a HOOT!
January 1, 2013 10:15 AM
 Delete


Laura, I'm not sure how to reach you by e-mail. Please can contact me through the "Contact Me" link at the top. Congratulations!


Have a great day!


Supplies
Digital Elements: (Chillin Journaling Cards) Dianne Rigdon; (Winter Fresh Solids and Winter Fresh Ornate Circles Stamps) JustJaimee, all available at Two Peas in a Bucket. 
Cardstock: (Natural) My Favorite Things
Specialty Paper: (Premium Matte Photo Paper) Office Max
Clear Stamps: (sentiment from Winter Wishes CL647) Hero Arts
Dye Ink: (Marina Mist) Stampin Up
Pigment Ink: (Weathered Wood Distress Ink) Ranger
Twine: (Natural) May Arts
Button: (Bitty Buttons) Stampin Up
Feather from my stash
Blog Design by Caked Designs